Wednesday, January 25, 2012

Knitting Practice

I received a bunch of Barnes and Noble gift certificates for Christmas, so last week I ordered myself The Knitting Book. Random side note: Did you know that the prices on B&N.com are lower than in the store? They're pretty much on par with Amazon prices. Did you further know that you can order books on B&N.com and choose the pick up in store option so you don't have to pay shipping? You're basically getting your books for less money by telling B&N ahead of time that you're going to come to their store and buy a book. This makes no sense to me!

Anyway, I figured a good knitting reference book was needed in my crafty library since I'm hoping to get serious about learning how to knit this year. This book is pretty extensive as far as techniques and stitches are concerned and the instructions and illustrations actually make sense to me.

Up until this point the only knitting I have done has been rectangular. After a very rough morning with a migraine, I was ready for a good sit on the couch on Friday night. So I decided to give increases and decreases a try. I knitted a few rows and sporadically increased and decreased to get the feel for the different techniques. After a while the knitted rows started to look like a complete mess, so I ripped it out and started looking through the stitch pattern index to get some structured practice. I picked out the basic chevron stitch because it encompasses both increases and decreases. I also taught myself a new way to cast on! 

  IMG_5114

There's definitely room for improvement but I'm pretty pleased with my progress so far. It actually looks like the picture in the book! I seem to be having tension issues especially when I increase stitches. Those stitches seem to be super tight, which I think is what is making the knitting a bit wonky. Anyone have any suggestions?

Tuesday, January 24, 2012

Sewaholic Minoru Muslin

My Minoru muslin went together so quickly! I worked on it during this week's sewing class and had it mostly finished before I left. I had trouble zig-zagging the waist elastic on, so I pinned it in. This didn't really give the same effect as it would have if it were sewn in, but just know that the waist is going to be cinched in on the finished jacket. I also only sewed on one sleeve cuff.

IMG_5111

The only thing I needed to change for the fit was to move the elastic waist band up about a quarter of an inch so it sat at my natural waist. Otherwise, I'm good to start work on the real deal!

This week I added a new accessory to my sewing corner: safety glasses! I know a lot of you might be thinking I'm nuts, but give me a minute. I am somewhat of a clutz. Remember my visit to the ER last August when I accidentally sewed my finger? On more than one occasion I have managed to break a needle and it ends up flying the through the air and pieces of it hit me in the face. This happened last week at the Serger Workshop and my mom suggested (or more like strongly insisted) that I start sewing with a pair of protective goggles. There was no way that I was going to wear goggles while sewing, but I agreed that I needed some sort of protection. I took to the interwebs to find a cheap pair of fake glasses and the only ones I could find that were reasonably priced were these hipster frames. They were only $2. The rest of the fake glasses that I found were around $40. So I ordered the hipster frames.

How conflicting is my look here? Part hipster, part Gap customer.

IMG_5102

The only thing I can think of when I see these glasses is Brenda in Adventures in Babysitting.

Image Source

HA! The good news is that the glasses are light and comfortable and after a while I forget that I'm wearing them. I'm not entirely foreign to glasses wearing though. Before I got my eyes lasered in 2006, I had to wear contacts or glasses daily. I definitely want to protect my eyes from flying needles—they cost me a lot of money! Do you think protective glasses will become all the rage for sewists or am I just nuts?

Monday, January 23, 2012

Saturday Snow Hike

We finally got some snow on Saturday! I've been itching to use my snowshoes but we have had a serious lack of snow so far this winter. We were blessed with about 4 inches yesterday, which wasn't enough to use the snowshoes, but it was nice for a snow hike.

After months of spending most of our weekends indoors, it was really nice to get out and enjoy some fresh air. I think the key to not being miserable out in the cold is the right gear. You can't be too cold or too warm or it won't be very fun romping around in the snow. Yesterday I wore the usual long underwear, double pair of socks, snow pants, ski jacket, and ear warmer (I find that if I wear a hat I get way overheated). But I also added two new pieces of gear that pretty much made my winter activities perfect: gaitors and 3-in-1 mittens.

Mr. Pinds and I received gaitors from his sister for Christmas because we were sick of getting snow in our boots.  Mine are the teal colored things around my boots.

IMG_5022

These things are brilliant!  They're basically a waterproof piece of fabric that attach to the tip of your boot, wrap around the sole of your boot and then get clasped together around your calf.  They kept the snow out of my boots and in turn my feet were nice and toasty for the entire time that we were outside.

Mr. Pinds found the 3-in-1 mittens at EMS while looking for Christmas gifts. I got the mittens and he picked up a pair of the gloves. These are great because there is a thin pair of gloves on the inside the mittens, so you can take off the mittens if you need a little more dexterity and still have warm hands. These worked great while we were taking pictures! The mittens have a strap on them so I just had to slip the mittens off and not worry about losing them while I took pictures. They just dangled around my wrists until I was finished.

IMG_5013

My fingers were seriously toasty with both gloves on and pretty warm with just the liner gloves too.

I am so glad that we finally have all of the gear that we need for winter outdoor fun. Do you have any favorite gear for winter?

Friday, January 20, 2012

Sew U Blouse: Finished!

Behold, my last completed project from 2011!  In our previous session of sewing class we focused on making a blouse.  I somehow missed both pattern sales at Joann in September, so I decided to use the blouse pattern in Sew U, which had, until then, just been sitting on my bookshelf.

I mentioned before that my sewing instructor and I decided to go rogue and not follow the pattern completely because it was either missing instructions or my instructor knew how to complete some steps more easily/in a better way.  Pair this with super slippery fabric and I ended up with the most frustrating sewing project I have yet encountered.

021

Just cutting out the pattern pieces from the fabric was frustrating.  I have no idea what type of fabric this is, but it seemed to change shape constantly.  The pattern pieces would warp almost every time I picked them up so I had to keep ironing them to reshape them.  The same thing would happen when I put the pattern pieces away when I finished each session of sewing.  I'm shocked that when sewed together they actually resembled a blouse because of how many times they warped from their original shape!

019

By the time our final sewing class rolled around in mid-December I was about 75% finished my blouse.  Then we had a long break for Christmas and I let the blouse sit while I finished up the rest of my Christmas gifts.  Once I was finished all of the gifts and my mom's birthday present, I had some free time and was trying to decide what to work on.  I pretty much forced myself to sew until my blouse was finished, because I figured if I didn't finish it then, I would never finish it.  I hated it that much!

Here's a good example of how this fabric warps.  I took this picture a couple of days after I ironed the shirt and it has all of these weird ripples in it just from hanging on the hanger in my closet.  Believe me, those lumps below my waist aren't from my mid-section!

Sew U Blouse

I think the blouse turned out OK, but it would have been much better had I liked the blouse pattern and the material better.  I flat felled all of the seams, which turned out awesome!

  Sew U Blouse  

This pattern has a pretty small collar and I think it looks a little strange.  It's also quite boxy even though I took the muslin in to account for this.  And then there's that sizable ripple on the back left near the bottom.  I am fine with living with these problems and just wearing this shirt under a sweater.  There is no way I am going to spend any more time fiddling around with this fabric!

The good news is that I really love the look of this fabric and love how it feels when I'm wearing the blouse, even if sewing with it was a nightmare.  I will be sticking to sewing with cotton and wool for my next few projects!

Tuesday, January 17, 2012

Serger Workshop

On Saturday I took a Serger Workshop class with my mom and aunts at Steve's Sew and Vac in King of Prussia.  I've had Mr. Nilsson for about a year now, but I've really only used him to finish seams.  It was really awesome to see the different things you can do with a serger!

There were about 10 people in our class and almost everyone had a different machine.  I am SO glad that I got the Babylock Imagine, which has automatic tension and a very easy threading system.  Using it seriously couldn't be more simple.  I can't imagine having to deal with tension knobs and the very complex threading on some of the machines.  One poor woman brought her serger that was made in 1982 and ended up beyond frustrated with it.

Our instructor was Pamela Leggett, who has her own pattern line, Pamela's Patterns, and has written quite a few articles for Threads.  She was very patient with all of us and our different machines and shared a bunch of great tips for using our sergers.  She gave us a few sheets of different techniques and as we completed sampes of the techniques, we pinned them onto the pages.

  012

This way we have a working notebook of the techniques and can refer back to them later.  Since I have automatic tension, my Tension Control sheet was super easy to complete!  If you have a serger that doesn't have automatic tension, this sheet works as a cheat sheet for what tension settings your machine needs for different types of fabric. You record the tension settings for each type of fabric and then you have a logical starting place when you work with that fabric in the future.  It's a great system but I am so glad that I didn't have to bother with all of that fiddling!

007

We used this worksheet method for a few different techniques in a my very first sewing class and I think it's a great idea.
   009

The Serger Workshop was from 10am-4:30pm, so it was a lot of information to remember.   Being able to have an actual example of the technique is so much more informative than just taking notes.

I highly recommend taking a class with Pamela and at Steve's in general.  But remember to wear layers—it was freezing in there!

Friday, January 13, 2012

Finally! Threaded Commenting!

Blogger users, our day has finally come!  Blogger now offers the ability to reply to individual comments, aka threaded commenting!  Words cannot describe how excited I am about this, since I try to reply to all comments but have to depend on the commenter coming back to that blog post to realize that I commented.  That is just not a reliable system.  If you weren't aware, WordPress has been using this functionality for quite some time.

Now we can have it too!  The only downside (in my opinion) is having to switch to the new Blogger interface to set up your blog to have threaded commenting.  I guess I'll just have to get used to this new layout.

If you're interesting in setting up your Blogger blog to have threaded commenting, see this Help post.

Happy commenting!

Wednesday, January 11, 2012

Works in Progress: Start of 2012

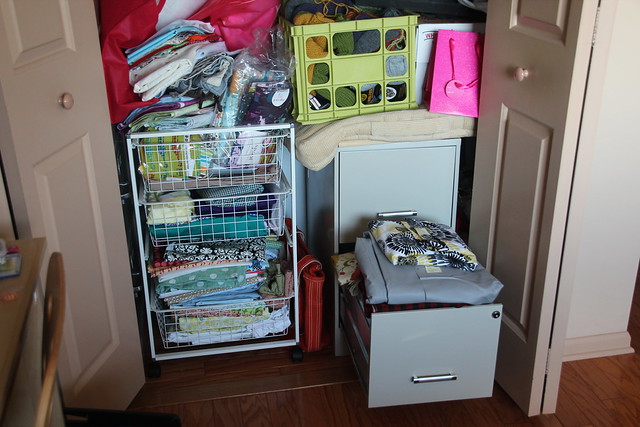
Here it is: my big shamefully long works in progress list.  I thought I would lay everything out there in hopes of widdling down this very long list.

Knitted Blanket
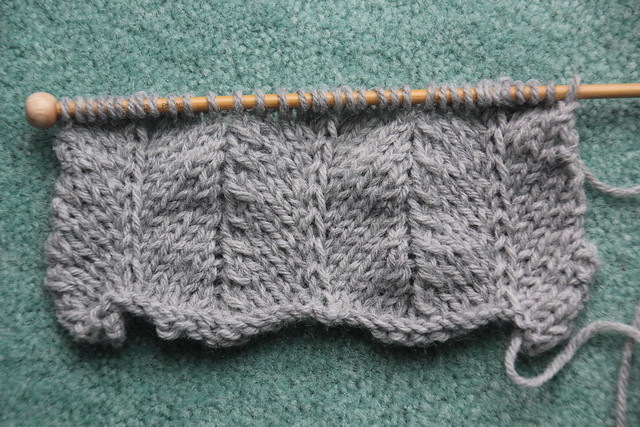
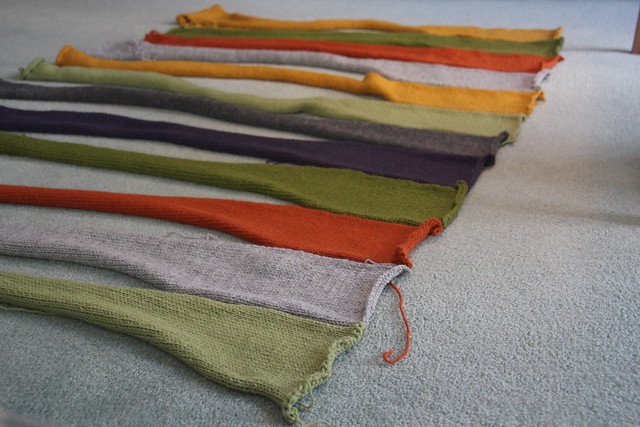
Let’s start with the oldest project in my pile, the knitted blanket.  I am so excited that I finally finished knitting all of the panels, so the only thing left to do is to block the panels and then piece them together.  Never mind that I don’t yet know how to do either of these steps, but I will figure it out.  I really wish I had discovered this Super Easy Baby Blanket before now.  Then I would be finishing up the project and not have to piece anything!
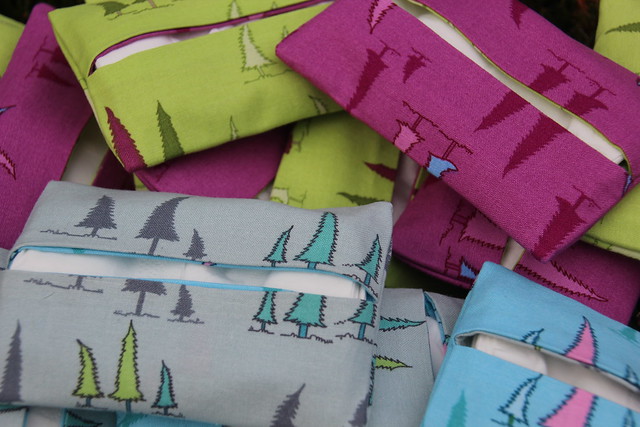
Knit Panels for Afghan


Art Kit
I cut the pieces for the Art Kit from the Craft Hope book while making an art kit for my nephew last Christmas.  My original intention was to donate it to a local charity since that is what the Craft Hope book suggests.  I got a little behind on my gift making that year so I ended up pushing this to the side and then I never found an organization that would want such a donation.  I have no idea where or why I got these fabrics, but I think they’re super cute.  Don't you just love those ants?  Oh and that stray piece of cat hair on the zig zags (gah it's everywhere!).  I’m considering finishing this up and hosting a giveaway as a thank you to a lucky winner for reading my blog.  Stay tuned!
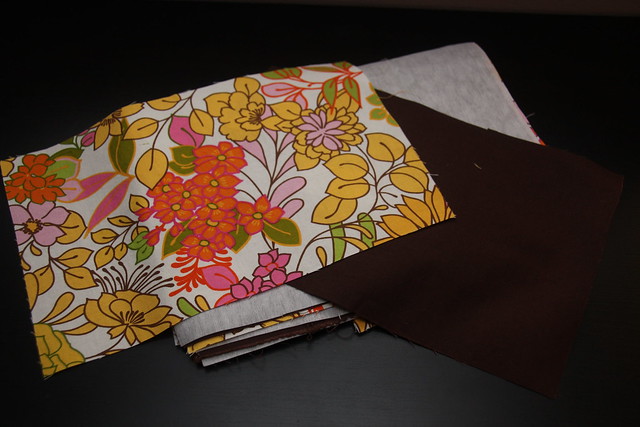
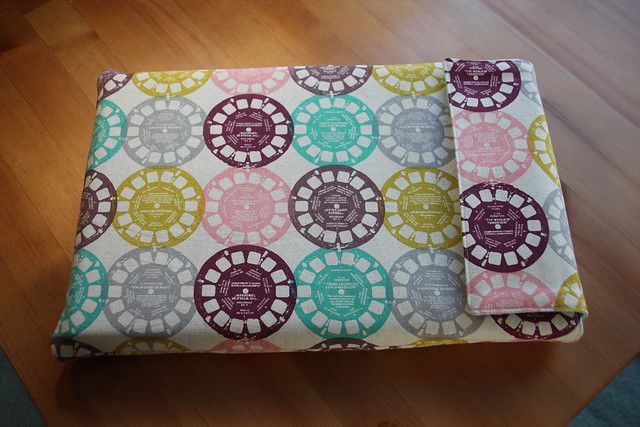
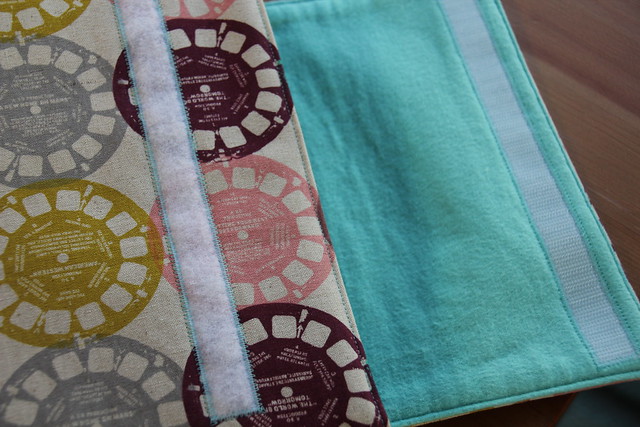
Art Kit Fabric


All-Day Tote
I’m pretty sure the pieces for the All-Day Tote from Lotta Jansdotter’s Simple Sewing have been cut out for at least as long as the Art Kit.  After discovering the pieces in my stash, I decided to add a long adjustable strap to the bag, but even with that, I think this bag will be quick and easy to complete.  I think I got both fabrics from the remnant bin from Joann, but who knows how long ago that was.  Sorry for the dark pic.  The outside fabric is a dark brown.
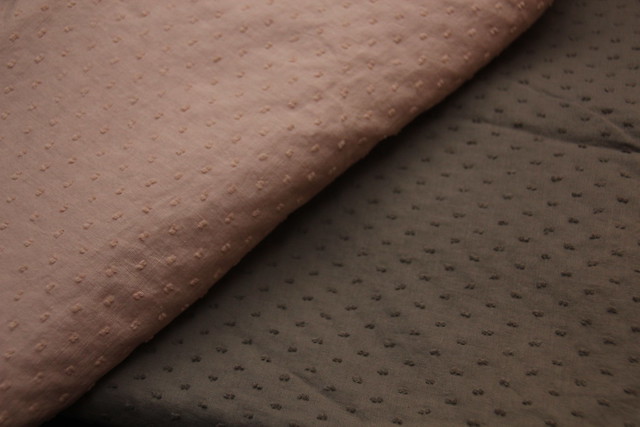
All-Day Tote Bag Fabric


Crepe Dress
I started working on the Colette Crepe dress last March and have made very little progress since because I haven’t picked it up since then!  In my defense, I had no idea how to fit a muslin after sewing it up and I needed a major small bust adjustment for this pattern.  I have received a few tips on fitting the bodice since then, so I hope to return to this dress soon because I originally wanted to wear it on Easter.  Hopefully I will be able to this year!  The pink is the body of the dress and the gray is for a waist sash.
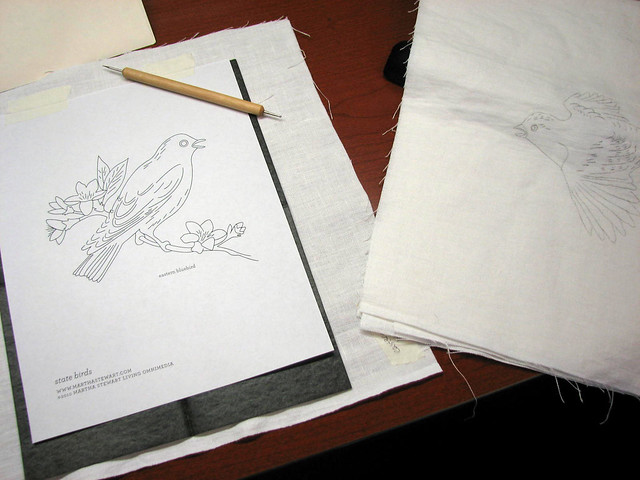
Crepe Fabric


State Birds Quilt
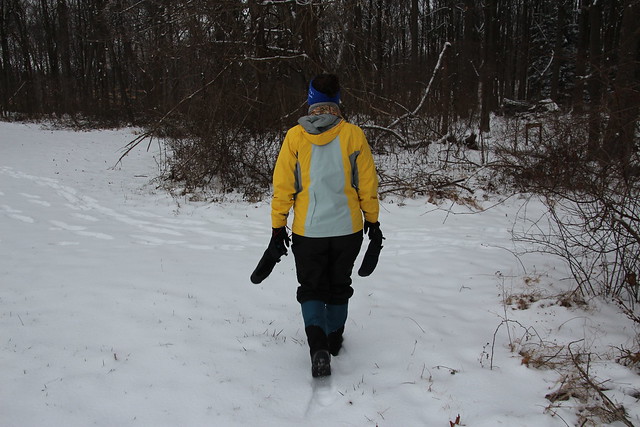
I thought I would make some progress on this quilt while on our Great Western Adventure, but it still remains in the same state it was before we left.  Almost all of the 36 state birds are traced onto white linen and are waiting to be embroidered (some states use the same state bird, which is why there aren't 50). I originally had hoped to have this complete so we can use it on our bed this coming summer, but that definitely doesn’t look like it’s going to happen, so our bed will have to wait until Summer 2013.  That is, if the world doesn’t end in December.
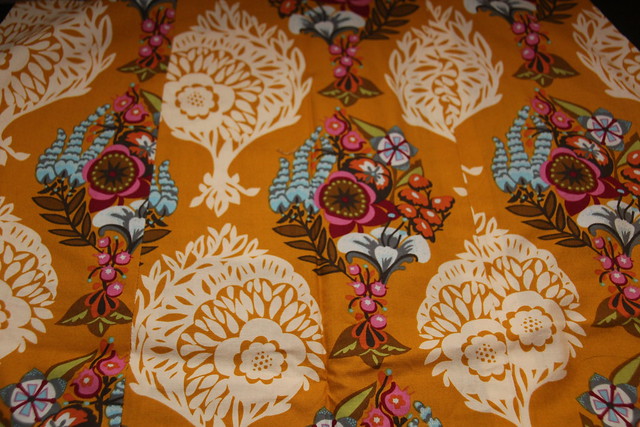
Tracing State Birds onto Linen


Market Skirt
The Lisette Market Skirt has been partially finished since the end of September.  I had a good deal of it finished until I realized that I didn’t cut my pieces to match up the pattern on the fabric.  For a couple of days I considered just finishing it and calling it “good enough,” but my OCDness reared its ugly head and I decided that it was unacceptable in its current state.  I did some brief research on how to match up patterns, but I am still a little hazy about it.  I’m also not sure if I have enough fabric left to match up the pattern.  If I don’t, then I’ll have to make the decision to finish it like it is or rip it out and try and use the fabric for something else.  I’ll get back to this project when I’m feeling a little more adventurous.

Market Skirt Fabric


In the Night Kitchen Embroidery
Originally, this was to be a Christmas gift to Mr. Pinds.  Then I got honest with myself and realized that that wasn’t going to happen, so now it’s a project that we’re working on together.  We’ve been so busy since Christmas that we haven’t looked at it since I originally unveiled it!  I have a feeling that this is going to be a work in progress for a while.

In the Night Kitchen


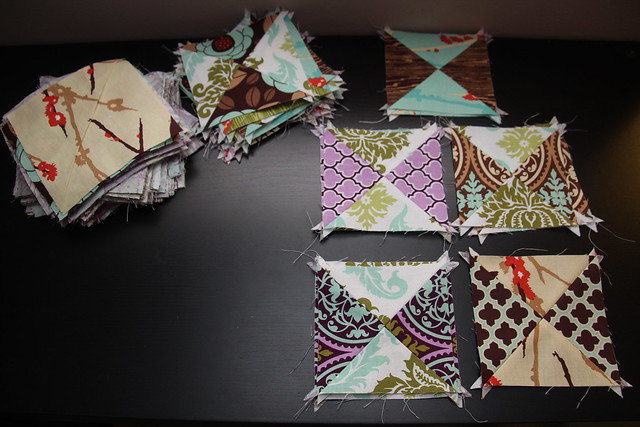
Birthday Quilt for MaMotts
(Shh, family members!  This is super secret!)

My grandmother, who we call MaMotts, is turning 90 this March, so I thought it would be nice to make her a pretty quilt.  I didn’t want to make anything too modern, so I chose the Planetarium pattern from Elizabeth Hartman’s The Practical Guide to Patchwork.  I got a bunch of Aviary 2 charm packs in the Bark and Lilac colorways and have been going to town making hour glass blocks.  I spent a good chunk of Sunday doing this and I still have a long way to go.  The good news/bad news is that I won’t be working on this quilt for too long because we’re throwing a surprise birthday party for her in the beginning of February.  This is the largest quilt that I have made to date, so I hope the quilting goes smoothly!

The finished hour glass blocks are in the stack on the right.  The almost-finished hour glass blocks are in the stack on the left.  Yikes!
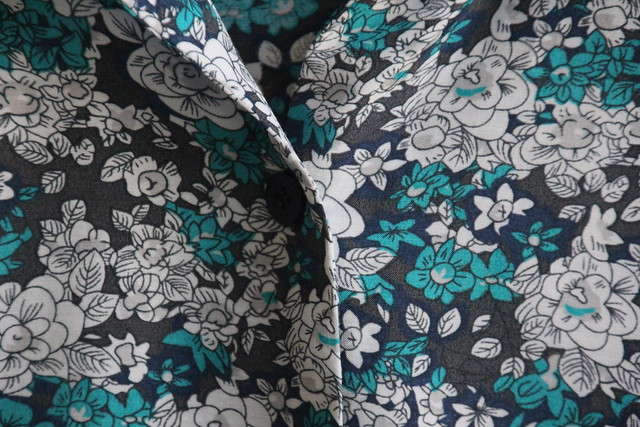
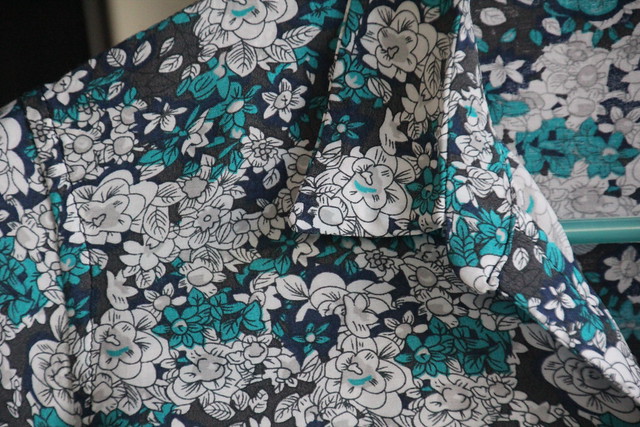
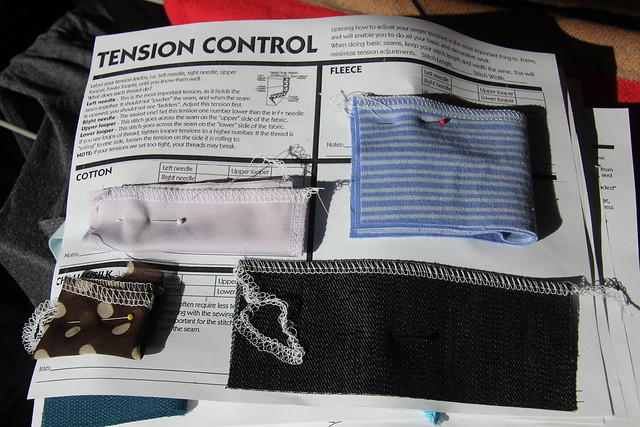
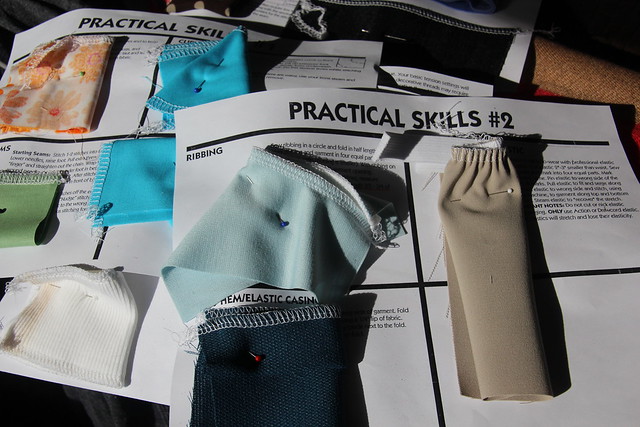
Quilt Blocks


New Look 6073 Cape
For this session of 
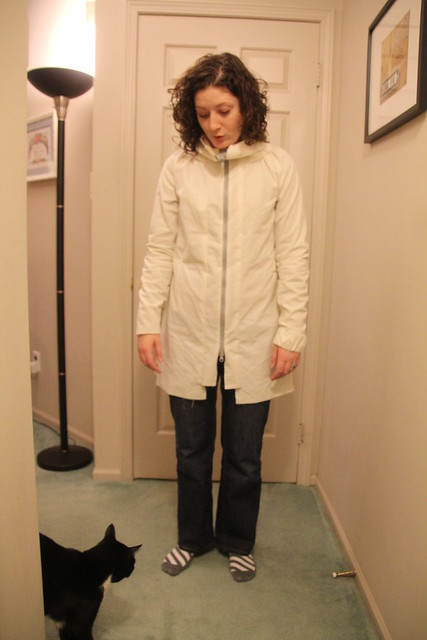
sewing class, we’re making capes.  I chose view C of New Look 6073, which includes toggle closures and a hood.  I took my very first trip down to Fabric Row in Philly (on 4th Street near Fitzwater) and went into about 6 different stores until I discovered the awesome wool section in the Pennsylvania Fabric Outlet.  They had a wide variety of colors, styles, and types of wool!  I went through a few different patterns before I decided on this fabric.  I’m not sure what lining I’m going to use yet, but I’m thinking something cozy that will add some warmth.

Cape Fabric

Of course Mr. Pinds and I swung by Jim's for some cheesesteaks for lunch, which is conveniently just a few blocks away from Fabric Row.  Seriously delicious.  I usually get mine double Whiz without (double the Cheez Whiz and without onions) and Mr. Pinds gets his double Whiz with (double the Cheez Whiz with onions).  We average about one cheesesteak a year, so I'm OK with how unhealthy this is.  It was delicious and totally worth it.  Did I mention it was delicious?  If you're in the Philadelphia area, Jim's is really the only acceptable place to go for a cheesesteak.  And the guys who work there are really nice too.  Be prepared to wait in a hefty line though.


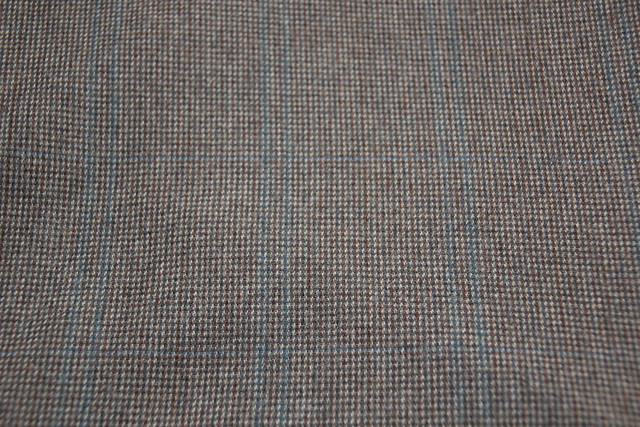
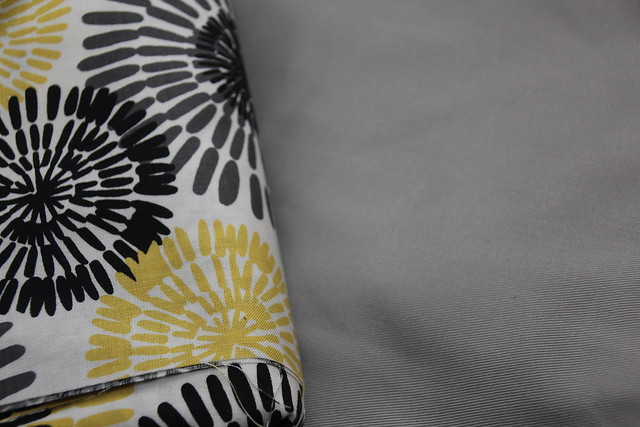
Sewaholic Minoru Jacket
Now for the least complete project in my pile!  I only have the pattern pieces cut out but the muslin is prepped and ready to be cut.  The final version will be made up in a gray cotton twill with a cotton lining.  I’ll probably use a slippery fabric for the sleeves so my arms slide in easily, but I haven’t picked that up yet.  Tasia from Sewaholic is hosting a sew along that starts on Monday, so there’s still time for you to join in!

Sewaholic Minoru Fabric


So there they are, my whopping 10 in-progress projects.  I’m hoping that by linking this to WIP Wednesday on Freshly Pieced, I’ll be motivated to actually work on these instead of turning to something else mid-progress!

Thursday, January 5, 2012

Project Runway All Stars Premieres Tonight!

This kinda slipped under my radar, but Project Runway All Stars premieres tonight!  The full cast can be found on the Lifetime site.

Image Source

Who am I most excited to see?  Mondo, of course!  I think everyone can agree that he was totally robbed on his season.  I'm also pumped that Kara, Austin, Rami, and Sweet P are back!  An added bonus are the sound bites that they get out of Anthony.

Who am I least excited to see?  It was a hard pick between crazy face Kenley, spit mark Elisa, or I-don't-know-why-she-bothers-me-but-she-does Mila, but I think the winner is Kenley.  I wonder how the show would go if they only brought back the designers that fans and the other designers liked?  I know the producers think it would probably be very boring, but I'm not convinced.  I think it would be nice to watch everyone getting along and supporting each other.  I'm probably in the minority though.

Tune in for the fun on Lifetime at 9:00pm!

Wednesday, January 4, 2012

Tissue Holders Stocking Stuffer

I just realized that I never posted the stocking stuffers that I made back in November!  I like to sneak something handmade into the stockings that I have access to on Christmas Eve and Christmas Day. This year I had access to 15 stockings, so I had to choose my project wisely.

I used the JCasa tutorial from Sew Mama Sew and wowie were they quick to put together! I had these cut and sewn within 2 hours! I highly recommend an assembly line if you’re going to tackle large quantities of the same product.

Tissue Holders

These were a hit, surprisingly especially with our almost-5 year-old nephew, who asked if he could bring it to bed with him because he was a little sniffly.  I love that they can be refilled with tissues from a normal box.  Plus, since I end up crying at a good deal of the movies we see, it’s nice that I’m not alerting the whole theatre of my sappiness by the crinkling of a normal tissue packet.  It makes my crying covert!

I love this Jay McCarroll fabric.  I used it to make last year’s stocking stuffers.  I still have a bunch of large scraps leftover and am thinking that they would work nicely for one of the charity quilts that I plan on making.

Tuesday, January 3, 2012

Laptop Sleeve

Back in September, shortly after we returned from our Great Western Adventure, the N key on my netbook decided it didn't want to work anymore.  This was poor timing for our bank account, so I attempted surgery to fix the key.  After a few different attempts at fixing the problem and a little while trying to use the netbook without use of an N key, I threw in the towel and ordered myself a new laptop.  Thankfully I get a discount through work, so the damage wasn't quite as bad as it could have been.

I could have ordered a case when I bought my laptop, but all of the cases were black and boring.  Most of the time I keep my laptop out on our side table in the living room, so I wanted something pretty.

Laptop Sleeve

I finally built up enough courage to cut into my precious Ruby Star Rising viewfinder print.  Thankfully I didn't have to use that much of it, so I still have a lot left!  The lining is a teal flannel that I picked up at Joann for super cheap with a coupon.  It's so soft and I think it goes perfectly with the viewfinders!

Laptop Sleeve

I used Elizabeth Hartman's Laptop Sleeve pattern for Sew Mama Sew.  The pattern was really easy to follow even though you have to do your own math.  I double checked mine to ensure that I wouldn't end up wasting any fabric, but in true form, I made a mistake.  I measured the height of my laptop from the front without realizing that it angles up and is higher in the back.  Gah!

Laptop Sleeve

Of course I didn't realize this until after I had finished the sleeve and tried to insert my laptop.  After some struggle, I was finally able to close the flap with the computer completely inside, but it took way too much effort.  I was disappointed and torn about what to do to remedy the situation.

Laptop Sleeve

The next day I woke up and realized that if I took it all apart I could sew it back together with smaller seam allowances.  Mindblowing, I know.  It saddened me to have to rip out the seams and basically start from the beginning, but I kept telling myself that there was hope that the laptop would just slide right in when I was finished.

And guess what?  It totally worked!  I decreased the seam allowances from 1/2" to 1/4" and that was enough to create ease in the sleeve.  It's so easy to get my laptop in now!

Laptop Sleeve

I definitely could not have found such a pretty sleeve in a store.  And it looks gorgeous sitting on our side table too!

Sunday, January 1, 2012

Hello 2012!

Happy New Year!  The start of a new year is an exciting time for a list maker like me.  Last year I set some goals geared at furthering my knowledge of sewing and knitting, which I think kept me on track as far as determining what projects to make and when.  This year, I'm following the same pattern.  Here are my new goals for 2012.

1) Make two quilts for charity.
I really enjoy sewing for charity and this year I'm taking that up a notch.  A couple of months ago I found out about a great organization called Quilts for Kids, which happens to be headquartered near where I live.  They collect quilts for children and babies with life threatening diseases or for children who are abuse victims.  Since they need quilts that are small, I'm positive that I can commit to making two this coming year.  I know I have lots of leftover fabric in my stash to put together a couple of bright and happy quilts.


2) Say no to new fabric purchases.
Speaking of my fabric stash, I have to admit that it's gotten completely out of control.  This is entirely because I think I can complete projects faster than I possibly can.  With the exception of fabric for my sewing class (our first session will be making a cape and I definitely don't have any wool in my stash), gifts, and notions/lining fabric that I need to complete projects, I am not allowing myself to buy any new fabric until I have used what I already have.  I would say this will take me the entire year, but I have so many backlogged projects that it very well could flow over into next year.  These projects include dresses, skirts, blouses, bags, towels, and refashioning garments that I already have.  The first thing I'm doing is organizing this mess. How did this happen?

Mess of a Fabric Stash

The second part of this goal is to finish up the many projects that have been half done for most of 2011.  I made some good progress on this during Winter Break, so hopefully soon I'll be able to count my number of works in progress on one hand (right now I have 7 unfinished projects).


3) Make one quilt for myself.
I spent a lot of 2011 a little nervous about making another quilt after I finished my first one.  Once I started work on my second quilt, I wondered what I was so worried about.  Truthfully, I was worried that I'd cut the fabric wrong and waste it, but if I triple read the instructions and checked myself along the way, I was fine!  So this year I am going full force into quilting and that means I'm finally getting around to making myself a quilt from Jay McCarroll's Habitat line.  I can't wait!

Habitat by Jay McCarroll


4) Learn how to knit in the round.
Up until now, I've only ever knitted projects that are rectangular.  This is the year where I branch out and learn how to knit in the round.  I'm not sure what I'm going to make yet, but I think a snood might be in order.  Although, I have had my eye on the Gap-tastic Cowl for awhile now!  I'm sure some hefty perusing on Ravelry is in my future to figure out the perfect project.

Image Source

5) Beat our time in the Broad Street Run/exercise regularly every week.
These two items go hand in hand for the first 5 months of the year, but I really want to get on a regular exercise schedule and actually stick with it for more than a couple of months.  I have really fallen off the exercise wagon the last few months of 2011 and I'm ready to get back in shape.  I plan on swimming on Tuesdays/Thursdays and either running or doing an exercise DVD on Monday/Friday/Saturday.  My off days will be Wednesday (because of sewing class) and Sunday (although if I have to skip Saturday for some reason I will exercise on Sunday).  This is happening, people!  I just have to keep reminding myself of how much better I feel overall if I exercise.

Broad Street Run 2011

I think those goals will keep me busy!  Of course I'll be working on other non-goal related projects too, like embroidering the state birds for a summer quilt.

Have you set goals for 2012?