Saturday, December 31, 2011

My Year in Review

I probably say this every year, but I can't believe another year has gone by already.  At the beginning of this year, I started this blog and set a few goals that I wanted to accomplish over the past 12 months.  I did really well!

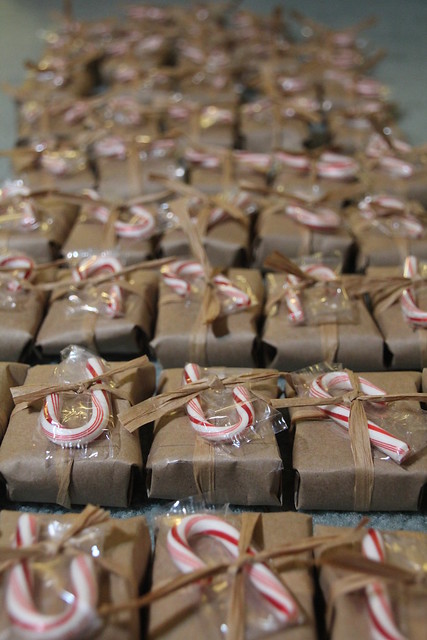
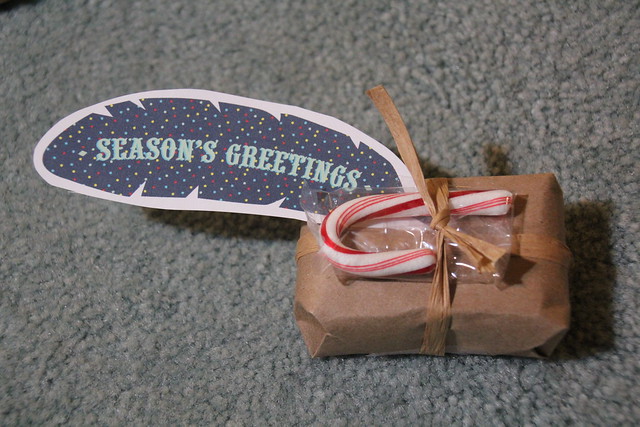
1) Make 14 items for charity.  
Konbit Sante Delivery KitJust One Star ChallengeI Spy Bag

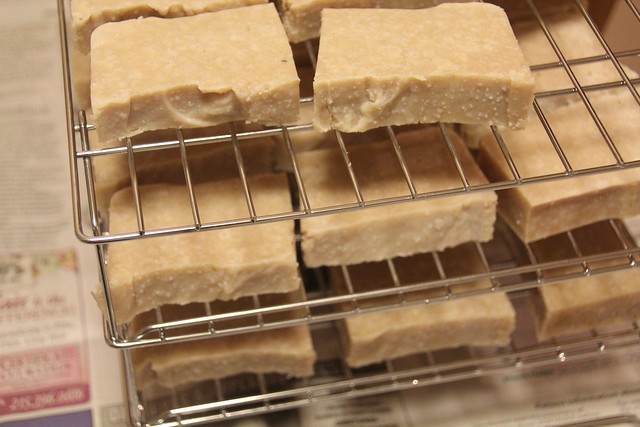
You've heard of Craft Hope, right?  Back in the beginning of the year, they collected birthing kits for the organization Konbit Sante to send to Haiti so women would have access to a sanitary and safe delivery.  I was more than happy to put together a couple of receiving blankets and toys for the new moms and babies.  Craft Hope was able to collect 2,510 birthing kits for the women in Haiti!  I am so happy to be part of such a great movement.  The best news is that Craft Hope recently heard from the organization and they shared that the birthing kits have made the women excited to seek out prenatal care.

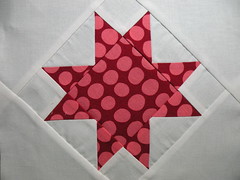
In March I made a quilt block as part of a challenge hosted by Moda to send a quilt to an injured soldier.  It was my first time making a star quilt block and I was surprised at how easy it was.

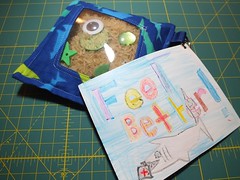
And in April I undertook a sewing marathon to pre-make 100 I Spy games to give to patients at St. Christopher's Hospital for Children.  We helped the kids that participated in Take Your Kids to Work Day at my workplace fill the bags with rice and charms and then we sewed them up.  The kids loved the activity and so did the kids at St. Chris!  Technically I only fully made 36 of the bags from start to finish, so I'm only counting those bags toward this goal.

End result: I made 39 items for charity this year, which was a tad over my goal.

2) Sew one wearable dress, skirt, and blouse.
I went conservative on this goal because up until January, I had struggled with garment making.  Thankfully I overcame my issues and was able to fulfill this goal.

Lisette Passport DressChambray Colette GingerYellow Gingham Pendrell

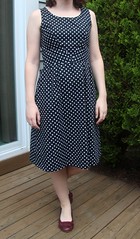
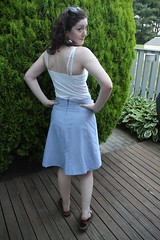
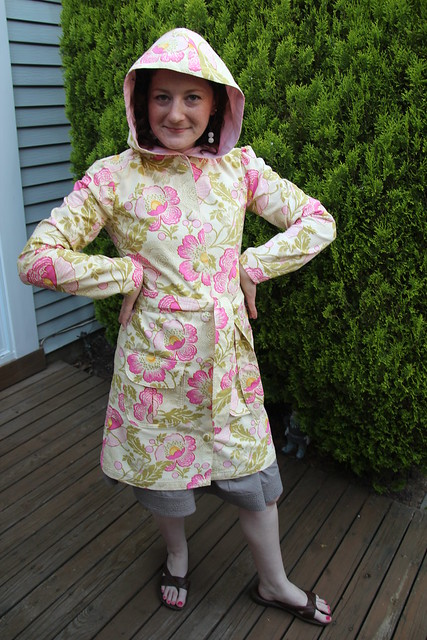
From left to right are my Passport dress, Ginger skirt, and Pendrell blouse.  Although it wasn't included in my goal, I think my very favorite garment that I made this year is my Amy Butler Runabout Jacket.  The terrible thing is that I finished it in the early summer and I haven't been able to wear it yet!  I'm very excited to wear it this coming spring.

Amy Butler Runabout Jacket

Thankfully I've made a few other garments, including another Ginger, another Pendrell (which doesn't fit me but fits my sister!), and another dress (New Look 6557).  I hope to increase the number of garments I'm able to make next year.  Some of these projects took me way too long!  I am glad that I'm slowly adding staples to my wardrobe, which was the point of learning how to sew my own clothes.

3) Make one quilt.
Although I started out thinking I would make a quilt for our house, I ended up making another adorable baby quilt!

Henry's Quilt

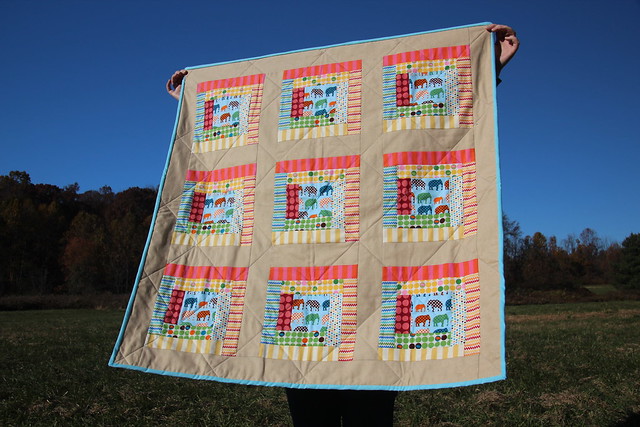
This was my first attempt at log cabins.  They turned out to be so easy!

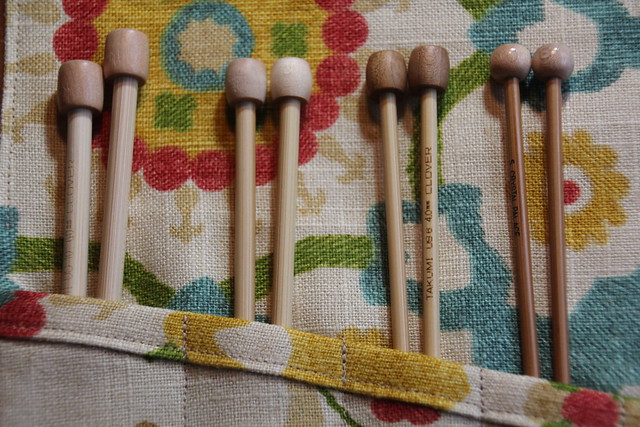
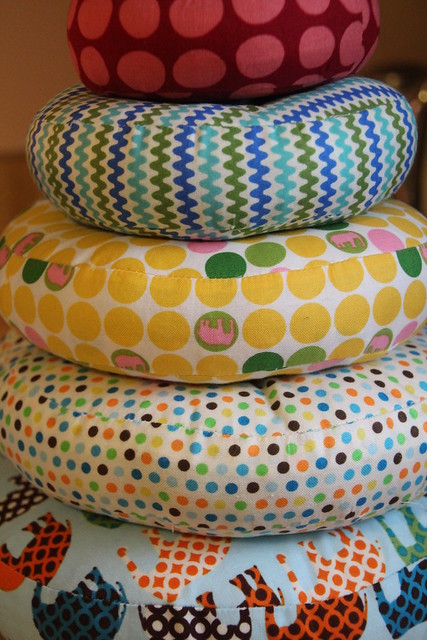
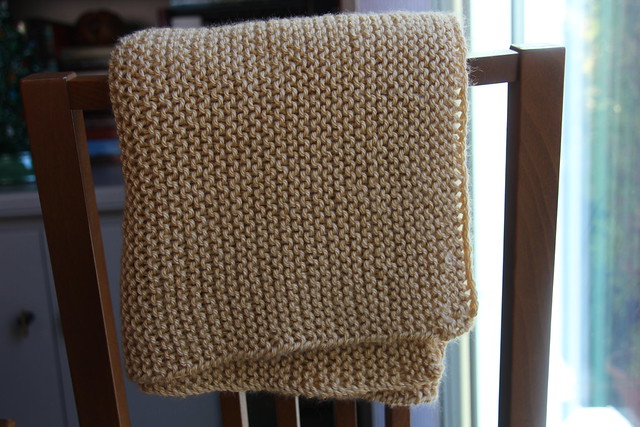
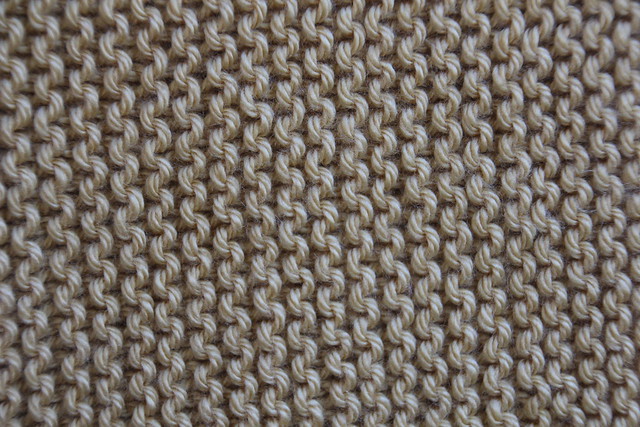
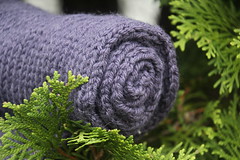
4) Knit 10 panels for an afghan.
I'm going to be honest: about a month ago, I didn't think this goal was going to happen.  But I've gone into knitting overdrive and am happy to report that I finished 10 panels this year!  I somehow managed to finish 4 panels in the past month or so.

Panels for AfghanPanel #2 for AfghanPanel #4Panel #3Fifth Panel for BlanketPanels 7 & 8

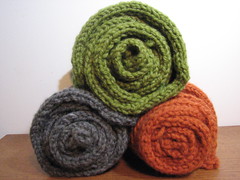
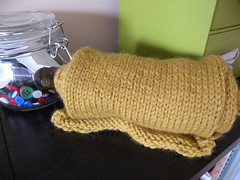
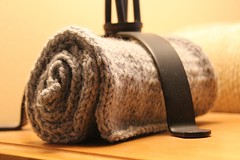
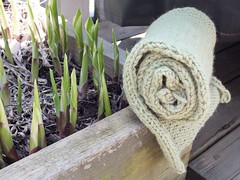
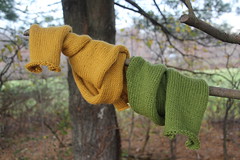
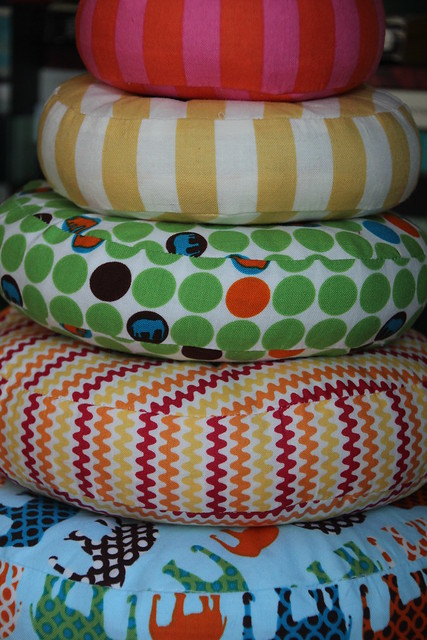
So what am I planning to do with all of these panels?  Piece them together of course!  I have no idea how that works, but I'll worry about that once all of the panels are knitted.  Here are all of the panels I have finished so far, including the last two that I didn't get to photograph individually.

Knit Panels for Afghan
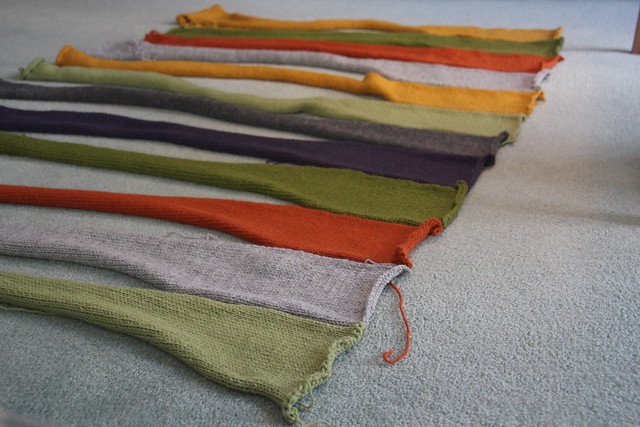
This isn't the order that they are going to be in when the whole thing is pieced.  I just lined them up randomly to see how  long and wide the panels are so far.

After I laid them out on the floor I realized that I am really close to being finished!  I'm going to knit two more panels so I have two of each of the colors and then figure out the whole piecing thing.  I hope to be finished before March!

5) Run the Broad Street Run in under 2 hours.
Mr. Pinds and I were able to finish the race in 1 hour and 55 minutes, a whopping 5 minutes under our goal! I was a little delirious at the end, but I'm so proud of our progress.  And we were able to raise $640 for Back on My Feet, which really makes all of the pain of training and running worth it.

For a full list of everything that I made this year, check out my 2011 Completed Projects page!

Come back tomorrow to see my goals for 2012!

Thursday, December 29, 2011

Pretty Things Thursday: Sam the Snowman

Isn't he glorious?  Mr. Pinds made him a couple of years ago using an old lamp that we got from my grandparents.

Sam the Snowman

The only problem is that we can't turn the lamp on because the globe gets really hot really quickly.  It's OK though because he looks better with the light turned off anyway.

Wednesday, December 28, 2011

Knitting Needle Roll

Today is my mom's birthday!  Happy birthday, mommy!  Since she's picking up her knitting again, I decided an appropriate gift would be a nice place to store all of the knitting needles that I'm sure she'll be collecting.  I've been meaning to make one for myself, so it seemed like perfect timing for some more assembly line action.

Knitting Needle Roll

I used the Tool Roll pattern from Lotta Jansdotter's Simple Sewing.  I had this upholstery-type fabric in my stash and I thought the weight of it would be perfect for the rolls.

Knitting Needle Roll

Since the pattern calls for ribbon to finish the edges of the roll and I didn't have any ribbon, I made some using extra fabric.

I love how you fold over the flap to enclose the tools so they don't fall out once the fabric is rolled up.  It's like those fancy cases for chef's knives!

Knitting Needle Roll

Here is my meager collection of knitting needles in their new case!

Knitting Needle Roll

I ended up changing the pattern a bit because of my lack of ribbon.  Instead of doing some weird thing with the top and bottom seams, I placed the inside piece with the pocket and the outside piece right-sides together and stitched around the edges, making sure to leave a small gap to pull the fabric right-side out.  Then I pressed and edge stitched around the top flap.  I think it worked out nicely!  And even better, my mom loved her birthday present!

Tuesday, December 27, 2011

Oliver + S Explorer Vest

When the Oliver + S Little Things to Sew book came out earlier this year, I knew right away that I had to make the Explorer Vest for my nephew for Christmas.  Isn't it adorable?

Image Source

Except that I knew it had to be less dressy/hipster and more sporty than the one pictured above.  Of course Mr. Pinds totally agreed with this idea and declared that it needed to be made in a khaki canvas to be a legit explorer's vest.  A couple of weeks ago we visited Joann to pick out the fabric and found the perfect khaki canvas and then found the perfect lining: a black and red checked flannel aka lumberjack fabric.

Explorer Vest

We decided to use pockets with bellows on the back and for the front bottom pockets so the little guy could stuff them with all of his spy gear (some of which we gave to him for Christmas).  Mr. Pinds also insisted that I add a loop to hold the flashlight that we were including with the vest.  After all, a good explorer needs the perfect storage for his tools.

Explorer Vest

This was my first time making and working with bias tape.  The Appendix of Little Things to Sew includes instructions and tips for making and working with bias strips, so I had no problem at all!

Explorer Vest

I was worried that the vest would be complicated and take a long time to complete, but it was actually pretty easy to put together.  Making and attaching the bellowed pockets took the most amount of time, but it was worth it in the end to have sturdy and large pockets.  The only thing I didn't like about the book is that all of the patterns are squeezed onto three sheets of paper and, since they overlap, you have to trace them instead of simply cutting them out.  Somehow I didn't realize this until I started working on the project and the added step took more time than I had originally planned for.

Explorer Vest

I stitched a Hawk Mountain patch onto the back of the vest. Part of the little guy's present is that we're going to take him to Hawk Mountain in the spring for some mountain climbing and exploring.

Explorer Vest

Overall I highly recommend Little Things to Sew and the Explorer Vest pattern.  The instructions are great and they include really informative and helpful pictures and diagrams.  Plus the patterns are so classic and adorable that I want to make everything in the book!  Someone just needs to have a little girl now so I can make the red riding hood cape!

Monday, December 26, 2011

Gifts for the Little Ones

I was SO excited when I finally finished with these ring toys.  I committed to making two of these before I got the pattern in the mail and upon reading the instructions I realized that I was in trouble.  I didn't realize they would involve so much hand sewing and that they would be so complex to construct!  Thankfully I have a lengthy daily commute on the train so I was able to do most of the hand sewing while in transit.

Ring Stacker Toys

They aren't perfect, but I finished them!  And that's all that matters.  I used the Heather Bailey Happy Stacker Ring Toy pattern. I had a bunch of leftover fabric from Henry's baby quilt so I didn't even have to buy any additional fabric!

Ring Stacker Toy for A

I love how happy the fabrics look together! I hope the little ones that will receive these love them as much as I do!

Ring Stacker Toy for G

I also made another superhero cape, this time for my sister's nephew. I think I have perfected my approach at appliqueing the letters and shapes onto the back of the cape.  This little guy loves Lightning McQueen too. He's a pretty popular character!

G's Superhero Cape

The good news is that since this is the fourth cape that I've made, it went together in under two hours. That was very much appreciated after I spent most of the month making the two ring sets!

Friday, December 23, 2011

Gifts for Co-Workers

Last year I made peppermint soap for my co-workers and a few of them have mentioned to me over the past year that they loved it and were sad when their bars ran out.  So I knew I had to make the soap again!

I like to give a little something to all of my co-workers and since I have about 40 of them, making soap is an easy and cost-efficient option.  The process went a little more smoothly and quickly than it did last year, even if it still is a little scary to be dealing with such a toxic ingredient (lye).  Once again, Mr. Pinds and I suited up with our protective gear to make the soap, which I’m sure caused our neighbors to wonder what we were up to. 

I used the Good Morning Soap recipe that I used last year from Raleigh Briggs' How to Make Soap Without Burning Your Face Off.  This year I measured everything out before we started the process, which worked out really well.  When the time came to add the next ingredient, all I had to do was reach for the bowl and dump it in.  Of course I waited to measure and pour the lye until we were outside.

Homemade Soap

The fats in the soap are coconut oil, olive oil, sunflower oil, canola oil, shortening, and castor oil.  I added sea salt and sand for exfoliation and flavored it with basil and peppermint essential oils.  Our house has smelled like peppermint since I first made this on December 4th!  It’s great walking in after work to the delightful smell of peppermint—I’m sad to have it go away.

The first step to making this soap is to add the lye to water, or in this case, to peppermint tea.

Homemade Soap

You then melt the fats. Once the lye mixture has cooled to the same temperature as the fats, you add it to the fats and then mix until you reach trace.

Homemade Soap

Trace means that if you run a spoon through the soap it will leave a trail behind.  If you’re just stirring by hand, reaching trace can often take hours, but I read somewhere that if you use an immersion blender it happens within minutes.  And I’m all about efficiency, so I picked up a cheap immersion blender to use for concoctions.  If you’re going to do the same, I highly recommend that you label the non-food blender.  I’m not sure if it makes a difference, but I would feel funny preparing food with the same blender that has had contact with lye.  Once you reach trace, you add essential oils.

Homemade Soap

Then add the sea salt and sand and mix thoroughly.  It’s really simple!

Homemade Soap

I use two shallow but long plastic containers as soap molds.  You just have to grease them beforehand (I used Pam) and once the soap has molded it pops out really easily.  You let the soap stay in the mold (or as my book says, "put them to bed") for a day or two and then they are ready to be cut.

Homemade Soap

Homemade Soap

Mr. Pinds came up with the great idea of marking guides into the top of the soap with a pizza cutter before we started cutting.  Brilliant!  Last year I made the mistake of waiting more than two days to take the soap out of the molds and the soap was a lot harder to cut and crumbled a bit.  This year I made sure to cut the soap after two days and it was so much easier and we didn’t have any crumbling!  I enlisted Mr. Pinds to cut the soap for me.  He used a serrated bread knife to cut the blocks of soap into bars, which he said worked perfectly.

Homemade Soap

Once the bars were cut, I placed them on drying racks and they cured for a couple of weeks.  I had to hide them in our laundry room where our rascal cat wouldn’t have access to lick them all day while we were at work.

Homemade Soap

To package them, I wrapped each bar in plastic wrap (I know, not the most environmentally friendly, but it was the easiest and fastest option) and then wrapped the bars in postal paper. 

Homemade Soap

Each bar got tied off with some raffia and was topped with a mini candy cane and a printed feather (I found these on How About Orange and there are more here) as a gift tag.  I think they look pretty festive!  I waited until I got to work to put the feathers on because I was afraid they’d get creased during my commute.

Homemade Soap

I’m glad to tell you that the soaps were a hit once again.  A few of my co-workers told me that they were secretly hoping that I’d refill their soap bins!

We also did a Secret Santa gift exchange and my Secret Santee requested a scarf.  With a $20 limit, I knew I wouldn’t be able to get an amazing handmade scarf from Etsy, so I did the next best thing: decided to knit one myself.  Even though I am a very beginner knitter, I think it turned out beautifully.  I made a simple scarf about 50 stitches wide in a knit stitch.  This yarn is so soft!  I wasn’t able to make it to a specialty yarn shop (why do they all have such strange hours?) so I spent a good 20 minutes in Joann rubbing all of the yarns against my face to find the softest.  I ended up with Caron Simply Soft in Autumn Maize.  I wanted a gold yarn, but that was the closest I could get.

Knitted Scarf

When I was about halfway through the scarf I realized that I made it a little wide, resulting in a wide but short scarf.  Oops!  It turned out OK in the end though and my co-worker loved it.  And because I made the scarf instead of buying it, and thanks to a Joann coupon, I was able to pick her up a bottle of wine without going over our $20 limit!  I do enjoy when things work out.

Knitted Scarf

Another plus from this scarf project is that now that I’m back to knitting my 30-stitch-wide panels for my afghan, I seem to go through the rows much faster!  Now it only feels like two more years instead of five until I’m finished with that project!

Thursday, December 22, 2011

Pretty Things Thursday: Our Christmas Tree

Sorry for the late PTT post today, folks!  I unexpectedly got sick and have been down for the count for the past two days. Thankfully I'm starting to feel better because I still have some Christmas sewing to finish!

Anyway, here is our finished tree, complete with strings of popcorn!  We only put strings 3/4 of the way down so the crazy cat that lives here can't eat it all while we're at work.  It looks a little weird, but it works for us.

2011 Christmas Tree

2011 Christmas Tree

We're celebrating only one more work day until Christmas break by going to the Shady Brook Farm light show night!  I can't wait!

Wednesday, December 21, 2011

Great Western Adventure: Day 10

Interested in what we did before we returned to Yellowstone?


Day 10: The Grand Canyon of Yellowstone and Lamar Valley
After waking up from what felt like the best sleep of my life after camping for three days, Mr. Pinds and I walked down to the cafeteria for our usual breakfast of oatmeal with raisins, bacon, a biscuit, and an apple.  We then hopped in the car to go to the Grand Canyon of Yellowstone for a ranger-led walk.

On the way, we saw signs for Mud Volcano, so we stopped.  This used to be in the shape of a volcano, but in the 1870s it blew itself apart.  Now it's this bubbly hole of mud and it smells really badly of sulfur.

2011-8-25 192

A little bit down the road we saw a bunch of people pulled over so we decided to stop.  There were a bunch of bison in the valley below but there were also three bears!  You can see them in the top left-hand corner of this picture.

2011-8-25 243

2011-8-25 254

We watched them run along the creek.  They are insanely fast!  We were really far away though, and there was a ranger there making sure no one did anything stupid, so we were out of harms way.  They then swam across the creek (they're fast swimmers too—there's no escaping them!) and then ran up into the woods.

At that point it was around lunchtime, so we stopped at one of the small take out restaurants and got some sandwiches.  They were terrible!  I'm not sure why Yellowstone can't seem to put together decent food, but they were pretty repulsive.  Unfortunately they didn't turn out to be the worst lunch we would have while there.

We still had some time before the ranger walk, so we swung by the Artist Paintpots.  I could have stood here all day.  The bubbling sound of the mud and watching it pop and bubble is so relaxing.  They should make videos of it and sell it for personal therapy.  I seriously loved it there.

2011-8-25 289

Unfortunately we had to get back in the car if we wanted to make it to the Grand Canyon in time for the ranger walk, so Mr. Pinds dragged me away.  At the Grand Canyon, we met Ranger Don.

2011-8-25 307

He was great!  He has been working as a ranger at Yellowstone for years, so he knew a ton of history.

2011-8-25 312

He told us that the people preserving Yellowstone have been trying to make it less about tourism and more about nature.  Over the past 50 years or so, they have been removing the hotels that are right next to the main geological areas, like the Grand Canyon, and locating them where they won't disturb the natural landscape and view.  This was surprising to me since everything is so corporate these days.  I guess the government is doing some things well!

2011-8-25 314

By the Lower Falls you can see the rock that was the inspiration for the park's name. It's literally yellow stone!

2011-8-25 317

After the walk, upon Ranger Don's suggestion, we visited Artist Point, which is a little farther down the river from the Lower Falls and is the same view that Thomas Moran painted.

2011-8-25 926

From there, we drove north to have dinner at the Roosevelt Lodge.  I had my first taste of elk and bison in a delicious pasta dish.  We then traveled east to Lamar Valley, which was recommended to us by our guides in the Tetons.  They assured us that if we went to Lamar Valley around 7:00pm we would have the greatest chance of seeing packs of animals feeding, including a wolf pack.

As soon as we entered the area we saw a mangy looking coyote off in the distance, so we were pretty excited that we would get to see more animals.  We made our way down the road along the valley, where we saw bison and some pronghorns.

2011-8-25 400

Eventually we saw a large group of people standing in a field who appeared to be watching something.  We decided to pull over and see what was up.  A lot of the people had crazy high-powered lenses for their cameras, so we knew it had to be something good.  It turned out to be a wolf feasting on a carcass.  We were able to see him pretty well with our binoculars, but he looks tiny in our pictures.  In reality, the wolf is bigger than a German Shepard.  It wasn't a wolf pack, but at least we got to see a wolf! He's right in the middle of the picture.

2011-8-25 1002

We wandered back to our car when the sun had almost completely set and then had the daunting task of driving the windy mountain roads in the dark back to our cabin.

2011-8-25 409

When we were almost to our cabin, we stopped at a restaurant and rewarded ourselves with some dessert.

Once we got back to the cabin we were exhausted.  Right before we turned in for the night, we heard a coyote cry, which was followed up by the pack of coyotes crying.  Goodnight, Yellowstone.

Up Next: Mr. Pinds and I kayak on Yellowstone Lake!