
I like to give a little something to all of my co-workers and since I have about 40 of them, making soap is an easy and cost-efficient option. The process went a little more smoothly and quickly than it did last year, even if it still is a little scary to be dealing with such a toxic ingredient (lye). Once again, Mr. Pinds and I suited up with our protective gear to make the soap, which I’m sure caused our neighbors to wonder what we were up to.
I used the Good Morning Soap recipe that I used last year from Raleigh Briggs' How to Make Soap Without Burning Your Face Off. This year I measured everything out before we started the process, which worked out really well. When the time came to add the next ingredient, all I had to do was reach for the bowl and dump it in. Of course I waited to measure and pour the lye until we were outside.
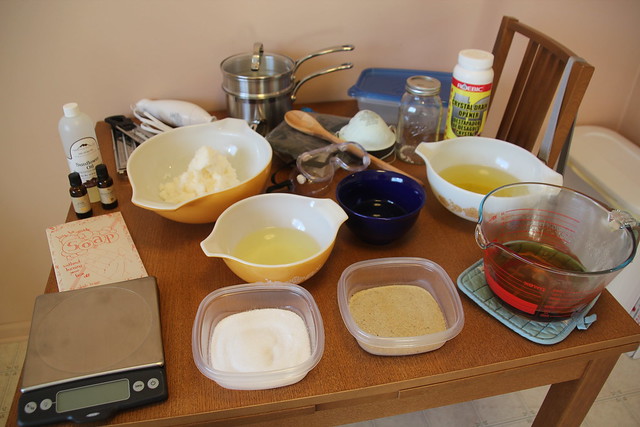
The fats in the soap are coconut oil, olive oil, sunflower oil, canola oil, shortening, and castor oil. I added sea salt and sand for exfoliation and flavored it with basil and peppermint essential oils. Our house has smelled like peppermint since I first made this on December 4th! It’s great walking in after work to the delightful smell of peppermint—I’m sad to have it go away.
The first step to making this soap is to add the lye to water, or in this case, to peppermint tea.
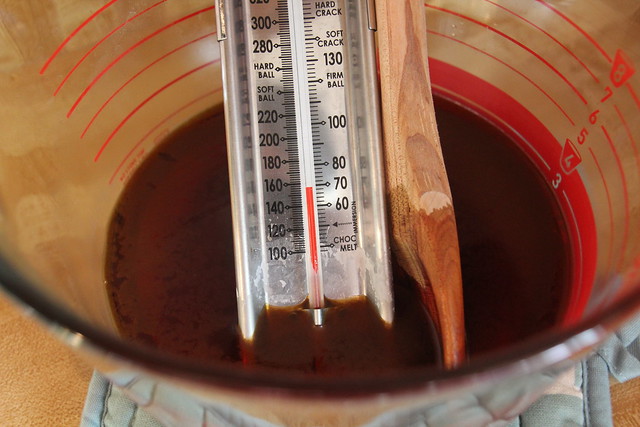
You then melt the fats. Once the lye mixture has cooled to the same temperature as the fats, you add it to the fats and then mix until you reach trace.

Trace means that if you run a spoon through the soap it will leave a trail behind. If you’re just stirring by hand, reaching trace can often take hours, but I read somewhere that if you use an immersion blender it happens within minutes. And I’m all about efficiency, so I picked up a cheap immersion blender to use for concoctions. If you’re going to do the same, I highly recommend that you label the non-food blender. I’m not sure if it makes a difference, but I would feel funny preparing food with the same blender that has had contact with lye. Once you reach trace, you add essential oils.

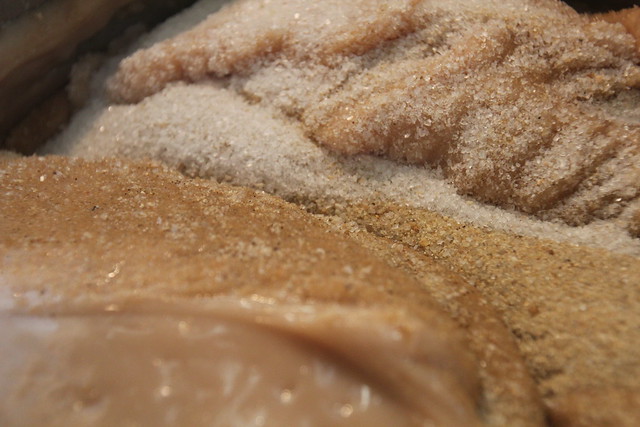
Then add the sea salt and sand and mix thoroughly. It’s really simple!
You then melt the fats. Once the lye mixture has cooled to the same temperature as the fats, you add it to the fats and then mix until you reach trace.
Trace means that if you run a spoon through the soap it will leave a trail behind. If you’re just stirring by hand, reaching trace can often take hours, but I read somewhere that if you use an immersion blender it happens within minutes. And I’m all about efficiency, so I picked up a cheap immersion blender to use for concoctions. If you’re going to do the same, I highly recommend that you label the non-food blender. I’m not sure if it makes a difference, but I would feel funny preparing food with the same blender that has had contact with lye. Once you reach trace, you add essential oils.
Then add the sea salt and sand and mix thoroughly. It’s really simple!
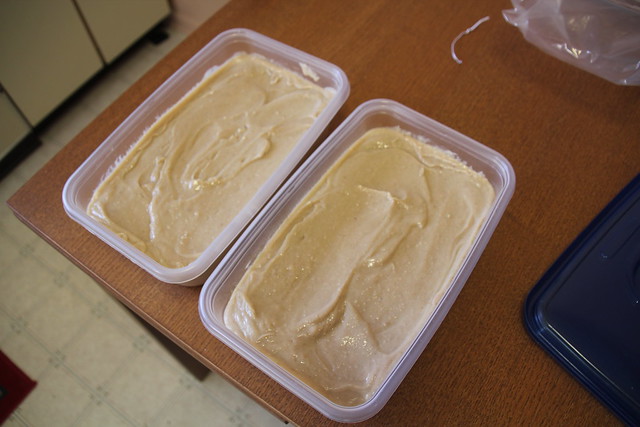
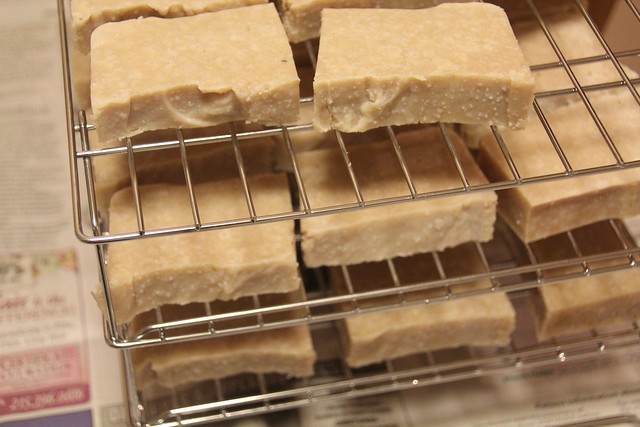
I use two shallow but long plastic containers as soap molds. You just have to grease them beforehand (I used Pam) and once the soap has molded it pops out really easily. You let the soap stay in the mold (or as my book says, "put them to bed") for a day or two and then they are ready to be cut.

Mr. Pinds came up with the great idea of marking guides into the top of the soap with a pizza cutter before we started cutting. Brilliant! Last year I made the mistake of waiting more than two days to take the soap out of the molds and the soap was a lot harder to cut and crumbled a bit. This year I made sure to cut the soap after two days and it was so much easier and we didn’t have any crumbling! I enlisted Mr. Pinds to cut the soap for me. He used a serrated bread knife to cut the blocks of soap into bars, which he said worked perfectly.
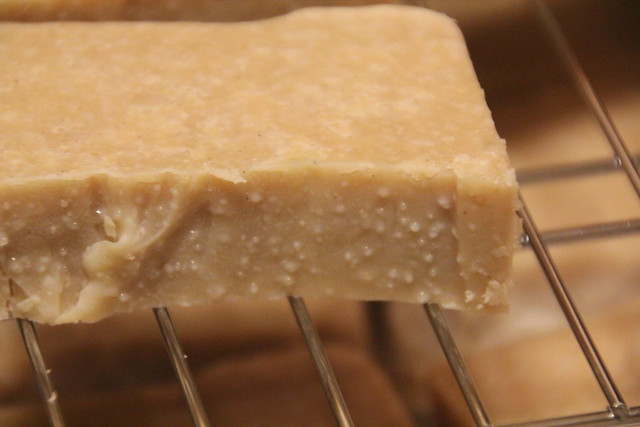
Once the bars were cut, I placed them on drying racks and they cured for a couple of weeks. I had to hide them in our laundry room where our rascal cat wouldn’t have access to lick them all day while we were at work.
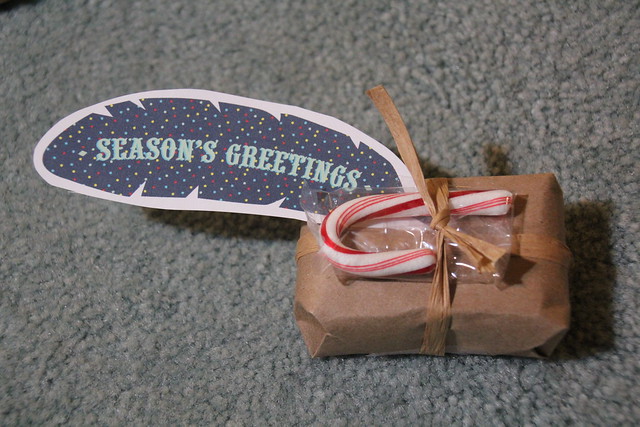
To package them, I wrapped each bar in plastic wrap (I know, not the most environmentally friendly, but it was the easiest and fastest option) and then wrapped the bars in postal paper.
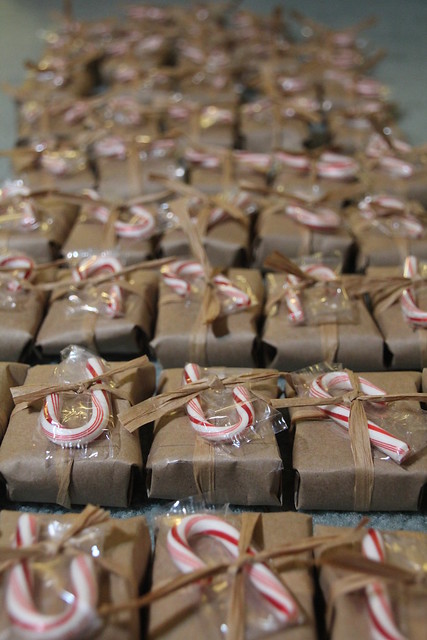
Each bar got tied off with some raffia and was topped with a mini candy cane and a printed feather (I found these on How About Orange and there are more here) as a gift tag. I think they look pretty festive! I waited until I got to work to put the feathers on because I was afraid they’d get creased during my commute.
Each bar got tied off with some raffia and was topped with a mini candy cane and a printed feather (I found these on How About Orange and there are more here) as a gift tag. I think they look pretty festive! I waited until I got to work to put the feathers on because I was afraid they’d get creased during my commute.
I’m glad to tell you that the soaps were a hit once again. A few of my co-workers told me that they were secretly hoping that I’d refill their soap bins!
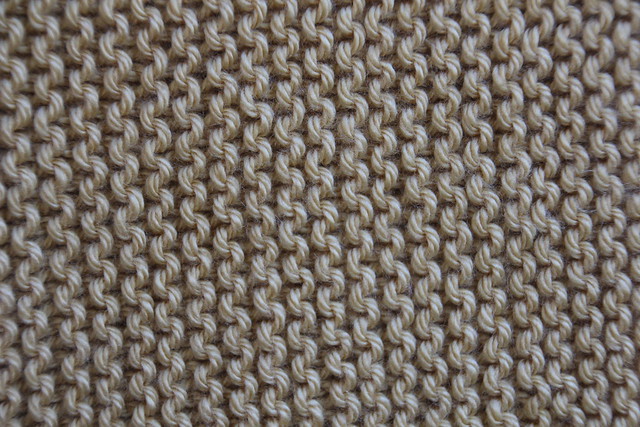
We also did a Secret Santa gift exchange and my Secret Santee requested a scarf. With a $20 limit, I knew I wouldn’t be able to get an amazing handmade scarf from Etsy, so I did the next best thing: decided to knit one myself. Even though I am a very beginner knitter, I think it turned out beautifully. I made a simple scarf about 50 stitches wide in a knit stitch. This yarn is so soft! I wasn’t able to make it to a specialty yarn shop (why do they all have such strange hours?) so I spent a good 20 minutes in Joann rubbing all of the yarns against my face to find the softest. I ended up with Caron Simply Soft in Autumn Maize. I wanted a gold yarn, but that was the closest I could get.
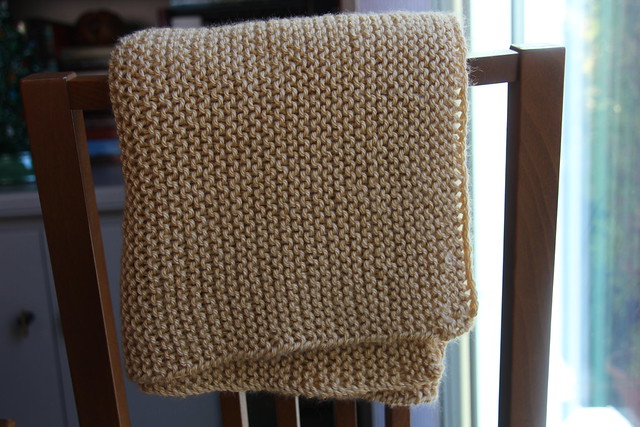
When I was about halfway through the scarf I realized that I made it a little wide, resulting in a wide but short scarf. Oops! It turned out OK in the end though and my co-worker loved it. And because I made the scarf instead of buying it, and thanks to a Joann coupon, I was able to pick her up a bottle of wine without going over our $20 limit! I do enjoy when things work out.
Another plus from this scarf project is that now that I’m back to knitting my 30-stitch-wide panels for my afghan, I seem to go through the rows much faster! Now it only feels like two more years instead of five until I’m finished with that project!
wow! soap for 40, i'm impressed! that's so sweet of you!
ReplyDeleteThank you soooooo much for the soap tutorial. I am going to try this in 2012.
ReplyDelete