This Christmas was a little different than last Christmas when it came to gifting handmade items. Who would have thought that having another baby would alter my Christmas gift production? :)
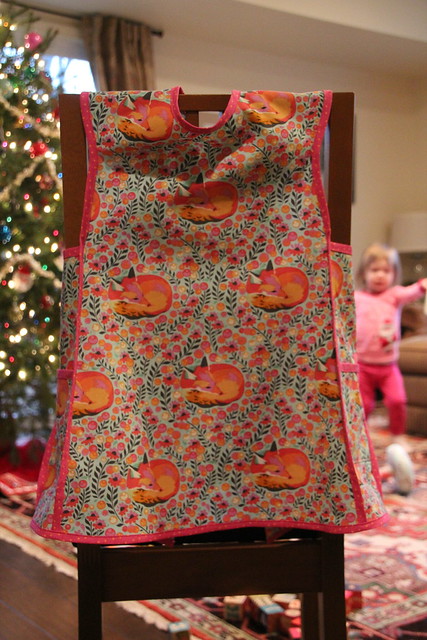
This year my niece was the only person to receive a handmade gift. She loves helping my sister-in-law cook, so I made her this quick and easy bias trimmed apron from Oliver + S' Little Things to Sew. I seriously love my edgestitching foot (Bernina #10) now. It made sewing on the trim so neat and easy.
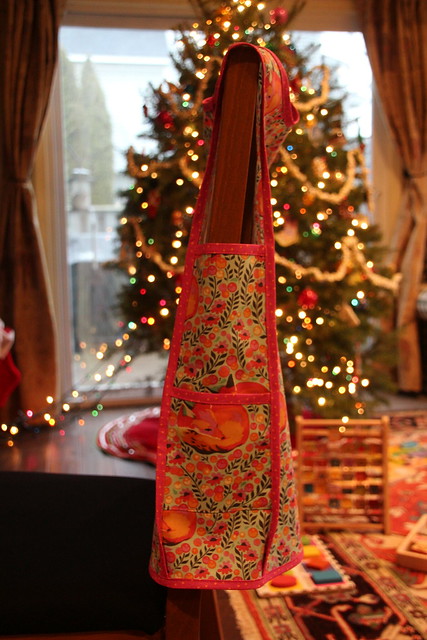
The apron is made completely from Tula Pink fabrics: the body is Fox Nap from the Chipper collection and the trim is Tortoise Shell from Slow and Steady. I don't usually buy a lot of Tula (I think the designs are pretty but they never seem to fit into the projects I'm making), but these prints jumped out at me when I was browsing in Pennington Quilt Works as my niece is a great lover of all things pink. I thought Fox Nap was just pink enough but will age nicely as she gets older.
I love the crazy toddler photobomb happening in the photo above. Truthfully, I completely forgot to take nice pictures of this apron and had to settle for a quick snap before wrapping it on Christmas Eve morning. They turned out a little dark, but you get the idea.
I included a little pink whisk to the side pocket when I wrapped it. That would have been a cute picture to capture!
Although they weren't Christmas gifts, right before Christmas I whipped up two pairs of mittens for my little wild animal. Before this, we had one pair of mittens that I was constantly misplacing in our tiny house (how this is even possible is beyond me). I didn't have any fleece in my stash, so I raided her outgrown clothes bag and reused an old pair of pajamas. And I was able to use leftover bias tape from the apron for the elastic casing (even if they are double the size the pattern calls for). It took me maybe two hours to complete both pairs, so this is a very quick project if you are in a bind. My daughter calls these her "Mommy mittens" and proclaims "Mommy made them!" every time she puts them on, including at school. Her teachers were impressed!
Two more wins for Little Things to Sew! I think by the time I'm through having little kids in my life I'll have sewn through the entire book. All of the patterns are so classic, easy, and well written that I will never tire of them. It's by far my favorite source for kids sewing. (I've also made the Red Riding Hood Cape, Tutu, and Explorer Vest).
Although made a few months apart, it seems like I've had hearts on the mind lately when it comes to mini quilts. And all before Valentine's Day even!
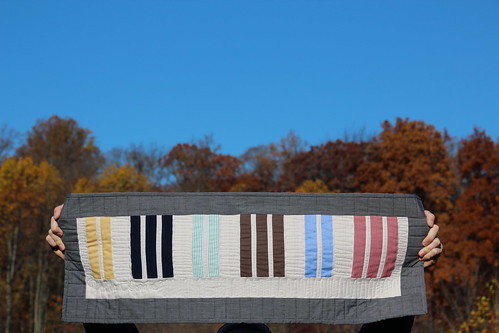
To celebrate my quilt guild's 5th anniversary, we were challenged to make quilts with the theme of "Five." I went through a couple of ideas before I settled on creating an homage to Big, which was released in 1989, the year I turned 5 years old. Is there a more iconic scene in the movie than the "Heart and Soul" keyboard scene?
I'm really into the reuse/repurpose and only-buy-what-you-need mentality lately (watching Minimalism on Netflix (and also probably having a second kid) only added fuel to the fire). I had just gone to the Salvation Army during their weekly 50% off sale so I had a large selection of thrifted clothes to chop up for my material. I got a strange satisfaction from breaking down all of the clothes into usable fabric.
I now have a stockpile of thrifted materials (and buttons!) that I have big plans for—you haven't seen the last of them yet.
Since I was at the height of baby brain when I made this and couldn't imagine thinking through how to measure all of the pieces on my own, I found a simple keyboard quilt pattern. It was very quick and easy to sew together, just the sort of project I could handle when 36 weeks pregnant.
I used this quilt as a personal challenge to step outside of my quilting comfort zone (straight line quilting) and finally try some freemotion quilting on an actual project instead of just test squares. I'm pleased with the result even if it's relatively simple quilting. Baby steps.
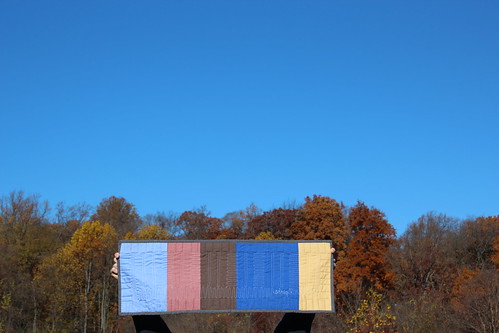
I wish I would have gotten a close-up picture of the bottom left of the keyboard where I quilted in "Zoltar Speaks" (the name of the arcade game that grants Tom Hanks' wish). You can kind of see the writing in the bottom right corner on the back below. I didn't trust myself to freemotion handwriting, so I wrote out the words using a water soluble marker and then traced over it. It turned out much better than I was expecting!
Speaking of freemotion quilting, I had gotten a Sew Steady table to make quilting on my domestic machine a little more bearable and was disappointed when I found this quilt almost sticking to the plastic table surface (I tried with cotton too so it wasn't due to the synthetic material). After some internet troubleshooting, I found a tip to buff the table with Turtle Wax. I can excitedly proclaim this to be a fantastic solution! I have a hunch that since Sew Steady now sells their own polishing kit, they don't buff the tables to be as smooth in the factory, but maybe that's just the way my conspiracy theory mind works. Just apply a very thin coat of original Turtle Wax on the entire table, let dry, and wipe clean with a microfiber towel. After repeating three times as suggested, my Sew Steady table is now slick as can be! I don't even need the Supreme Slider anymore, the quilt glides that nicely over the newly buffed table.
I love these little challenges from my quilt guild because it's a fun prompt to create something I might not have thought of on my own. Plus it's a great way to make just-because gifts for the people you love. This little beauty is now hanging in my music-teacher-sister's classroom. Check out our guild blog to see all of the "Five" themed quilts. I love that everyone approached it differently.
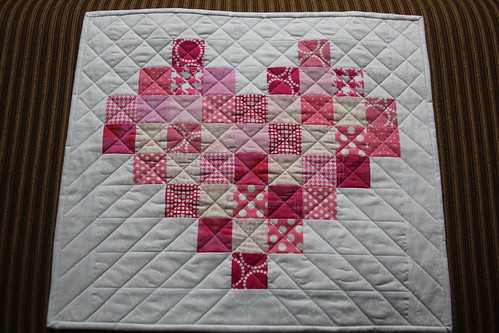
Each member of my guild was recently given a bag stuffed with fat quarters. It was a huge haul, and free! I decided to use some of the pink prints to make a mini quilt to send to a friend's quilty mom who has been in the hospital (pink is her favorite color).
I used the Scrappy Heart tutorial from the Hopeful Homemaker. It was super quick and easy to sew (and again, probably something I could have figured out on my own if my brain wasn't so zapped). It seriously took longer to "randomly" arrange the prints than it took to sew together. And even after spending all of that time flipping and switching the prints, I still managed to have a diagonal line of light colored prints down the left side of the heart. Of course I didn't notice until it was all sewn together. Gah! Since it doesn't look quite as glaring in person as it does in a photo, I decided to keep it as is. Otherwise I'm happy with the scrappy look.
Even though I went with my old standby straight lines for the quilting, I really like how I mixed it up and only quilted the crosshatch on the heart and above. Yes, this is mixing it up for me! I think it adds a nice movement and visual interest.
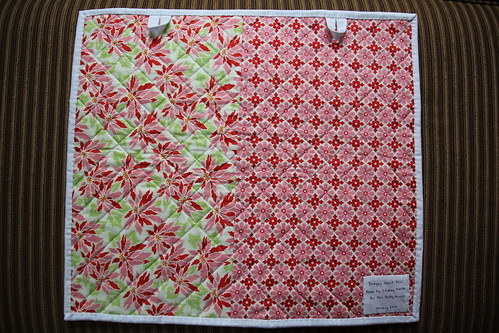
This was the first time I sewed hanging loops onto the back of a quilt. I included two Command hooks in the package so they could easily hang it up in her hospital room.
I also added a label, which I've only ever done once before on a quilt (besides the Quilt of Valor—the label was mandatory). For some reason I envisioned making and attaching a label to be a super long and annoying process, but I was pleasantly surprised to find that it took only 15 minutes from start to finish. Now I love the idea of labeling all of my quilts!
Just in time for this epiphany, Quilt Alliance is currently hosting a Labeling pledge (thanks for the heads up, Jess!). If you take the pledge you are entered into a drawing to win custom quilt labels! But isn't the idea that the details behind your quilt won't be lost in the void of time more of an incentive?
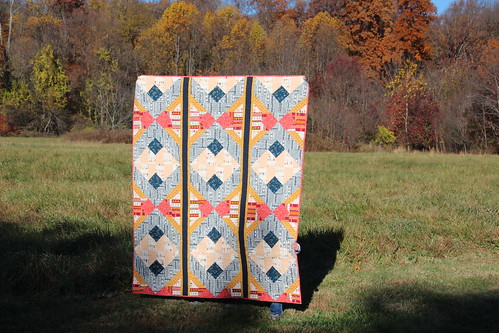
Last March I learned about the Quilt of Valor Foundation while listening to the now defunctQuilt Your Heart Out podcast hosted by Mary and Marianne Fons. From what I understand, Marianne has been involved with the foundation for quite some time. The foundation's mission is to award quilts to service members and veterans touched by war. I thought getting involved would be a good opportunity to show my appreciation for the sacrifice that our service members and their families make for our country. Plus, I noticed that most of the quilts being awarded were very traditional in style and there might be younger veterans who would be interested in receiving a more modern style quilt.
Joining the organization is pretty easy and soon after I was contacted by my state coordinator with my first assignment. After some searching, I decided on the Follow the Stars kit by Maureen Cracknell from Hawthorne Threads. The color palette is patriotic without being overly traditional and the pattern reminded me of the floor in a fancy building (in a good way, of course). I didn't realize that I would have to make roughly 5,000 half square triangles to construct the quilt top, so it was a little slow going for me. It is pretty magical how arranging all of those squares just so results in a big and bold geometric design.
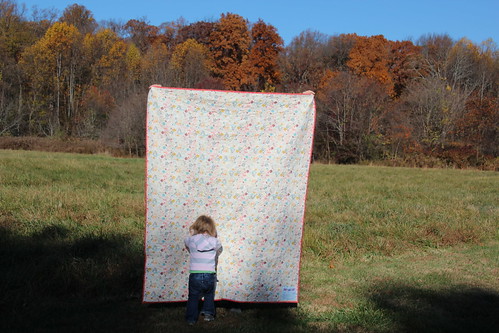
Once I finished piecing the top and the back, I sent both to a volunteer long arm quilter who was super quick to return a beautifully quilted sandwich back. Then all I had to do was attach the binding and the label.
What better way to show our appreciation and wrap our service members and veterans in a warm virtual hug than through quilts?