
The long-awaited Passport dress is finally finished! I can’t believe it took me so long to put this dress together, considering the muslin took me less than two hours. Of course I ran into a few snags along the way. (I apologize for the headless pictures again! Sundays are when I make no attempt to do my hair or makeup, in addition to needing a haircut. I will plan better in the future!)
The main thing that slowed me down was that my instructor and I decided to add a full lining to the dress (the original pattern doesn’t call for any lining). Basically I sewed up two versions of the dress (leaving the top seam of the straps open) and then attached them together at the neckline and the armpit. Then I pulled the lining through the straps to turn the dress right side out and then sewed the top seam of the strap like usual, making sure that the lining was out of the way. Then I trimmed the seam allowance on the strap and tucked the extra behind the lining (so it’s essentially sandwiched in between the lining and the fashion fabric), folded the lining over and tucked the extra underneath the lining layer, and then whip stitched the edge of the lining to the fashion fabric. Then I was ready to top stitch around the armpit holes and neckline. See why I decided to wait until I was with my instructor to do these steps? At the time it was confusing the hell out of me, but now that I’ve done it once (twice actually, but we’re not there yet), I understand the logic behind it and am comfortable doing it again by myself. That’s the point of taking sewing lessons, right?
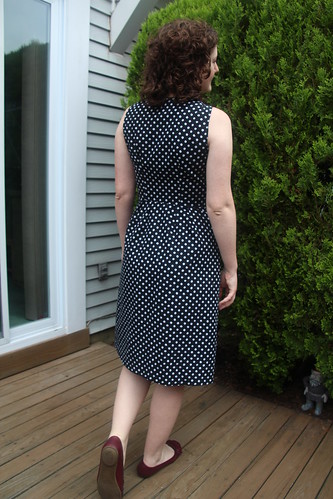
The sad part was when I tried on the dress to mark the hemline and I realized that there was gaping in the neck on the front and the back. Gah! I was infuriated, especially since the muslin fit so well. My instructor and I ended up pinching up the straps a bit, which completely fixed the fitting issues without making the armpit too tight. But it also meant that I had to take out the straps and redo everything that I explained above. Wah wah. The silver lining is that since I used this strategy twice, I will definitely remember it going forward. I used the marked up muslin to cut out my fashion and lining fabric, so either I didn’t use the adjusted lines to cut out the straps or my fabric shifted while I was cutting those pieces. Either way, I’m glad I now have a strategy to fix neck gaping!
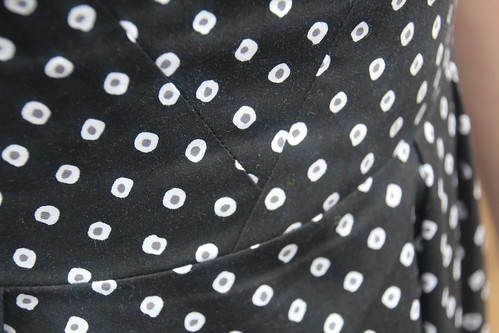
I really love the detailing on the front of the dress. The bodice is crisscrossed and there are also pleats on the front and back of the skirt.
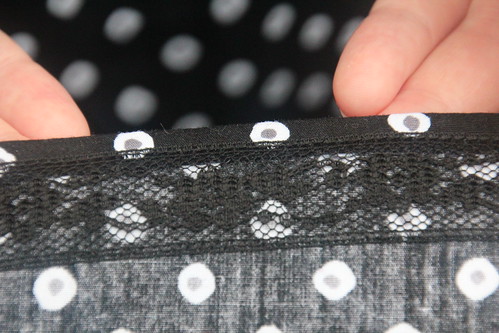
Once the straps were fixed I was all ready to start hemming, when we realized that there was barely a ½ inch for the hem. I couldn’t believe it! My instructor sent me to Joann to pick up 1 inch hem tape, but they only had 1 7/8 inch or ½ inch hem tape, so I picked up both and ended up not being able to use either. When I went back to return the tapes, I picked up some hem ribbon, which did the trick. I stitched it to the raw edge of the bottom of the dress (sewing my finger in the process) and then flipped it up and stitched the ribbon to the dress.
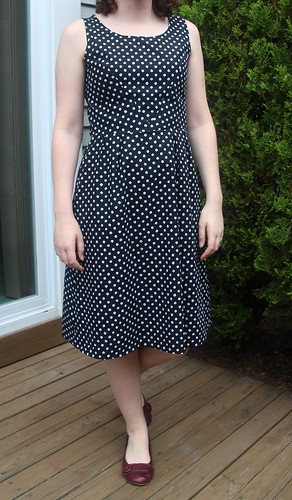
And now I finally have a finished Passport dress! Even though it took forever to sew, I’m pleased with the result. It’s comfortable and cute for work, but is also cool enough to wear during the summer. My one major oops for this project was that I inserted the lapped zipper with the opening facing the front instead of the back. Nothing major, but I’ll make sure to be aware of that in the future.
I will probably make another Passport, but not for a while. We need a break from each other.
The main thing that slowed me down was that my instructor and I decided to add a full lining to the dress (the original pattern doesn’t call for any lining). Basically I sewed up two versions of the dress (leaving the top seam of the straps open) and then attached them together at the neckline and the armpit. Then I pulled the lining through the straps to turn the dress right side out and then sewed the top seam of the strap like usual, making sure that the lining was out of the way. Then I trimmed the seam allowance on the strap and tucked the extra behind the lining (so it’s essentially sandwiched in between the lining and the fashion fabric), folded the lining over and tucked the extra underneath the lining layer, and then whip stitched the edge of the lining to the fashion fabric. Then I was ready to top stitch around the armpit holes and neckline. See why I decided to wait until I was with my instructor to do these steps? At the time it was confusing the hell out of me, but now that I’ve done it once (twice actually, but we’re not there yet), I understand the logic behind it and am comfortable doing it again by myself. That’s the point of taking sewing lessons, right?
The sad part was when I tried on the dress to mark the hemline and I realized that there was gaping in the neck on the front and the back. Gah! I was infuriated, especially since the muslin fit so well. My instructor and I ended up pinching up the straps a bit, which completely fixed the fitting issues without making the armpit too tight. But it also meant that I had to take out the straps and redo everything that I explained above. Wah wah. The silver lining is that since I used this strategy twice, I will definitely remember it going forward. I used the marked up muslin to cut out my fashion and lining fabric, so either I didn’t use the adjusted lines to cut out the straps or my fabric shifted while I was cutting those pieces. Either way, I’m glad I now have a strategy to fix neck gaping!
I really love the detailing on the front of the dress. The bodice is crisscrossed and there are also pleats on the front and back of the skirt.
Once the straps were fixed I was all ready to start hemming, when we realized that there was barely a ½ inch for the hem. I couldn’t believe it! My instructor sent me to Joann to pick up 1 inch hem tape, but they only had 1 7/8 inch or ½ inch hem tape, so I picked up both and ended up not being able to use either. When I went back to return the tapes, I picked up some hem ribbon, which did the trick. I stitched it to the raw edge of the bottom of the dress (sewing my finger in the process) and then flipped it up and stitched the ribbon to the dress.
And now I finally have a finished Passport dress! Even though it took forever to sew, I’m pleased with the result. It’s comfortable and cute for work, but is also cool enough to wear during the summer. My one major oops for this project was that I inserted the lapped zipper with the opening facing the front instead of the back. Nothing major, but I’ll make sure to be aware of that in the future.
I will probably make another Passport, but not for a while. We need a break from each other.
It looks awesome. The changes made the dress all the more professional. Well done!
ReplyDeletei love it! your fabric choice is great, love it with those shoes! Fantastic job, I'm always too scared to modify patterns.
ReplyDeleteI really like how this dress turned out, and once again, all your efforts will pay off - just think all you learned and all the wear you'll get form this cute dress. Well done! By the way, I’m having that same gaping at the back issue with my Rooibos muslin and have no clue how to fix it. I need to go read up on fitting issues.
ReplyDeleteThis really did turn out cute! Sorry you had so many headaches-- hope they were worth it!
ReplyDeleteThanks everyone! I forgot to mention that the dress was super comfortable. I wore it to a conference at work and ended up having to run back and forth between buildings on campus (on a very humid day, I might add) and the dress held up nicely! Best of all, there were barely any wrinkles! In fact, I didn't iron it before taking the pictures after wearing it for a full day! Hurrah!
ReplyDelete