Since the government decided to wait until the last hour possible to decide on a budget, we ended up not going to DC this weekend. We postponed until May, which I think will work out better since it will be warmer and I'll be able to wear my Roundabout Jacket (it better be finished by then). Hopefully we'll have new cameras by then as well. We had no trouble filling up our plan-less weekend though. We got in a 9-mile run on Saturday morning and a 8-mile bikeride on Sunday, some Spring cleaning, some sewing, and a delicious Saturday night meal.
Last weekend I whipped up some more soft scrub to clean the shower. This recipe is from Make Your Place, which I use to make my other cleaning products. It's really simple to make and you only need a few ingredients, most of which you already have if you make other cleaning products. You'll need castile soap, baking soda, tea tree oil, crushed up asprin, and some water.
Yes, that's an empty bottle of The Olive Branch shower gel from Lush. I am a Lush junkie. If you take a peak into our medicine cabinet, you will see many a jar of Lush products. Every time I go in there I find something else that I love. I would suggest that you try some of their products but I'd feel guilty converting yet another addict.
I was excited to use the awesome mortar and pestle that I got for Christmas to crush the asprin. Once you add all of the ingredients, it should look like this.
Then you add enough water to make a paste. I keep the bottle in the shower so it's easier for me to clean the shower regularly. Just make sure if you have guests over they know it's not shampoo! I used to keep the soft scrub in an old Pert Plus bottle and there's a very good chance that one of our recent house guests used it for shampoo because we forgot to tell him otherwise. Whoops! One batch lasts for three to four shower cleanings. You might need to add a little water each time because the paste hardens a bit over time.
I used the soft scrub, along with a few other cleaners that I have made in the past, to clean pretty much the entire house. It's amazing what a little cleaning and airing out the house can do. It's so fresh in here! I am very ready for warm weather now.
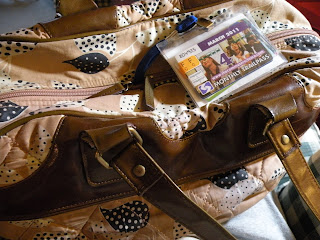
After I finished cleaning, I settled down at my sewing table to finally tackle a train pass holder, which has been on my project list for close to a year. I had been using an old name tag holder to hold my train pass but it had a few issues: 1) the tag that attached the plastic holder to the lanyard broke, so I just had the clip on the plastic holder, 2) the lanyard would just hang out of my bag with the plastic holder sitting on top and I was always worried that it would slip out of my bag while I was sleeping and I would be out $140 dollars for that month (yes, SEPTA does charge that much for a month's worth of train commuting), and 3) there was nothing holding the train pass in the plastic holder, and it would sometimes slide out of the holder over the course of my train ride.
To remedy these problems, I decided that my holder needed something that hooked it to the zipper inside my bag and a closure. Here are my old and new train pass holders side by side. Which do you think is better?
Easy choice, right? I was excited to finally make something out of scraps from a previous project. This fabric was left over from a yoga mat bag that I made last year. The design is pretty basic, but that didn't stop me from messing things up along the way. I guess that's what I get for not drafting and thinking through the entire design before I start cutting. Lesson learned!
Working with the vinyl was a little tricky in the beginning. It kept sticking to the bottom of the presser foot so I ended up sliding a scrap piece of cotton above the vinyl (making sure not to stitch it onto my pass holder, of course), which solved all of my problems.
Can you believe I couldn't find a swivel hook in Joann? I had to order this thing online! Thanks, guys. It works perfectly though, and I will no longer be startled awake thinking that my pass is sliding off the top of my bag. My train nap minutes are too precious to waste on paranoia.
Even though the button is slightly off-center, I can nap soundly knowing that my pass won't slide out the top. I got to use my automatic button hole foot and my button foot for this project! The button foot is amazing since it sews on the button for you. What a brilliant invention! Isn't this pass holder so much prettier than the plastic one? Hopefully it will make every morning happy when I take it out for the conductor to see!


0 comments:
Post a Comment
I love to receive your comments and try to respond to all via email.