
First up, Abby Glassenberg's Asleep Awake Doll! I loved these adorable dolls when I first saw the pattern but resisted purchasing it until I had an actual need, which happened to coincide with a sale. Bonus! I made one for my adorable niece's first birthday and, since I had originally wanted to make one for my daughter, I decided to make two at once. This pattern is so quick and easy! I could have made them both in one night had the Olympics not taken over my entire life before the birthday party. So this little dolly got gifted a little late. Thankfully the birthday girl nor my friend minded!
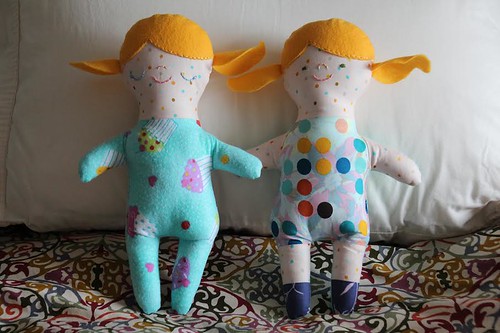
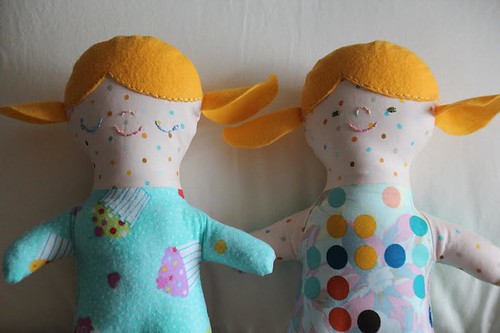
My second adjustment was to use embroidery floss to sew the hair pieces onto the head. The pattern calls for you to sew the hair pieces on with your machine, but honestly I forgot to pick up matching thread when I bought the felt and I didn't feel like going back out for such a tiny amount of thread. Since I have a crazy large embroidery floss stash, I easily found the perfect color and used that instead. I love the texture it adds! And aren't the pigtails adorable?
The best part about these dolls is that they're entirely made from scraps except for the felt and the flannel. I wanted these to be girly, and the only flannel I have in my stash are small pieces from my epic I Spy bag production or remnants from my nephew's explorer vest. Neither would work! I was able to cut both dolls from a fat quarter of flannel though, so the additional fabric wasn't a huge expense.
I will definitely be making a boy version for our little guy when arrives in November!
The embroidery floss IS a perfect addition! I would have gone for that, too, and will have that in the back of my mind because of you. Can't wait to see what else you've been working on. :)
ReplyDelete