Tuesday, May 10, 2011

My New Camera... For Real This Time

This past Saturday, after running a 5k in record time (28:50!), Nick and I went over to our local New York Camera & Video to check out the Canon Rebel T3i.  We had been there a few months ago to test out the Rebel T2i, but then, as I mentioned previously, the day before we were going to buy them we heard about the FujiFilm HS20 and decided to hold off until it came out.

Fast forward three months and a failed test drive of the HS20 later, we are each now proud owners of Canon Rebel T3is!  Instead of getting the Canon lens that came with the body as part of a kit, we bought Tamron 18-270mm lenses.  We thought this was the best option for us because it provided enough zoom without having to switch out lenses.  Eventually I’ll probably invest in a macro lens, but for now I think we’re good to go! 

Nick was able to haggle a bit with the owner of the store.  He became a master at haggling on our honeymoon in Guatemala, so he was comfortable with attempting to lower the price of the cameras a bit, especially since we were buying two.  They were a little hesitant to give us a break at first since they work closely with the manufacturers to give customers the best prices, but in the end, Nick got them to knock off $50 and got them to throw in guide classes to learn how to work the camera.  I think it’s a little nutty that guide classes aren’t included when you buy a camera there since you can buy a camera anywhere these days.  Guide classes are pretty standard when you buy sewing machines and sergers.  They were included when I purchased Pippi and Mr. Nilsson, and I bought them in different stores, so it's not like it was an anomaly.  Since a camera is equally as expensive and as complicated as a sewing machine (perhaps even more so), I think stores should get on board with this policy and offer guide classes for free.  They might even steal some business away from Amazon and B & H Photo if they did!

Happy with our purchases and haggling success, we raced home to test out our new toys.  We went out to the field behind our house and happily snapped away.  We mostly used the auto setting and were very pleased with the results!  While not the most interesting photography, here are a few of the shots that I took.  The detail is amazing.


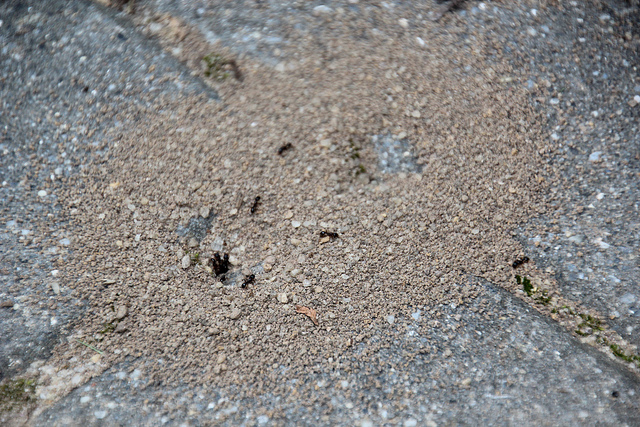
Check out the grains of dirt!

The owner suggested that we try out the cameras and write down any issues that we encounter along the way.  That way we have questions to bring with us to the class so can learn how we want to use the camera instead of them just giving us a general overview.

I was having trouble with macro view.  I couldn’t get the camera to focus even though I wasn’t zoomed in at all and had the camera in macro mode.  Any suggestions?

I also have trouble focusing the entire picture.  See how the trunk is out of focus on the peripheral? 


It’s a neat effect here, but I’d like to know how to control that effect since I’m going to want an entirely focused shot most of the time. 

I also want to learn about shutter speed and ISO and all of that.  I also don't want to have to use the flash, so learning all of the settings will help with that.  For some reason the flash is activated on every shot in auto mode regardless of the lighting.  Our little guy is adorable and the details of his fur and whiskers are crisp, but his eyes get a little nutty when the flash goes off. 


Perhaps I should dig out the book I used for a photography class in grad school.  It’s time to learn how this thing actually works instead of using auto all of the time!  I better do that soon so I'm comfortable with my camera in time for our Great Western Adventure! 

And because I feel the need to name all of the electronics that I work with on a daily basis, my camera needs a name.  Any suggestions?

Friday, May 6, 2011

On Second Thought...

Remember how I told you a couple of weeks ago that I was keeping the FujiFilm HS20?  Well, it’s going back after all.  I really tried to like this camera since it fit our price point and had most of the features that we wanted.  In the end, I decided to return it for two really good reasons: it consistently doesn’t take good pictures and it continually freezes.

I had issues with the HS20 from the start, but I thought it was mostly due to my not knowing how it worked.  I tried all of the settings in different light and I was never entirely happy with what turned out.  I was continually pleased with close shots that were in decent light.  Check out this great detail.


But last week while I was shooting for Pretty Things Thursday, it decided to start freezing.  I thought maybe I was running out of batteries (which was ridiculous in itself, but I was willing to deal with this camera being a battery-hog), so I switched them out for brand new ones, and then it froze again.  I thought maybe I was shooting too fast for the setting I was on, so I switched to the Manual setting.  And it froze again!

As if the freezing issues weren’t bad enough, I was never really satisfied with the quality of the photos.  The HS20 comes with a setting called EXR that is supposed to auto-fix whatever is lacking in your setting, most often the lighting.  I appreciated this setting while shooting in our dark house in the evening, but it took way too long for the camera to focus (sometimes up to 10 seconds).  Even worse, it over-corrected when the lighting was nice.  

Like this close up of our red sofa.  The texture is nice but the color is far from accurate.  Nor is our sofa even remotely shiny, as it looks in the top of the picture.


Or like when I was taking this picture in the awesome evening light.  Doesn't it look like the middle of the day?  This photo wasn't Photoshopped in any way.  Aside from being way too light, it looks completely washed out.  Yuck.


Switching to the other modes didn’t really help matters much.  After working with my Canon Powershot S3IS and its 6 megapixels, I expected to be wowed by the 16 megapixeled HS20.  Sadly, I saw very little difference.  Poor Nick spent 45 minutes one night trying to take pictures of the moon without ever being able to take a focused shot despite using many of the modes and manual.  His old point and shoot Nikon could take that shot the first time.  Very disappointing.

Life it too short to be constantly struggling with a camera.  I just can’t put up with a camera that freezes within the first month of having it.  The freezing put me over the edge and after coming up short with a reason for why it was freezing, and being less than thrilled about the picture quality, I decided that this guy needed to go back.  I will not put up with a camera freezing while I’m trying to take an awesome shot of a prairie dog on our Great Western Adventure (I’m really hoping to catch one in action!). 

So where does this leave us?  Tomorrow we will be heading over to New York Camera & Video to bargain down the price on two Canon Rebel T3is and two Tamron 18-270mm lenses.  We are ending up spending more than what we wanted to spend, but in the end we decided it was worth the extra money to not hate our cameras while getting the shots that we want.  In exchange for splurging on the cameras, we’re going light on each other’s birthday gifts this year (Nick’s is next week and mine is in July).  We understand that sometimes you have to spend a little more than you want to get the results you want, and this is definitely one of those times when we aren’t willing to compromise the results.  The T3i has gotten great reviews and I’m really excited about getting it and playing around with it before our trip to DC in a couple of weeks.

How do you feel about your camera?  What camera do you use and what do you use it for? 

Thursday, May 5, 2011

Pretty Things Thursday: Happy Cinco de Mayo from Chichén Itzá

Last May Nick and I traveled to Cancun, Mexico for the nuptials of our pals Linda and JJ.  We had the opportunity to take a bus trip to Chichén Itzá, one of the Wonders of the World.  When we were in Guatemala in November 2009, while climbing Volcan Pacaya we met a couple who was in the process of taking a two-year trip around the world.  They had just come from Mexico through Central America.  They told us that Chichén Itzá wasn't that great and that Tikal, which we were going to visit at the end of our trip, was a much better experience.  At the time we thought they were crazy.  How could a Wonder of the World be anything less than, well, a wonder? 

Now we understand.  The great thing about Tikal is that when it was excavated, most of the jungle around it was left undisturbed.  That is not the case for Chichén Itzá, where everything is mowed down for acres around the buildings.  There are millions of tourists and because of the lack of trees it was very hot and dusty.  Even worse, they let local merchants in, so each of the pathways is lined with people harassing you to buy their crap.  And I do mean crap: we didn't see one authentic or worthwhile item at any of the tables.

We don't regret going, because it made us appreciate our awesome experience in Tikal even more.  So why am I including this for Pretty Things Thursday if the experience was terrible?  Because El Castillo is amazing, no matter how bad the surrounding area is.


How incredible is it that the Mayans built these by hand?  The awesome thing about El Castillo is that during the Spring and Fall equinoxes, the sun hits the pyramid perfectly so the shadow looks like a serpent slithering down the side.  They did all of this without modern technology.  Insanity! 


Chichén Itzá is worth visiting if you happen to be in the Yucatan.  If you're looking for an awesome Mayan ruins adventure, I suggest going to Guatemala to visit Tikal or El Mirador, which they're still in the process of excavating.  I would love to go there one day!  Right now the only way to get there is to rent a helicopter or a week long hike or mule ride.  No thanks to both!

Wednesday, May 4, 2011

Planning My Habitat Quilt

Sadly, not much sewing has been happening around these parts because of the frenzied I Spy bag workshop that our house turned into last week and running in the Broad Street Run on Sunday.  I have been doing some planning though!

A few weeks ago, I was thinking about my Habitat quilt and that I still needed to select sashing, backing, and binding fabric for it.  The closest fabric shop to me is about a 25 minute drive, and even though they have a ton of fabric to select from, I never seem to find the time to go there.  I would love to open a fabric shop in Newtown Borough where people want to shop and discuss and be creative.  Isn’t State Street just asking for such a place?  Think Spool or the Urban Craft Center but in Bucks County.  Then I could walk or ride my bike to buy fabric.  How wonderful does that sound? 

Image Source

I would just buy all of my fabric from Spool, but they aren’t very convenient to get to by public transportation and since I take the train to work it’s not exactly easy to swing by after work or on lunch.

Anyway, this is all leading up to what you might have already guessed: I caved in and ordered myself a Robert Kaufman Kona Color Card from Pink Chalk Fabrics!


Isn’t it glorious?  A couple of Saturdays ago I surrounded myself with all of the Habitat fabrics and went through the color card to pick out sashing and binding fabric.  I did miss the opportunity to ask the clerk what she thought of my choices, but I consulted with Nick, so at least I have someone whose taste I trust to bounce ideas off of!  I decided on white for the sashing since the Habitat prints are a bit busy and I didn’t want the quilt to be super crazy.  The border will be berry. 

The backing fabric will be Drop Cloth Blue from Jay McCarroll's Habitat line.

Image Source


I’m very excited to finally cut into this awesome and colorful fabric!  What projects have you had in mind but just can’t seem to get started on?

Tuesday, May 3, 2011

Running the Broad Street Run

On Sunday, Nick and I headed down to Philadelphia to run the Broad Street Run.  My mom and sister were nice enough to drive us down to the starting line near Broad & Olney so we didn’t have to take the subway with the 30,000 people that were also running the race.  All of the parking is at the finish line at the Navy Yard, so SEPTA is kind enough to let all Broad Street runners ride the Broad Street Line to the starting line for free. 

Image source

This is our second year running the race and we had much better weather than last year, which was insanely hot and humid for the first Sunday in May.  The weather was pretty much perfect this year, although ideally I would have liked it 5-10 degrees cooler since it got kind of hot in the sun.  

Nick and I started running the Broad Street last year to raise money for Back on My Feet, an organization that empowers the homeless through running.  The organization started in Philly a few years ago and has expanded across the country.  We were able to raise $640 this year thanks to our awesome friends and family!

When I tell people that I love running the Broad Street, they look at me like I’m nuts (these are all non-running people, I might add).   Up until last year, I never considered myself a runner.  I played soccer and field hockey up until middle school and always managed to weasel my way out of the long distance runs into the park across the street from the school.  Last year while training for the Broad Street I realized that I actually did like running and could run for long distances if I actually tried and trained.  Most of my training occurs in the evening at Tyler Park across the street from our house.  Hearing the sound of my breathing and my feet hitting the pavement mixed with the sights and sounds of nature is incredibly relaxing.  A lot of the time I forget that I'm running and get into a sort of trance (while making sure to pay attention to my surroundings, of course).  It's very therapeutic and I always return happy and grateful that we have such ready access to nature.

But the Broad Street is a whole different animal.  The run starts in North Philly on Broad Street and you follow it down past City Hall before ending in South Philly at the Navy Yard. 


Nick and I signed up to be in the last corral, so we didn’t even start running until a half hour after the first corral started.  We got to get all pumped up at the starting line, where they were of course blasting the Rocky theme.  The Rocky theme popped up at various points along the route, which always energizes the crowd.  Imagine standing on a city street and seeing this in front of you.  It is literally a sea of people.  It's unlike anything I've ever seen.

Image source

I never get into a trance-like state during the Broad Street because of all of the city noise and the thousands of people, but all along the way are people cheering you on, which is what makes this race so great.  Ladies and gents who are all dressed up for church are all lined up on the sidewalks, guys playing drums, drumlines, marching bands, DJs, people cheering, people with funny signs (my favorite: Where R U Guys Going?), people with cow bells, and lots of people giving high fives to anyone who wants one.  It’s amazing.  And it really makes the 10 miles go by a lot faster.

Last year I remember struggling with every mile.  Maybe it was the heat and humidity, maybe it was entirely mental seeing Billy Penn so far away and knowing that he was only the halfway point.  But this year, I felt great until mile 7.  I had started to feel hungry around mile 3, so I was beginning to feel a little weak by mile 7.  And then the last two miles were pretty painful.  I kept telling myself that we had trained for this and that I was going to finish under 2 hours having run the whole way.  Last year we clocked in at 2 hours and 10 minutes, so I thought that 2 hours would be doable since the weather was working for us. 

I refused to allow myself to stop running and we finished in 1 hour and 55 minutes.  Success! Here Nick and I are steps before the Finish Line.  Nick is doing a goofy wave in the green shirt and I'm next to him in the blue shirt.  I was waving but had to stop to conserve the little energy I had left!


I think I’ll look into those protein snacks that I see people popping throughout the race.  We’re running a 5k on Saturday that my brother-in-law is organizing.  It is going to be delightfully easy!

Our ultimate Frisbee league starts up in a few weeks, so today Nick and I switch from training for an evenly paced long distance run to training for near constant running with long periods of sprinting.  I'm admittedly better at sprinting than long distance running, so I don't expect it to be a hard transition.  I look forward to running around on freshly cut grass in a few weeks!

Friday, April 29, 2011

I Spy Bag Tutorial

Remember last week when I had piles of flannel all over my sewing table?  I was pre-making I Spy bags for an activity for my workplace's Take Your Child to Work Day.


The kids spend the morning attending activity sessions held by different departments, attend a group activity, eat lunch, play games, and than spend about 2 hours at their parents' desks.  It makes for a much better day then making the poor kids follow their parents around at their desk jobs all day.  Bore-fest.

My workplace has a partnership with St. Christopher's Hospital for Children, so this year's group activity was to decorate cards for the kids in the hospital.  For my department's activity, we decided to have the kids make games for the kids at St. Chris.  Then my boss and I came across the I Spy bags and the next thing I knew I was planning out how to make them.  And planning to pre-make 100 of them so the kids could make one for themselves as well.  It took me about 3 days to make them, by the way.  I would imagine that it would take no longer than an hour if you were only going to make one.

Since I was making 100 bags, I kept them on the smaller side.  This is the template that I used.  It should be printed on legal paper.

You will need a 12" x 7" piece of fabric (I used flannel but next time I'll use something without stretch since the vinyl windows got a little wonky when I sewed them on), a 4" x 4" piece of vinyl, various treasures, and about a cup of rice (you can use plastic pellets but I thought rice was the safer choice in case any accidentally leaked out).  If you plan on attaching a card with the items to spy for, you'll also need a piece of ribbon at least 2.5" long and a keyring.  The finished bag will be roughly 6" x 6" with a 3" x 3" window.  I ordered most of our treasures from Oriental Trading: wooden fish, buttons, apples, sports ball beads, foam leaves, hearts, lucky coins, and googley eyes.  I also included paperclips and pennies.

After cutting out the rectangle of fabric, I cut out the square for the window.  What should I do with all of those squares?


Then, I cut all of the corners diagonally about 1/4", folded up the flaps, and pressed.


I placed the vinyl window over the square and pinned in place.  I pinned the vinyl on the bottom of the fabric even though I sewed with the bottom side down.  It was a bit tricky getting the pins out while I sewed, but I found that this was the fastest way to line the vinyl up with the window and the best way to keep the vinyl straight while sewing.  I also put masking tape over the throat plate on my machine so the vinyl didn't stick to it.


I used a double needle (my first time!) to make sure that the window was securely on there.  I didn't want to risk any treasures falling out!


Sewing the window in is the hardest part, so if you make it that far it's all down hill from there.  I folded the rectangle in half with right sides together.  Next, I threaded the keyring into the piece of ribbon, folded the ribbon in half, and lined the rough edges up with the edge of the fabric in between the layers.


I then stitched around the three open sides using a 1/2" seam allowance, making sure to keep a 3" opening so I could flip the bag right side out.  Next I trimmed the corners and then turned the bag right side out and pressed the edges flat.


At this point, I stitched 1/4" around the edges of the bag leaving the 3" opening so the kids could pour the treasures and rice into the bag.  You could do the same, or save this step until after you add the treasures and rice, but I think it might be a little difficult to keep the rice out of the way while stitching.

Here are the stacks of bags waiting for the kids to fill them with treasures and rice!


The kids loved making the bags and loved playing with them afterwards.  It was a success!  Aside from having the kids find the treasures that are hidden in the rice, you could have them look for specific colored items or even have them tell you a story about one of the items.  It's a very versatile toy and travels well!


Will you be making an I Spy bag for the kid in your life?

Thursday, April 28, 2011

Pretty Things Thursday: Bird Bath

This little guy sits on the patio outside of my parent's family room.  Their lucky little cat Leo gets to watch the birds all day long!  We've been promising poor Flick a bird feeder for awhile now.  Maybe this is his year!


It's a bird feeder that also acts as a bird bath when it rains.  How versatile!  Look at these neato seeds.


It has these nice flower details along the sides of the trough.


I love how it's gradually rusting over time and leaving marks on the cement.  


Now if only we can find a similar bird feeder so Flick can enjoy his birdie friends coming to our slider every day.