Showing posts with label Quilting. Show all posts

Friday, January 26, 2018

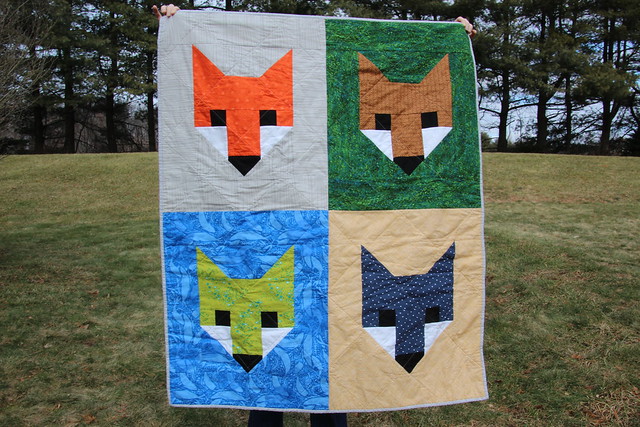
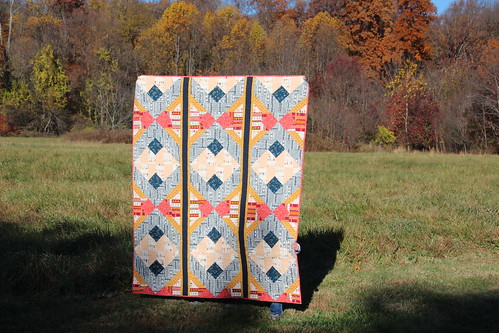
Fancy Fox II Baby Quilt

After a Thanksgiving-to-Christmas-filled sewing frenzy to finish craft show merchandise, a late housewarming gift, four lap-size charity quilts, and a table runner for my quilt guild gift exchange, I was looking forward to an easy make with the Fancy Fox II quilt by Elizabeth Hartman. This top comes together SO FAST! I cut all of the fabric one night and sewed it up in about two hours the next. Easy peasy.

IMG_3978

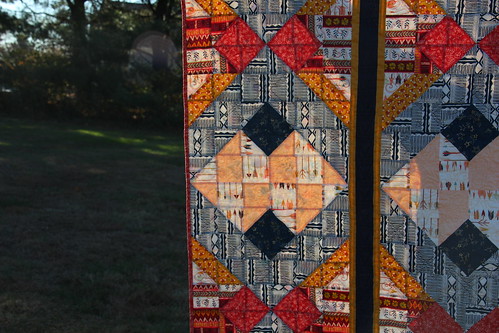
I've been in a self-induced stash busting mindset for the past few projects, and even though I didn't purchase any new fabric, I am really happy with the combinations I discovered after digging through my bins for a half hour. This pattern was a slight challenge to find fabric in my stash, as the background fabric calls for 1/2 yard each, whereas my stash is mostly leftover fabric from other projects and tons upon tons of fat quarters that I got for free through my guild last year. (Seriously, we got TONS: one of my guild mates estimated that we each got 40 yards of fat quarters. Then at our next two meetings we also were gifted yardagewhere I walked away with an entire bolt of cat fabric. I am flush with fabric!)

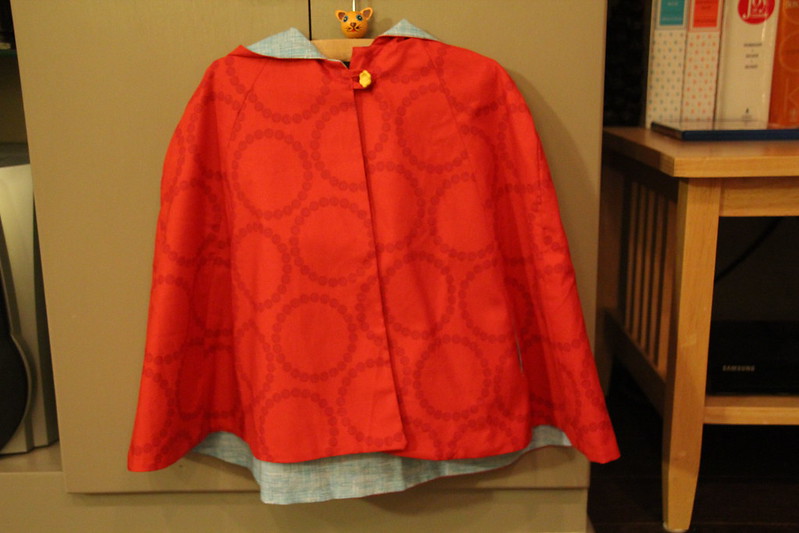
The nursery is a woodland theme, which might lead you to question my use of the Lizzy House whale print, but I liked the color combination and it was the only fabric I had enough of in that color. I used this same print on the backside of a cape I made for my daughter last year, and upon seeing the quilt, she was very concerned that I cannibalized said cape to make the quilt. It was very cute. I explained that mommy has all sorts of fabric, and a ton of that whale print for unknown reasons. It served as a good illustration for why mommy has commandeered her entire closet with sewing supplies.

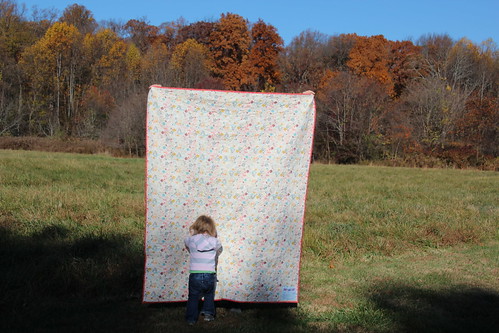
For the back, I used a light blue broadcloth that I think I initially purchased to make some mod mosaic floor pillows. After what has probably been 8 years, I was comfortable with finally throwing in the towel. At least I was keeping it in the family and using it for another Elizabeth Hartman project.

Wednesday, January 25, 2017

Mini Heart Quilts: Variations on a Theme

Although made a few months apart, it seems like I've had hearts on the mind lately when it comes to mini quilts. And all before Valentine's Day even!

To celebrate my quilt guild's 5th anniversary, we were challenged to make quilts with the theme of "Five." I went through a couple of ideas before I settled on creating an homage to Big, which was released in 1989, the year I turned 5 years old. Is there a more iconic scene in the movie than the "Heart and Soul" keyboard scene?

I'm really into the reuse/repurpose and only-buy-what-you-need mentality lately (watching Minimalism on Netflix (and also probably having a second kid) only added fuel to the fire). I had just gone to the Salvation Army during their weekly 50% off sale so I had a large selection of thrifted clothes to chop up for my material. I got a strange satisfaction from breaking down all of the clothes into usable fabric.


I now have a stockpile of thrifted materials (and buttons!) that I have big plans foryou haven't seen the last of them yet.

Since I was at the height of baby brain when I made this and couldn't imagine thinking through how to measure all of the pieces on my own, I found a simple keyboard quilt pattern. It was very quick and easy to sew together, just the sort of project I could handle when 36 weeks pregnant.

I used this quilt as a personal challenge to step outside of my quilting comfort zone (straight line quilting) and finally try some freemotion quilting on an actual project instead of just test squares. I'm pleased with the result even if it's relatively simple quilting. Baby steps.

Piano Keys Mini Quilt

I wish I would have gotten a close-up picture of the bottom left of the keyboard where I quilted in "Zoltar Speaks" (the name of the arcade game that grants Tom Hanks' wish). You can kind of see the writing in the bottom right corner on the back below. I didn't trust myself to freemotion handwriting, so I wrote out the words using a water soluble marker and then traced over it. It turned out much better than I was expecting!

Piano Keys Mini Quilt Back

Speaking of freemotion quilting, I had gotten a Sew Steady table to make quilting on my domestic machine a little more bearable and was disappointed when I found this quilt almost sticking to the plastic table surface (I tried with cotton too so it wasn't due to the synthetic material). After some internet troubleshooting, I found a tip to buff the table with Turtle Wax. I can excitedly proclaim this to be a fantastic solution! I have a hunch that since Sew Steady now sells their own polishing kit, they don't buff the tables to be as smooth in the factory, but maybe that's just the way my conspiracy theory mind works. Just apply a very thin coat of original Turtle Wax on the entire table, let dry, and wipe clean with a microfiber towel. After repeating three times as suggested, my Sew Steady table is now slick as can be! I don't even need the Supreme Slider anymore, the quilt glides that nicely over the newly buffed table.

I love these little challenges from my quilt guild because it's a fun prompt to create something I might not have thought of on my own. Plus it's a great way to make just-because gifts for the people you love. This little beauty is now hanging in my music-teacher-sister's classroom. Check out our guild blog to see all of the "Five" themed quilts. I love that everyone approached it differently.

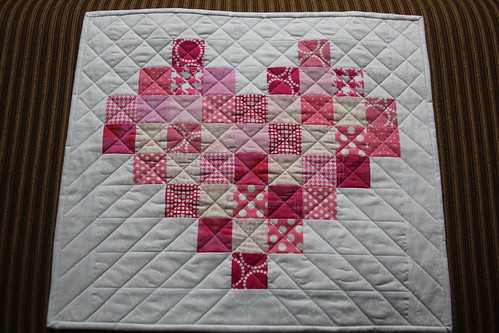
Each member of my guild was recently given a bag stuffed with fat quarters. It was a huge haul, and free! I decided to use some of the pink prints to make a mini quilt to send to a friend's quilty mom who has been in the hospital (pink is her favorite color).

I used the Scrappy Heart tutorial from the Hopeful Homemaker. It was super quick and easy to sew (and again, probably something I could have figured out on my own if my brain wasn't so zapped). It seriously took longer to "randomly" arrange the prints than it took to sew together. And even after spending all of that time flipping and switching the prints, I still managed to have a diagonal line of light colored prints down the left side of the heart. Of course I didn't notice until it was all sewn together. Gah! Since it doesn't look quite as glaring in person as it does in a photo, I decided to keep it as is. Otherwise I'm happy with the scrappy look.

Even though I went with my old standby straight lines for the quilting, I really like how I mixed it up and only quilted the crosshatch on the heart and above. Yes, this is mixing it up for me! I think it adds a nice movement and visual interest.

Scrappy Heart Mini Quilt

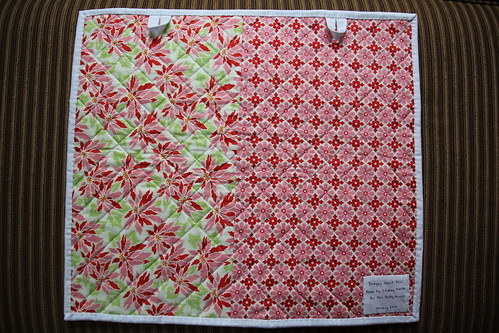
This was the first time I sewed hanging loops onto the back of a quilt. I included two Command hooks in the package so they could easily hang it up in her hospital room. 

Scrappy Heart Mini Quilt Back

I also added a label, which I've only ever done once before on a quilt (besides the Quilt of Valorthe label was mandatory). For some reason I envisioned making and attaching a label to be a super long and annoying process, but I was pleasantly surprised to find that it took only 15 minutes from start to finish. Now I love the idea of labeling all of my quilts!

Just in time for this epiphany, Quilt Alliance is currently hosting a Labeling pledge (thanks for the heads up, Jess!). If you take the pledge you are entered into a drawing to win custom quilt labels! But isn't the idea that the details behind your quilt won't be lost in the void of time more of an incentive?

Monday, January 23, 2017

Follow the Stars Quilt of Valor

Last March I learned about the Quilt of Valor Foundation while listening to the now defunct Quilt Your Heart Out podcast hosted by Mary and Marianne Fons. From what I understand, Marianne has been involved with the foundation for quite some time. The foundation's mission is to award quilts to service members and veterans touched by war. I thought getting involved would be a good opportunity to show my appreciation for the sacrifice that our service members and their families make for our country. Plus, I noticed that most of the quilts being awarded were very traditional in style and there might be younger veterans who would be interested in receiving a more modern style quilt.

Follow the Stars Quilt

Joining the organization is pretty easy and soon after I was contacted by my state coordinator with my first assignment. After some searching, I decided on the Follow the Stars kit by Maureen Cracknell from Hawthorne Threads. The color palette is patriotic without being overly traditional and the pattern reminded me of the floor in a fancy building (in a good way, of course). I didn't realize that I would have to make roughly 5,000 half square triangles to construct the quilt top, so it was a little slow going for me. It is pretty magical how arranging all of those squares just so results in a big and bold geometric design.

Follow the Stars Quilt Back 

Once I finished piecing the top and the back, I sent both to a volunteer long arm quilter who was super quick to return a beautifully quilted sandwich back. Then all I had to do was attach the binding and the label.

Follow the Stars Quilt 

What better way to show our appreciation and wrap our service members and veterans in a warm virtual hug than through quilts?

Wednesday, September 21, 2016

Crayon Challenge Mini Quilt

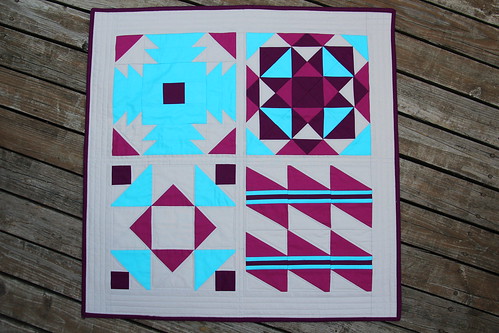
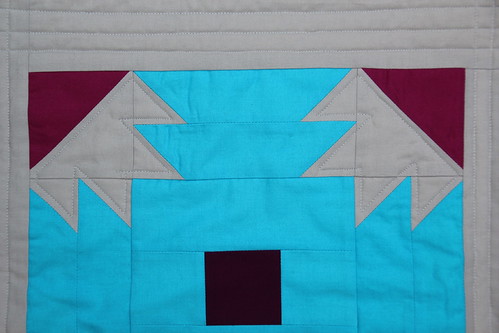
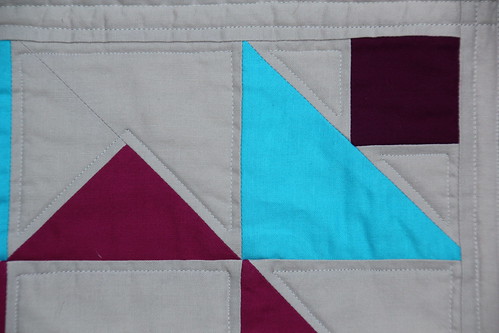
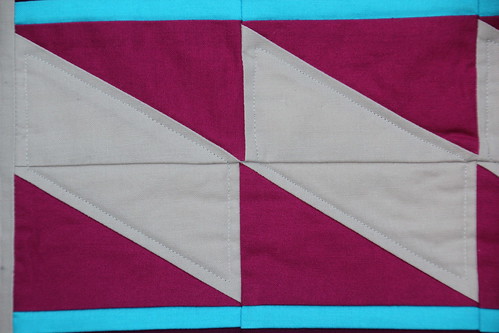
The upside to having pneumonia is the copious amount of couch time that accompanies the exhaustion. Before I got sick I was on track to finish the mini quilt that I made for my quilt guild's Crayon Challenge that started in June. We blindly chose three crayons and were tasked with making a quilt using only those colors and a neutral if we wanted. I'm glad I didn't push to finish before our September meeting since I was in the hospital instead of ogling my guild mates' beautiful quilts!

At first I was a little concerned with only using four colors but then I remembered the Summer Sampler blocks that I've been receiving every Monday for the past few months. Have I mentioned my love for classic quilt blocks? Perfect for only using four colors!

I admit that I totally lucked out with my colors. I probably wouldn't have put this quilt together on my own, but I love how it turned out and the colors are totally fun and go perfectly together. I used Kona solids Ash, Berry, Cerise, Peacock to make the Parallel, Deck of Cards, Summer Slice, Corner Canyon blocks.

IMG_1224

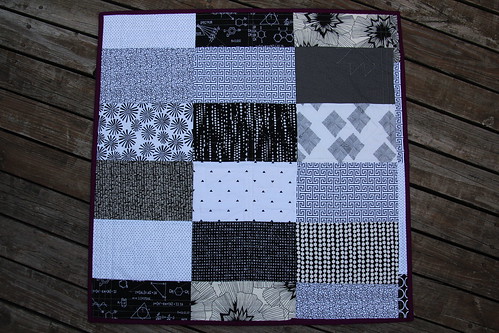
For the back I used some of the prints that I got in a black and white fabric swap at our last guild meeting. How much fun is this guild?! I'm so glad I found them last year.

IMG_1225

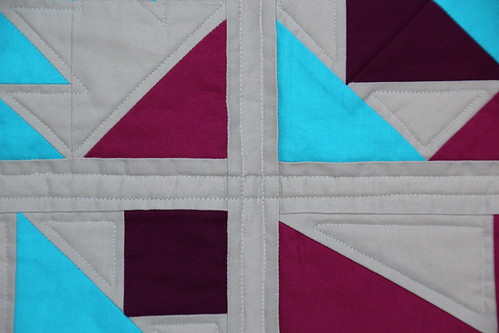
I've stuck to straight line quilting on all of the quilts I've made so far, either diagonal, stitch in the ditch, or a grid across the entire quilt. I really wanted to go outside of my comfort zone for the quilting on this one, especially since I finished piecing it in July and theoretically had plenty of time to figure out my quilting plan. But of course I procrastinated and chickened out and ended up sticking with more straight line quilting. HOWEVER, I got a little adventurous and instead of straight line quilting across the entire mini, I highlighted the gray sections of the quilt blocks. Even though I wimped out, I love the effect that the quilting added.

IMG_1243

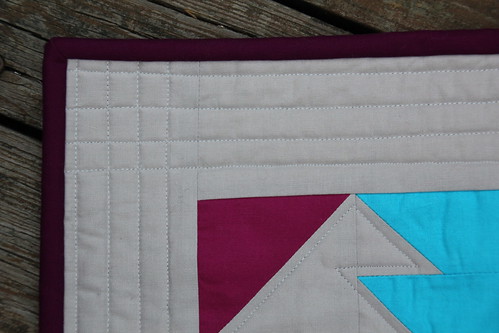
And then I straight line quilted in the sashing and the borders. I couldn't resist! Plus I love the grids that the quilting created in the corners and in the middle of the quilt.

IMG_1231

Here are some more detail shots because I couldn't resist.

IMG_1232

IMG_1237

And this is where my couch time came in handy. So many threads to bury!

IMG_1239

Check out the quilts that my guild mates made for the challenge. There is such a wide range of quilts, I wish I could have seen them in person!

Monday, September 12, 2016

Paper Pieced Cassette Tape Mug Rug

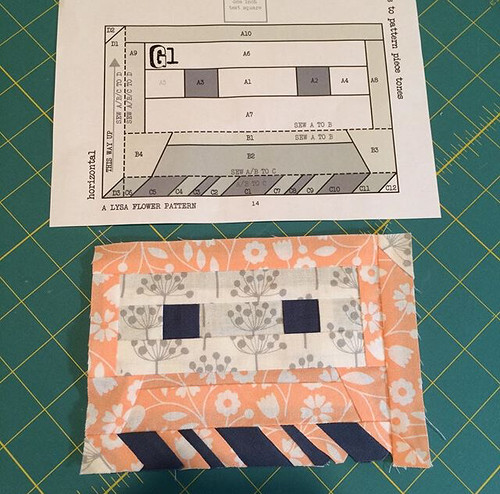
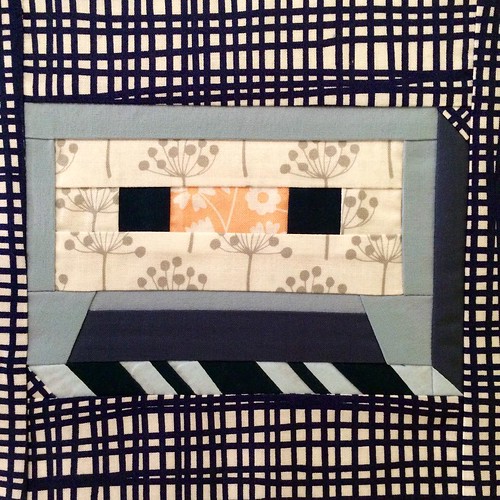
For our June meeting, my quilt guild hosted a paper pieced mug rug swap. I had done very little paper piecing up until that point so I took this as a challenge and dove right in. I found Lysa Flower's Cassette Tape pattern and it looked kinda hard, but I decided to go for it since a small mug rug wasn't a huge commitment. If it didn't work out, I could always make something less complicated.

My first attempt went pretty well, but I didn't cut the bottom pieces of the cassette large enough so there were a few gaps along the bottom edge. I learned very quickly that I need to test the seam before I sew it to make sure that the piece is going to flip the correct way after pressing. Unpicking those tiny stitches is really not fun. This post by Lee Heinrich on the Bernina We All Sew blog was extremely helpful.

Paper pieced cassette tape, take 1

The second time around I cut very generous pieces for the entire pattern and I think it turned out really well! The only thing I'd change next time is to not add this wonky crosshatch border around it, because even though my seams are pretty straight, the bottom edge gives the illusion that it's very wonky. I used Lotta Jansdotter and Elizabeth Olwen scraps for the finished mug rug, along with some blue solids.

Paper pieced cassette tape, take 2

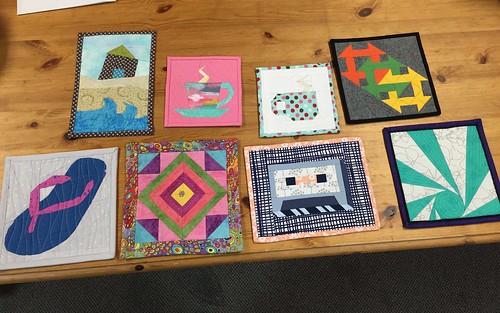
Here are all of the awesome mug rugs from the swap. I came away with the adorable pink steaming tea cup second from the left in the top row, made by our president, Neva!

09
Photo credit: Maggie from CJMQG

Friday, September 9, 2016

Pillow Covers for Grandmom

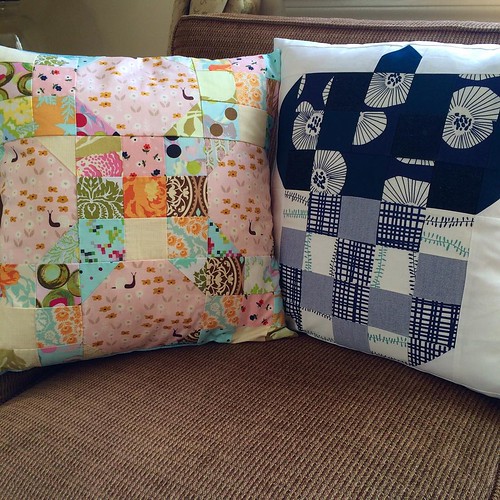
Earlier this year, my grandmother moved from an apartment to assisted living. Her new room was pretty drab, so I whipped up these pillow covers to brighten up her space. They are both made from Canoe Ridge Creations Fresh Mini Quilt Club patterns (Acorn pattern is from September 2015 and Farm Fresh is from January 2016) and both are made entirely from scraps! I love scrap buster projects: not only are they economical, but they cut down on the piles of scraps that fall over every time I go digging through my stash. It's a win-win.

Pillow covers

In retrospect, I made the Farm Fresh cover a little too unbalanced colorwise, but I was determined to use scraps and get these out the door quickly to my grandmother. At the very least, it is bright and cheerful and it makes me smile even if it is a little nutty. They have a simple envelope style back so the covers can be washed. I also labeled the back just in case her fellow assisted living mates think of getting sticky fingers! Just kidding... mostly.

If you're not familiar with the Fresh Mini Quilt Club, it's a club where Megan sends you a new mini quilt pattern every month. They're quick and easy, all measuring between 16" and 24", so even if you aren't using scraps, they aren't a big investment to make. The last round just ended, but be on the lookout for the next round starting in the next couple of months! Megan's IG is wonderful and she's always posting beautiful pictures of rural Iowa where she lives with her husband. It makes me want to travel out west again really bad!

Friday, February 19, 2016

Elizabeth Hartman Sewing Circle Tote

You guys, it's finished! And only over a month late for my mom's birthday!

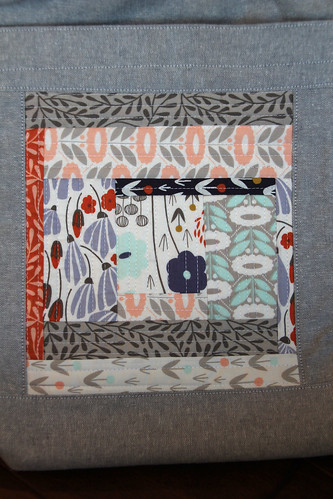
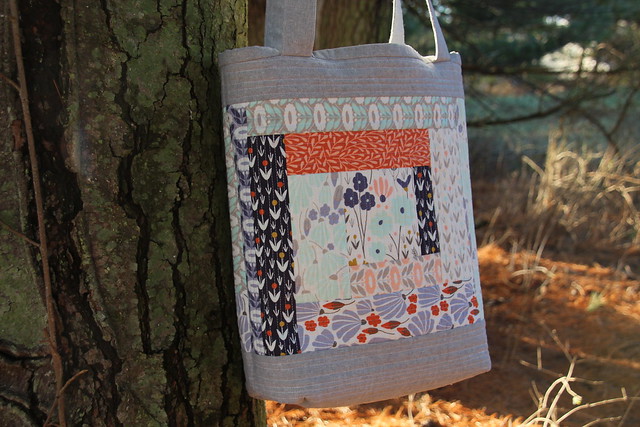
Sewing Circle Tote Front

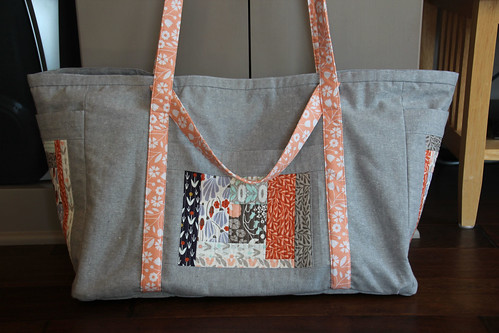
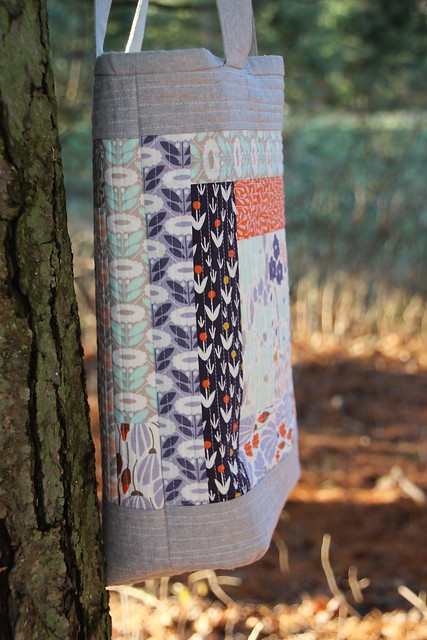
As I mentioned on Instagram, I'm in the middle of preparing for my first craft fair in March, but I sneaked in little bits of time here and there over the last month to make my mom an Elizabeth Hartman Sewing Circle tote for her birthday (sorry, the pattern is out of print). I used the same Elizabeth Olwen and essex linen fabrics that I used for the Perfect Tote and it came out beautifully! I love love love it.

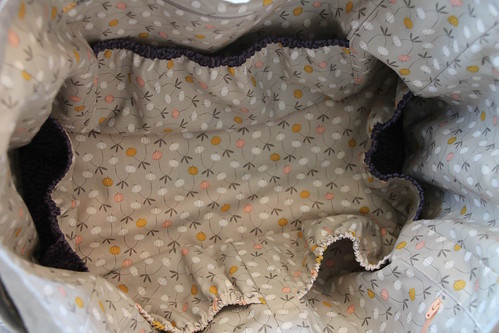
Sewing Circle Tote Inside 

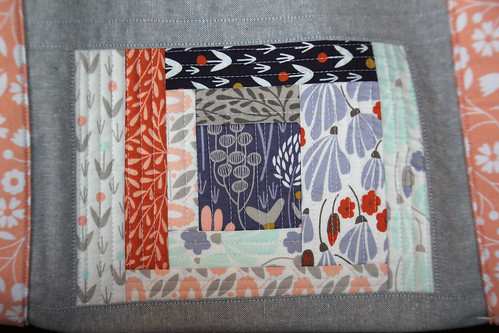
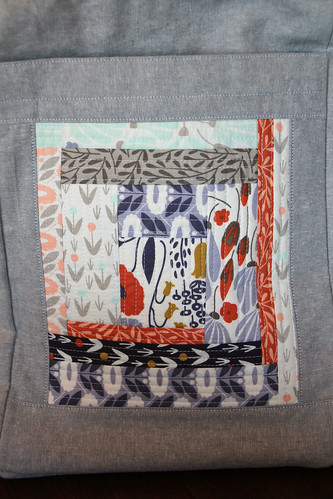
I still love the quilt-as-you-go process.

Sewing Circle Tote Side B

Sewing Circle Tote Back

Sewing Circle Tote Side A 

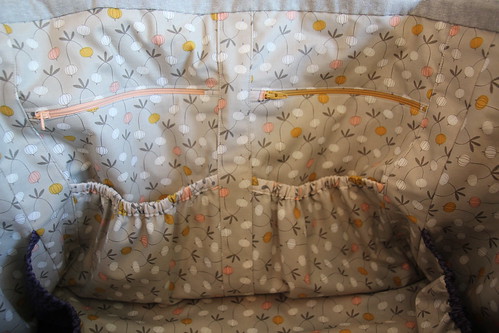
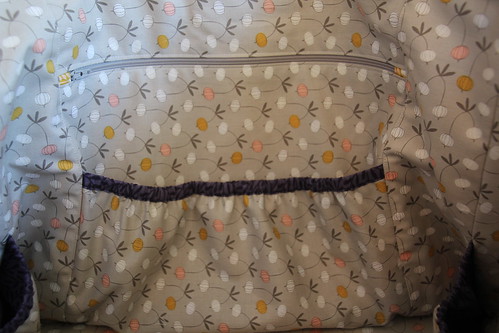
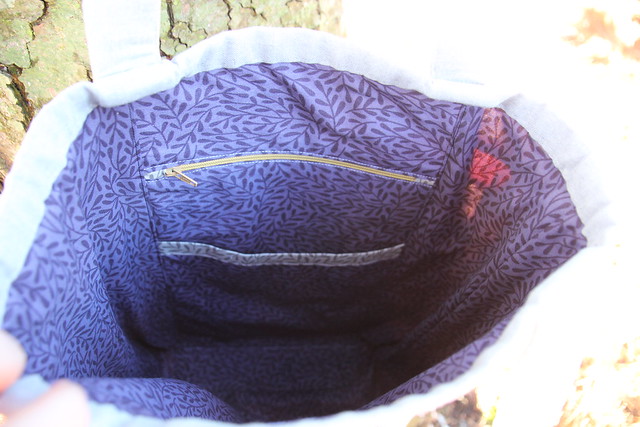
And I love all of the pockets on this thing. There are four on the outside and then the inside is packed with pockets: two small zipper pockets with elastic pockets underneath, one large zipper pocket with an elastic pocket underneath, and two elastic pockets on the sides. That's twelve pockets! TWELVE!

Sewing Circle Tote Small Zip Pockets

Sewing Circle Tote Large Zip Pocket 

What I didn't love was cutting out roughly 5 million pattern pieces. Or maybe it felt like 5 million because I was cutting out an identical one for myself at the same time? Mine will have to wait until after March 6, but watch out, we'll be sporting mommy-and-me matching Sewing Circle totes when it's finished! I'm going to leave the smaller handles off of mine so we can tell the difference.

I was initially a little disappointed with how floppy the tote ended up, but then I realized if I added any sturdier material the tote would have been heavier and then really heavy once it's stuffed full of sewing supplies. It is the perfect size to cram in all sorts of rulers, cutting mats, an iron, fabric, and pretty much anything else you would need to bring with you to a class or a sewing date. My mom immediately started filling it up with all of her quilting class goodies to see how everything would fit. There is PLENTY of room. There's even enough room to bring along your laptop and embroidery module if you have a fancy machine like that (my mom does, I don't).

I didn't get the nice detailed pictures that I would have liked because I admittedly forgot to take pictures until we were walking out the door to go to my parents' house. I'll take lots of pics when I finish my own!

Wednesday, January 13, 2016

Elizabeth Hartman Perfect Quilted Tote

Last fall I joined the Central Jersey Modern Quilt Guild after spending the day with them at Lizzy House’s Meadow Quilt workshop. No, I don't live in Jersey, but the drive to them is much closer than the Philly guild. They are so much fun and it’s exciting to have found a group of people who love sewing and quilting. Each year they host a Secret Quilter gift swap around Christmas. It’s completely optional and those who want to participate fill out a questionnaire that overviews preferences for style, color, and item (something small like a mini quilt, tote, potholder, pincushion, etc.), as well as social media handles so the partner can dig around and figure out what to make. It’s like investigative sewing!

My partner loves pretty much all Cloud9 fabrics, so I finally had the chance to pick up some of Elizabeth Olwen’s Morning Song. My initial plan was to make a tote bag out of quilt blocks, but I got behind on my other Christmas sewing and decided to make Elizabeth Hartman’s Perfect Quilted Tote instead (sadly it's no longer available for purchase). I am so glad I changed my plan!

Elizabeth Hartman Perfect Quilted Tote 

The tote features quilt-as-you-go sides. Ooooh you guys, quilt-as-you-go is SO MUCH FUN. And easy. And satisfying, because when you’re finished building the panel, you are finished quilting it too! (Duh.) The exterior pieces are quilted onto cotton duck, which makes the bag so sturdy that it stands up by itself without anything in it. I need to make myself one of these!

Elizabeth Hartman Perfect Quilted Tote 

The inside is so roomy and has a zippered pocket and a deep open pocket. I love the contrast of the purple lining to the cooler tones on the outside of the tote. (Forgive this picture. It rained all but a half hour on the one day that I had a chance to take pictures in daylight.)

Elizabeth Hartman Perfect Quilted Tote

I was off the week of Christmas and by some miracle my daughter was taking 4-hour naps each day (and still sleeping 12 hours at night—she is a champion sleeper, don’t hate me), so I was able to bust this out in a few days and finished mere seconds before the new episode of Sherlock premiered on New Year’s Day. Hurrah to my first finish of 2016 on the first day of the year!

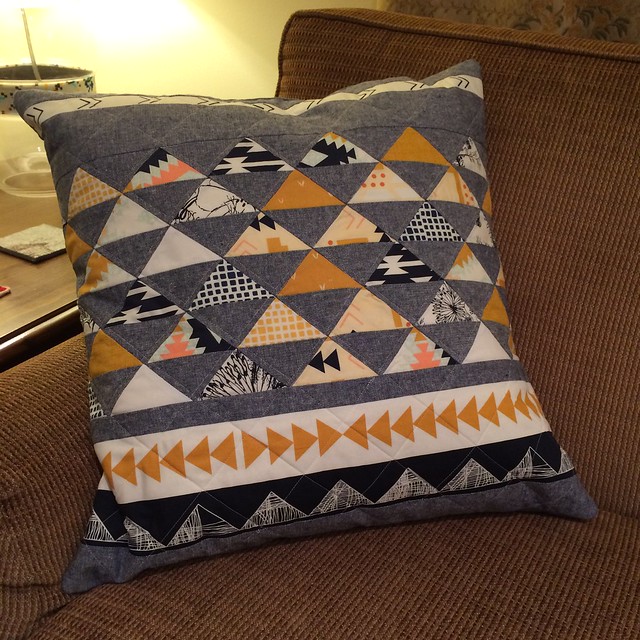
It was so hard to part with this beauty but I quickly got over it when I received this beautiful quilted pillow from my partner. She used April Rhodes fabrics as a tribute to my April Rhodes Adventure Swap banner and it turned out perfectly! This was my favorite gift out of the whole bunch and it’s mine, all mine! And it matches my couch perfectly. And it’s beautiful. Did I mention that? Now I want to fill up the couch with April Rhodes/Essex linen pillows!

Secret Quilter Gift

Monday, December 28, 2015

The Year I Made 105 Handmade Christmas Gifts

I know that title seems insane, but I actually did make 105 handmade gifts for Christmas this year! OK, some of them were batch gifts, but when divided, they came out to 105 items. Am I nuts? Perhaps, but there is a reason to my madness. My husband’s family decided to forego a Pollyanna for the adults and just get something small for everyone’s stocking. The kids, of course, can receive gifts from everyone, but since it’s been getting harder and harder to find gifts for the adults, we all welcomed this change. I also knew that we’d have a few extra guests this year with my brother in law’s family joining us from Honduras, so I wanted to make our stocking gifts extra special. This simple idea turned into my most prolific handmade Christmas to date. Or probably ever. Maybe.

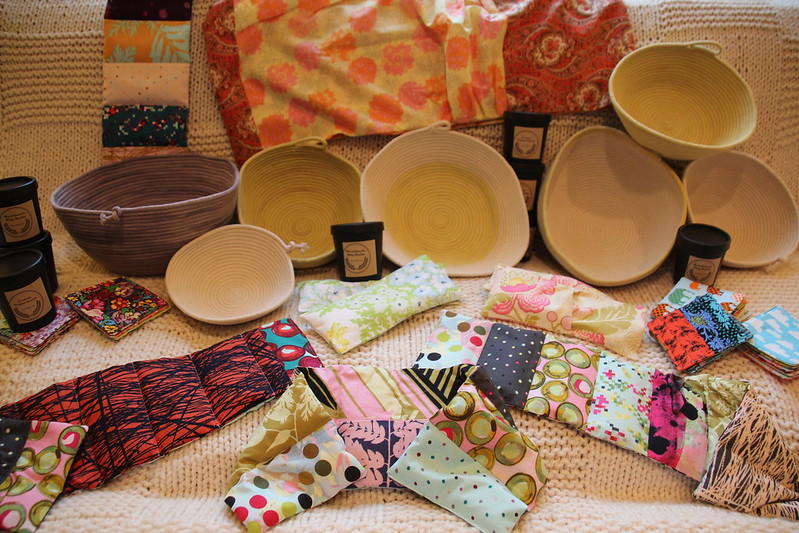
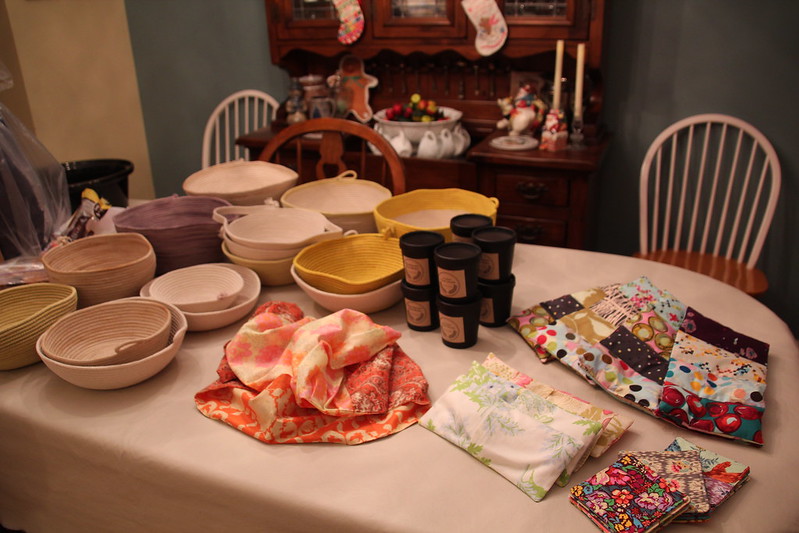
My initial plan for the stockings was to make about 12 different gifts, have the adults draw numbers, and then select their gift in that order. Then I decided to expand the stocking gifts to my family too. Then I had so much fun making the gifts that I decided to expand the game: the adults get to select one gift from each of three categories of gifts. The categories are: rope bowls, concoctions, and comfort. Here we go, but forgive my pictures. I was managed to get everything done on time but I didn’t have time to get good pictures of everything. Forgive my late-night, bad lighting photos!

2090

Rope Bowls
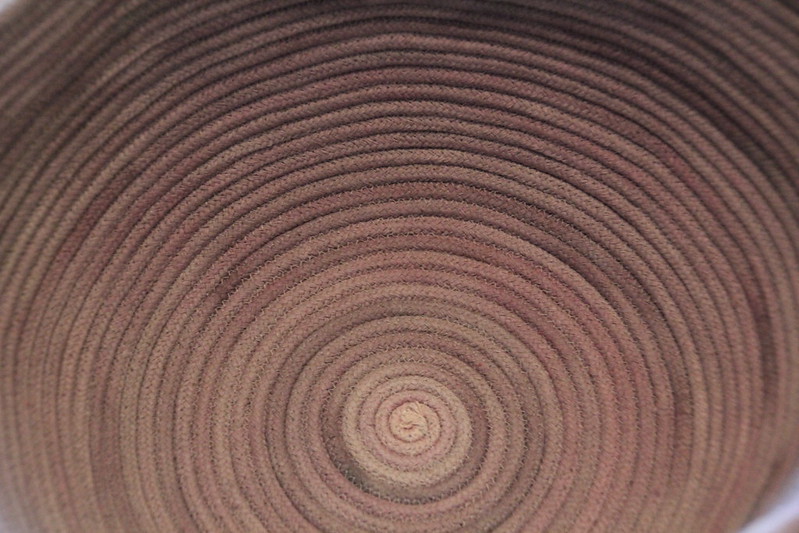
I’ve been seeing these pop up all over Instagram for the past year and finally decided to get over my fear and try it already. They are SO MUCH FUN. I used the Rope Baskets article by Maya Donenfeld in the FOLK issue of Taproot and Amanda Soule’s rope basket post on Soule Mama as references. But honestly, making them is really a practice of trial and error. The width/length of the zig zag stitch, the size of the base, the angle that you hold the base while sewing the sides, and the color thread that you use make the bowl completely unique every time. It’s exciting to see how tiny variations make such different bowls. I’ve never used a pottery wheel, but I imagine the process of seeing the bowl take shape as you sew is very similarly gratifying to seeing clay take shape on a wheel. And the entire process is so mindless you could use this as a nice buffer between intense sewing projects or just when you need a mental break.

2109

I added an extra element of adventure by dyeing the rope with natural ingredients. My first attempt was a mish mosh of things that I found in the kitchen. I started with a small amount of frozen blueberries. When that didn’t really do much, I added dried peppers, chili powder, and cayenne pepper, but the rope still didn’t change colors that much. Then I turned to curry and that whole combination resulted in a yellowish green, almost citron color. For the second batch I returned to blueberries but used a whole frozen package, which worked great! The last two batches were made with turmeric and about two weeks’ worth of used coffee grinds. I felt like a mad scientist playing with all of the elements! And the one positive to the unseasonably warm weather we’ve been having is that I was able to hose down the coffee-dyed rope outside without freezing. I like the blueberry and turmeric dyes the best.
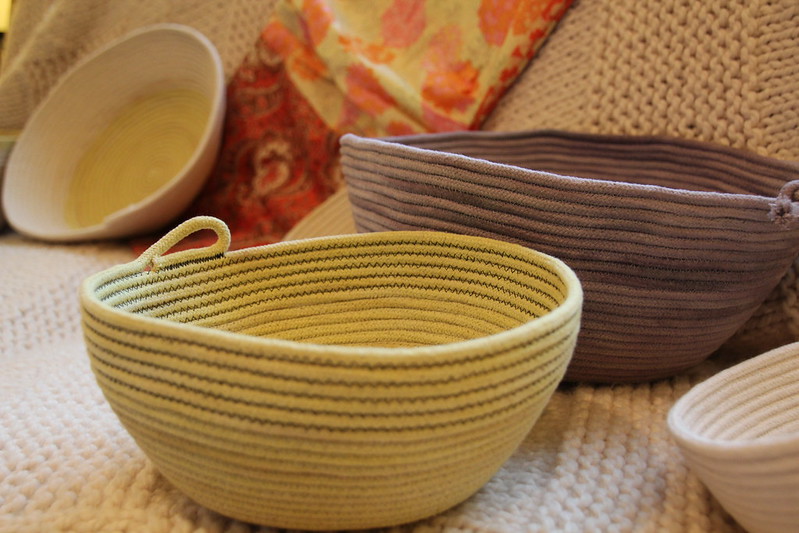
2072

I’m toying with the idea of selling these at local craft fairs because I can’t get enough of the dyeing and making them. I used a cotton/poly clothesline that I found online for the Christmas gifts, but afterward I decided to go all-natural and I found 100% cotton rope from a company based in Ohio. I’m sure you’ll hear more about this in the coming months.

Concoctions
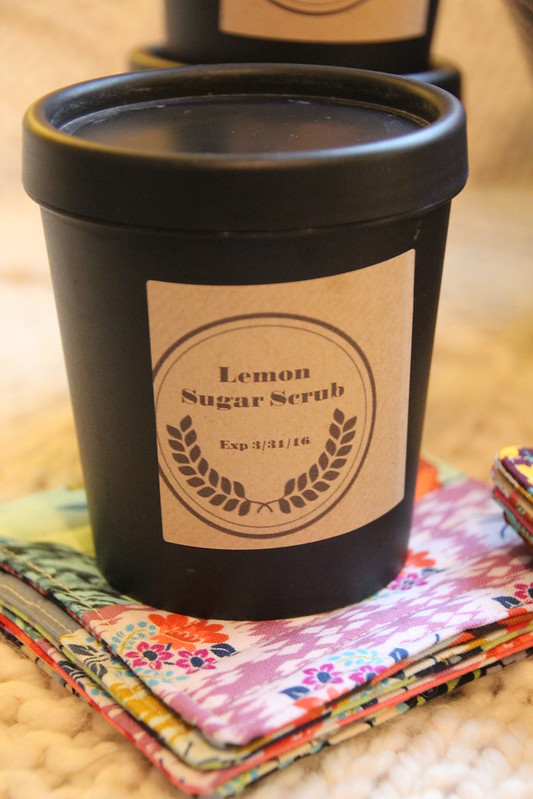
I’ve been making homemade cleaning supplies for a few years now and since I started I’ve been meaning to try out more handmade pampering products. Making them for others is the perfect time to try it! It wouldn’t be Christmas in our house unless I was burning something on the stove/oven. Usually it’s butter dripping from my cheesecake pans—this time it was mullein leaves and olive oil. I have no idea what happened, but the end result was me sequestering the burning pot in the backyard and scrapping the homemade vapor rub. I ended up making lemon/grapefruit/orange sugar scrub and bug balm. They both smell so yummy! I used Amy Karol’s recipes for both. She has a great homemade apothecary class on Creativebug, btw. I’m also making myself a batch of vapor rub, but making the mullein oil the slow way by steeping mullein leaves in olive oil for two weeks. We’ll see how it turns out!

2095


Comfort
Infinity scarf: Earlier this year I won an infinity scarf kit and the fabric wasn’t my style, so I decided to make the scarf and offer it up as stocking stuffer. The pattern is free from Free Spirit. It came out cute, but the pleats were kinda a pain and the whole project took way too long for the end result. I doubt I’d make this again.

2097

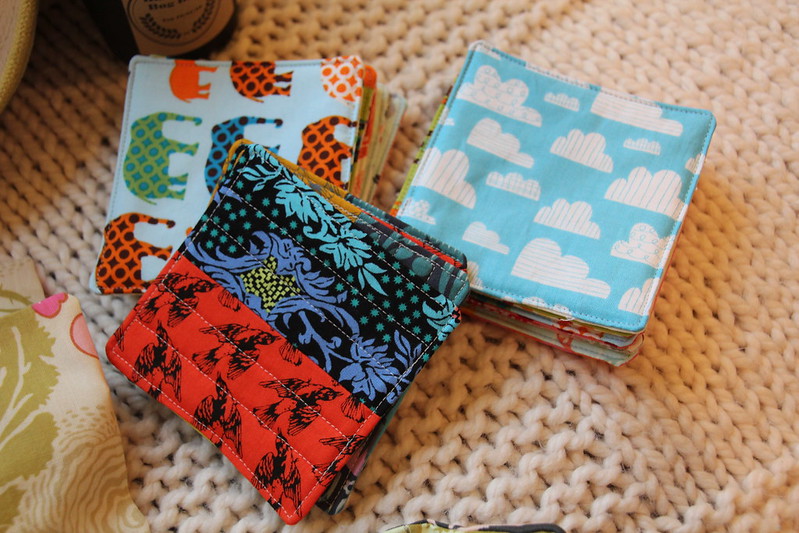
Coasters: After seeing the adorable modern quilted coasters from Very Shannon on Sew Mama Sew’s Handmade Holidays, I decided to whip up a few sets of these very simple coasters from a charm pack of Anna Maria Horner’s Honor Roll that I bought to pad my cart so I wouldn’t have to pay for shipping from Fabric.com. Of course mine are much more simple than the tutorial, but I’m totally fine with that!

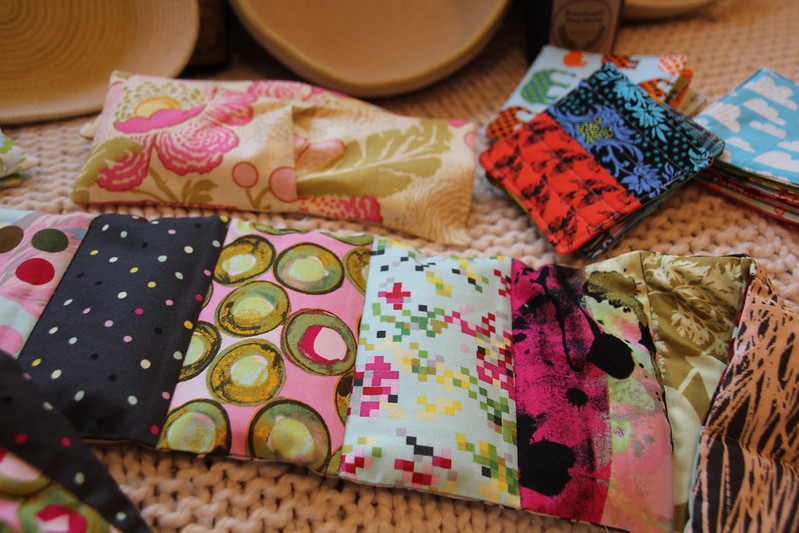
Eye Pillows: I’ve had the free Amy Butler Eye Pillow pattern in my files for years and finally found the time to make it! And I was able to use scraps to make them (Amy Butler Midwest Modern and Nicey Jane by Heather Bailey).

Head/Neck Heating Pad: Another great scrap buster pattern! I saw this one on Sew Mama Sew Handmade Holidays from Sew Can She. They were the most popular item during the game.

2104

It was fun to see the anticipation while our family members selected their items. There were some tense moments when one person thought the other was going to select the item that they wanted! It all turned out great in the end and everyone had fun and enjoyed what they picked out. It was a success!

2116

And then I didn’t stop with the stocking stuffer game.

Exfoliating Peppermint Soap
For a couple of Christmases in the past, I made exfoliating peppermint soap for my co-workers and it was a big hit. Last year I was out on leave during Christmas so I didn’t make any soap and I think I skipped the year before, so I decided it was time to bring back the soap. You would not believe how much people love this stuff. Someone mentions it to me every few months throughout the year without fail. And it’s so easy to make! As long as you remember to make it far enough in advance so it has enough time to cure before wrapping. I was way ahead of the game this year and made the soap on Halloween weekend. Thanks to the delicious peppermint smell permeating our house, I have been in the Christmas spirit for about two months now. I used the Good Morning Soap recipe from Raleigh Briggs’ How to Make Soap Without Burning Your Face Off. Such a great resource and such a brilliant title!

IMG_6668 (2)


Red Riding Hood Cape and Tutu from Little Things to Sew
My niece just turned 3 so it was the perfect time to break out the Oliver + S book Little Things to Sew and make her an adorable red riding hood cape. She is super girly and I knew a red cape was a must, so finding the Lizzy House pearl bracelets on sale at Pennington Quilt Works was a bonus. I’m so glad I finally got to make this cape since it was one of two projects that convinced me to buy the book. I made the other, the Explorer Vest, for my nephew in 2011. I can’t believe it’s been that long!

2119

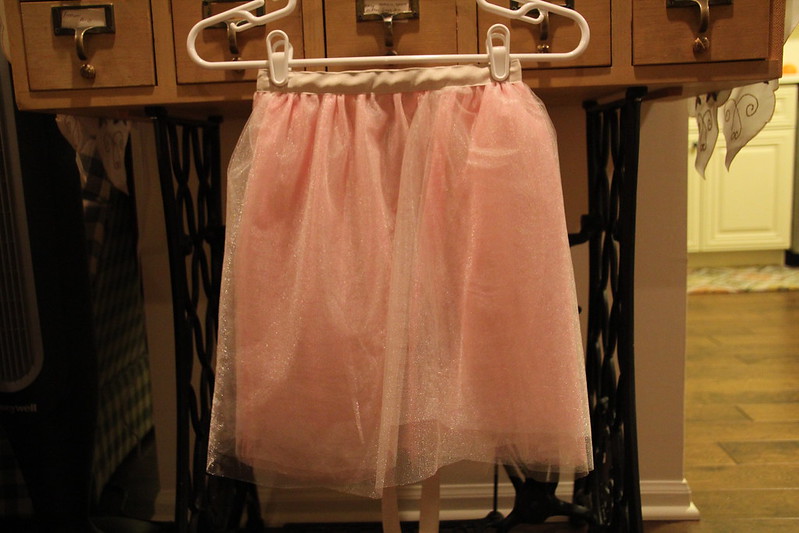
Shortly after I decided to make the red riding hood cape, I decided that now was the perfect time to also make my niece the tutu from Little Things to Sew. This book is filled with relatively quick and easy projects that turn out so wonderfully and hold up to years of abuse. I made the tutu and the cape in one afternoon. I’m glad to report that my niece loved them and put the tutu on right away.

2121


Kids Coasters
The long-running joke that kids will play with anything but the toys you get them is so long running because it’s true. My daughter is constantly picking up and carrying around the coasters in our living room (and everyone else’s living room for that matter), so I made her a few when I was making the stocking stuffer coaster sets. She loved the new ones so much that I made coaster sets for a few of the little ones in our family.

2105

Teacher Clutches
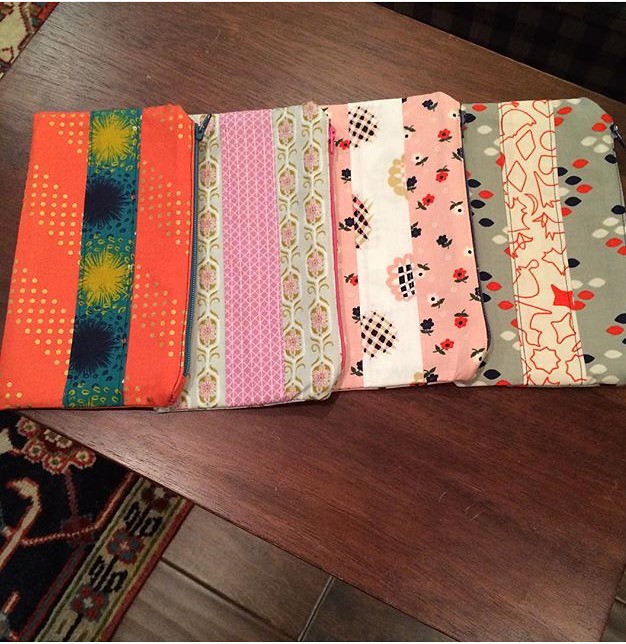
The teachers at my daughter’s day care are so wonderful and they love our little one so much that I knew I wanted to make them something extra special for Christmas. I started out making them gathered clutches by Anna at Noodlehead, but my OCDness couldn’t deal with the un-uniformity of the gathers, so I ended up making them ungathered clutches. I love how the Cotton + Steel prints mix and match.

FullSizeRender (2)


Knit Baby Blanket
Almost 10 months ago, my beautiful niece was born and in the flurry that was life having a 3-month old, I never got around to making her a baby blanket. I had the yarn, but it just never happened. I figured now was the time to finally make her a baby blanket before she completely outgrew it. If she doesn’t get much wear out of it now, she can always use it to play with her dolls. Or when she’s older, to cover hot leather car seats in the summer like my family does with our baby blankets. My point: I’m not worried, this thing will get used even though she’s not receiving it as a newborn.

2125

Stackable Ring Toy
Every time I make this toy I vow to never make it again because it always ends up taking way longer than I thought to make it. I finally have the perfect method to making them: I somehow convinced my sewing teacher to assembly line these things with me. She does all of the annoying pinning and then hands them to me to sew and then I hand them back to her for snipping and pinning the next step. It’s perfect! For me, anyway. She doesn’t seem to mind though! Don’t worry, I’m thanking her for her sweat shop contributions by giving her a rope basket and some soap.
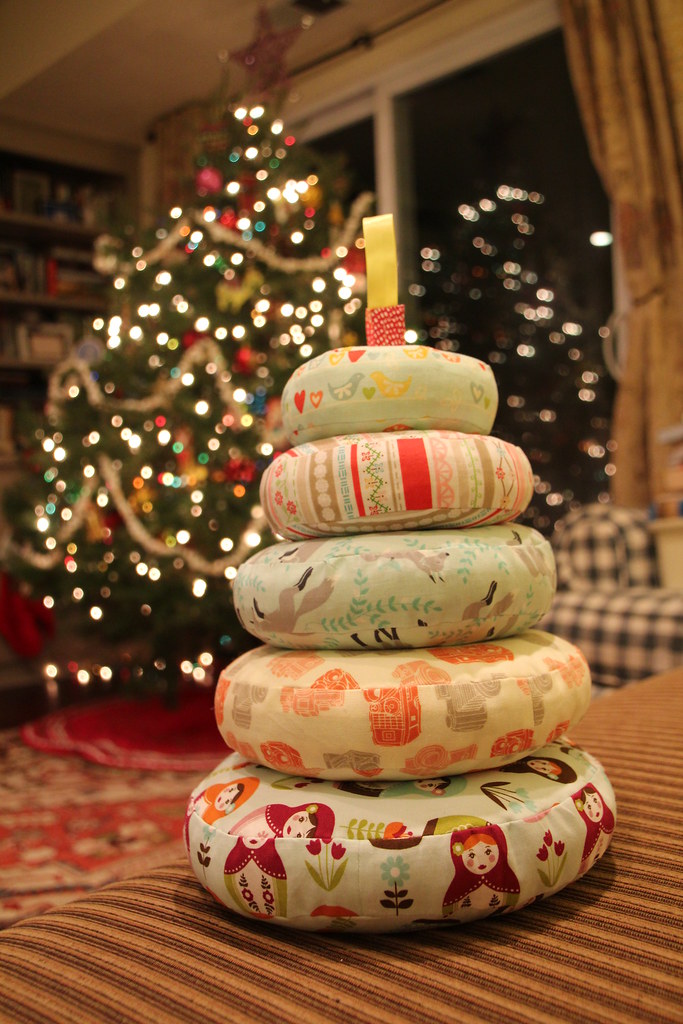
2134

The final tallies are:
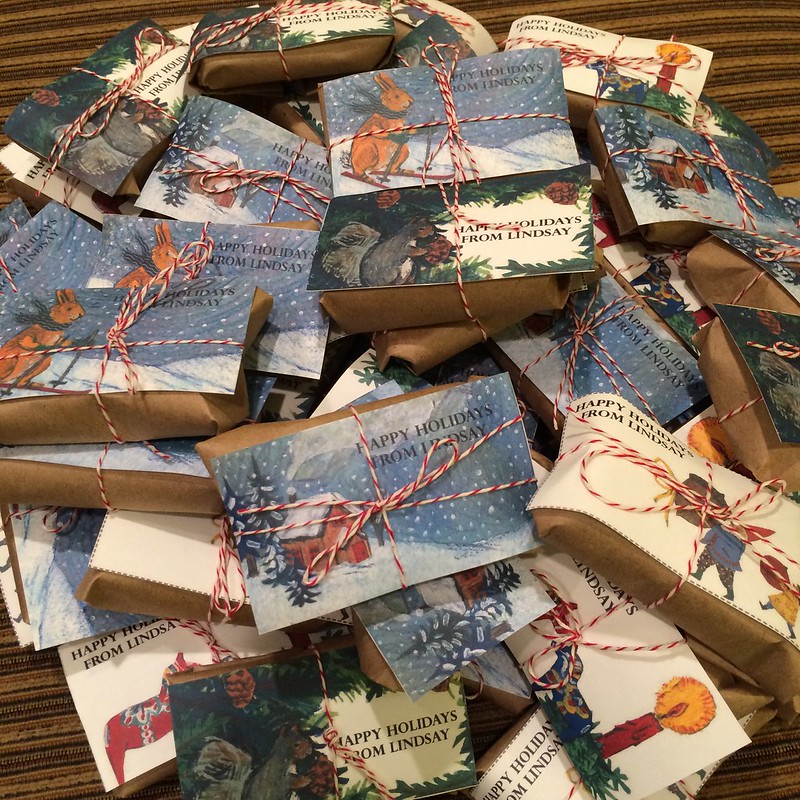
56 bars of peppermint soap 
16 rope bowls
1 infinity scarf
4 shoulder heating pads
4 eye pillows
3 sets of coasters
6 lemon sugar scrubs
4 bug balms
4 zipper clutches
1 red riding hood cape
1 tutu
3 kids coaster sets
1 knit baby blanket
1 stackable rings toy

It was a busy Christmas season! I think the key to not getting overwhelmed was starting early and using my nights and weekends wisely. I actually didn’t spend every weekend sewing and we were still able to do some fun Christmasy activities. If I hadn’t gotten sick for an entire week in the middle of December, I would have been on track for finishing everything before Christmas Eve.

I still have my mom’s birthday present and my secret quilter gift for Central Jersey to make, so I’m not entirely out of the gift making woods yet. But almost!

I did manage to sneak in some selfish sewing last weekend and made myself a vest that I intended to wear on Christmas. Unfortunately this weird warm weather we’ve been having had a mind of its own and it was too hot to wear it. Stay tuned for pics!

Tuesday, November 24, 2015

April Rhodes Banner Adventure Swap

I participated in the April Rhodes Banner Adventure Swap run by Kid Giddy and The Tattooed Quilter. The challenge was to create a banner no larger than 8x16" using only April Rhodes fabric. This was my first swap so I was nervous to participate because I have never sewn something like this that wasn't from a pattern, but I figured I could come up with something good in the two months that we were allotted.

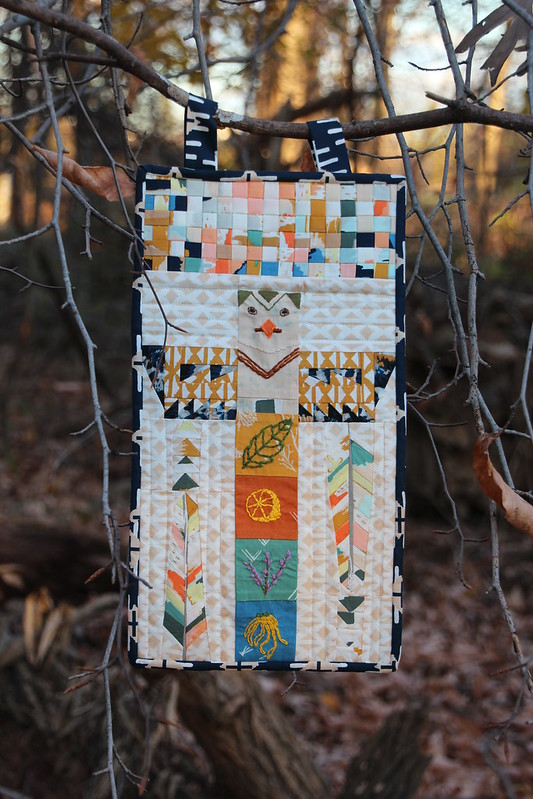
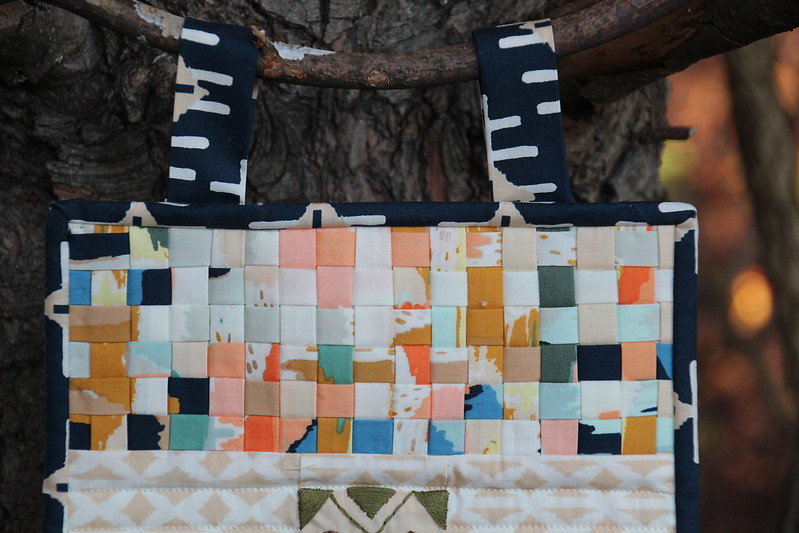
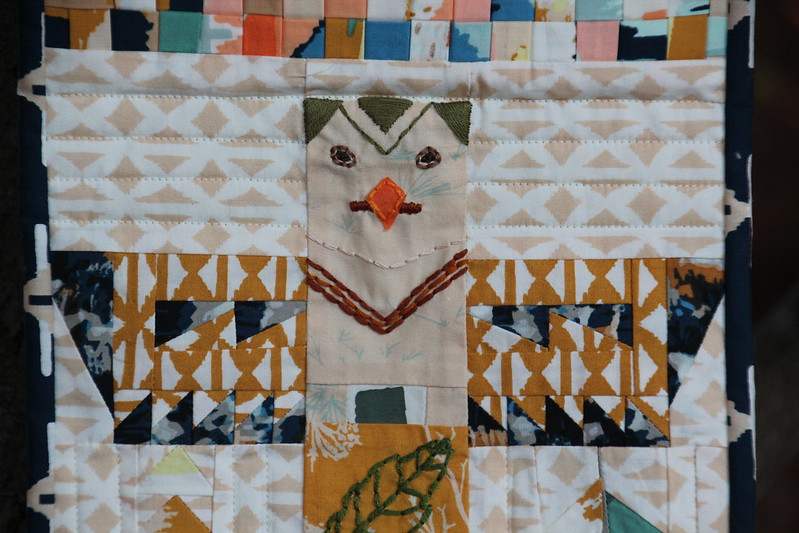
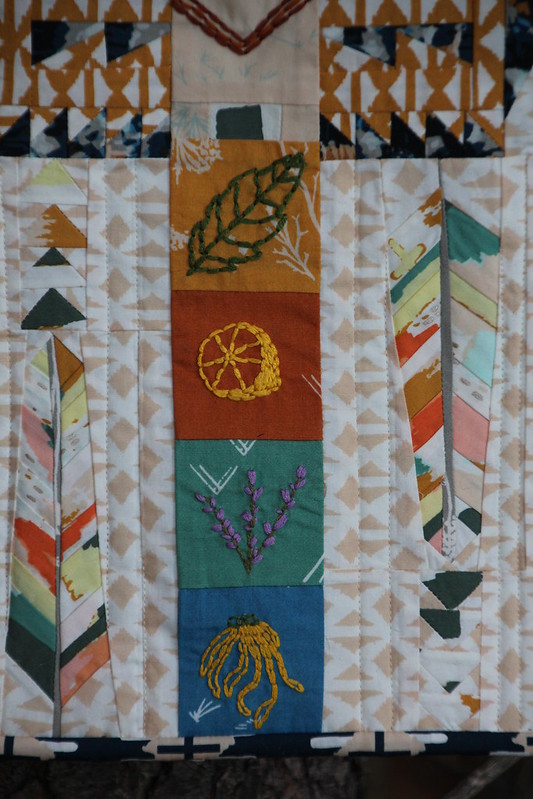
My partner didn't request anything specific and left pretty much all of the design details up to me, other than mentioning that the Bound fabric line was her favorite of April's. After digging through her Instagram account, I found out that she is a huge fan of essential oils. I knew I wanted to incorporate essential oils into her banner, and I went through a bunch of ideas before I settled on the final design. Initially I thought about piecing together essential oil bottles, but then it came to me: create a personal totem pole for her using essential oil ingredients. I also wanted to incorporate feathers without using actual feathers, so I shrunk the wonderful Feather Bed pattern by Anna Maria Horner to 33% of its original size. I used the Kid Giddy Paper Pieced Totem Pole pattern for reference and also added some teeny tiny flying geese. I had most of the elements ready to sketch when my IG friend t_jaye posted the most awesome fabric weaving tutorial. Perfect for the top of my banner! It looks super complicated but was actually pretty easy to execute.

Here's the final result:

April Rhodes Banner Adventure Swap

I am in love with it. My fingers have never felt so huge working with the tiny tiny pieces. Perhaps I would have had an easier time paper piecing some of the elements, but I have no experience with paper piecing. Now for some gratuitous detail shots.

April Rhodes Banner Adventure Swap

I hand embroidered the essential oil ingredients on the totem pole and the face, except for the beakthat's a small piece of fabric. I like how it adds a little depth to the face.

April Rhodes Banner Adventure Swap

Oh those flying geese! Each triangle is 1" wide by 1/2" tall. Never. Again. 

April Rhodes Banner Adventure Swap

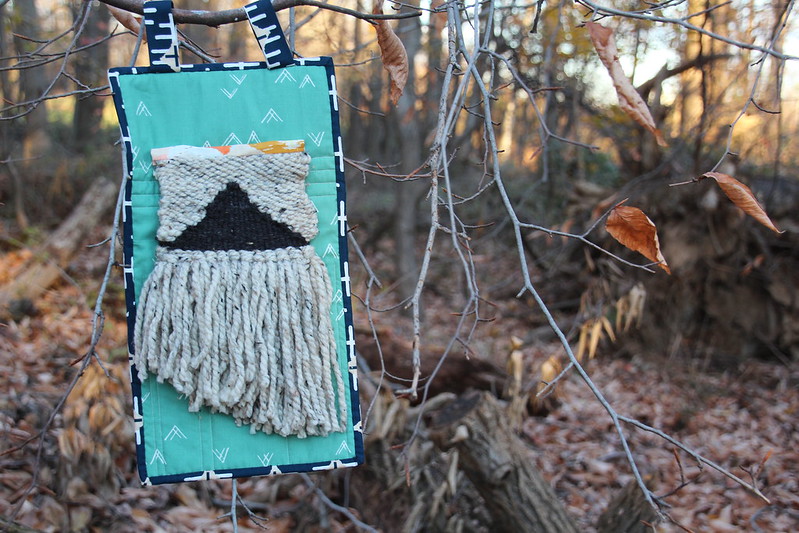
Early on in the swap I was playing around with weaving. I liked the result but I didn't want to include it on the front of the banner because it was too big and not as precise as I'd like. But it's fun hidden element on the back of the banner. The Weaving for Beginners course by Annabel Wrigley on Creativebug was super helpful. I ended up making my loom out of a Cheerios box and it worked out great!

IMG_9519

So concludes my first swap. I really enjoyed the design process. It wasn't nearly as difficult as I had made it out to be in my mind. I hope my partner loves the banner as much as I do!

Thursday, May 28, 2015

Back In Action

Hi folks! It's been a long and unplanned hiatus, but sometimes life does that to you. Since I was last here I made a couple of quilts and blankets, but the big news is that I birthed a 9 lb 8 oz baby girl! Seriously. Here I am seven full days before she finally came out. I'm disappointed I didn't take a picture the day of. There's only one baby in there! I spent 10 days after my due date walking around our neighborhood (hence my outfit) hoping to put myself into labor. Didn't happen.

On November 3rd we helped her out and named her Ellie Anne. We like to joke that she was so big because she was born a week and a half old. She is healthy and joyful and wonderful and hilarious and basically the light of our lives. And about to start crawling at just under 7 months. We're in for it!

Silly me was thinking I would be able to churn out a few projects while on maternity leave. It's hilarious that I'm even using that term since we don't have maternity leave here in the US, but my employer has pretty decent vacation and sick policies so I was able to bank up enough time to take 12 weeks off after her birth. Surely in 12 weeks I could easily fit some sewing in, right?

As those of you with babes of your own might have guessed, every minute of my leave was spent feeding, changing, and loving our little girl and I didn't do any sewing. It was awesome though! But I got the sewing bug again and decided to try to get back in action and do some sewing, even if it's just for 15 minutes here and there. Have you heard of The Fringe Hours? I haven't read the book, but I heard an interview with the author on a podcast and the concept is totally up my alley. Basically, you consciously find pockets of time in your day to do things for you. This week that has been roughly 9:15-10:00 after we put the littles to bed and before I put myself to bed (my 5:00 alarm to exercise before work is non-negotiable). And it's worked out great! Last night I only managed to sew from 9:40-10:00, but I was able to add sashing to two rows of a quilt that I'm working on. The old childless me would have been frustrated by such a short period of time and such little accomplished, but the new mom me is considering it awesome that I was able to find any time to sew. It's all about perspective.

I doubt I'll be posting many finished projects at this pace, so follow me on Instagram at lindsaypindsay33 to check out my progress. Right now I'm working on the City Green quilt from Cherri House's City Quilts. Flick was very excited to see it back on my living room floor.


Full disclosure: this quilt is about 5 years in the making. I bought the quilt kit when the book was released in 2010 and it sat in my stash until last spring when I finally pulled it out and began working on it. Then I got too pregnant to be comfortable sitting at my machine, so away it went until earlier this week. I am determined to finish it this year!

I have a few projects that I finished since I last posted (almost 2 years ago, wow!), so once I dig up those pictures I'll share them.

It's good to be back!

Monday, September 16, 2013

Baby Quilt for Penny

Where has the time gone? I started quite a few projects this summer but only managed to finish three: table runners for a friend of a friend (they were just basic burlap rectangles so I didn't take any pictures), a baby quilt, and some quilted potholders for our awesome friends who let us crash with them in Burlington last weekend (which I just realized I didn't take any pictures of, whoops!). Otherwise I was busy enjoying the weather and taking trips to Washington DC, the Poconos, and Burlington, Vermont, and Millinocket and Bar Harbor, Maine. We did some crazy hiking during the last trip so I'll share some photos soon!

Baby Penny decided to arrive early (on my 30th birthday!) so she didn't receive her quilt until she was a few weeks old. I actually finished attaching the binding on the train ride down to DC. About halfway through I referenced an online tutorial for attaching binding and realized that I had been attaching binding incorrrectly up until now. The way I found was so much easier and didn't create any puckering! Of course I can't find the tutorial now, but before I was taught to only pick up a few threads of the binding fabric in each stitch. This has always caused my binding to be very puckery and I didn't understand why my binding always looked like crap. The new method has you stitch about a quarter of an inch on the quilt sandwich and then stitch a quarter of an inch on the binding, starting directly above where the quilt sandwich stitch stopped, and so on. This works amazingly and it's quite sad that I went that long without realizing that the method I first learned just wasn't cutting it. So half of the quilt binding looks like crap (in my opinion) and half looks great. Thankfully you can't tell in the pictures and I'm sure I'm the only one who notices in person anyway.

I used the Promenade Quilt pattern by Basic Grey. I think my favorite print is the matryoshka dolls.

200

I had a bunch of the small squares left over, so I inserted them in a vertical line on the back.

206


204

I love the other print that I found for the back; it's like a cheater quilt!

147