Friday, February 2, 2018

Make Nine 2018

An amazing thing happened this week: I tried on my pair of pre-pregnancy work pants and they fit! I don’t think I’ve lost weight recently, so it’s very possible that they have fit for awhile and I’ve just assumed that they didn’t because I haven’t been exercising. Ahhh the life of having two small children: exhausting.

This isn’t a random pat-myself-on-the-back story though. Pre-kids I enjoyed sewing my own clothes, but since my body was changing throughout and after the pregnancies, I didn’t think it was worth my precious sewing time to sew clothes that wouldn’t fit me once my body returns to “normal.” No, my body will never be the same as it was pre-kids and I’m totally OK with that, but I didn’t want to waste the time and money on sewing clothes while my body was in flux. It appears that my body has decided on what its shape is going to be for the time being, so you know what that means: time to break out the sewing patterns!

And such wonderful timing too because it’s not too late for me to declare my #makenine2018! I’m finally getting to use the patterns and fabric that I’ve been hoarding and itching to make for years. YEARS!


  1. Sewaholic Harwood dress: This one is kinda a cheat because I started sewing a beautiful Rifle Paper Co. print version last summer. It just needs to be finished.
  2. True Bias Hudson pants: I’m finally getting around to tackling everyone’s favorite lounge pant, in Lizzy House pearl bracelet knit, no less.
  3. Sewaholic Robson trench: Years ago (2013?) I made a muslin for this trench and took it apart to cut the real fabric and then I think I must have gotten pregnant and shoved it in a closet. In retrospect, this seems silly because I could have just worn it unbuttoned during my pregnancies. I’m going to sew the muslin back together to see if it still fits (fingers crossed!) and then get moving on this thing so I can have it for fall. I’ve been wearing the same corduroy trench for the last 15ish years and although I still love it, it has definitely seen better days.
  4. Greenstyle Creations Centerfield Raglan: I love a good baseball tee and this pattern is going to look lovely in Lizzy House Dino Exhibit knit. Remember when Hit Parade knits were released in 2016?
  5. Jennifer Lauren Handmade Juniper cardigan: The one garment I made last year, a black knit cardigan for work, was a flop and I think this cardigan is more my style. It looks super quick to sew, so I’m hoping to make more than one version.
  6. Closet Case Patterns Mid-Rise Flare Ginger Jeans: Yes, the holy grail of jeans sewing patterns. I shared on Instagram this week that I’ve been hoarding two pairs’ worth of US-produced Cone Mills denim, and having just bought another 2.5 yards, this must be the year I tackle these babies.
  7. Sewaholic Thurlow shorts: I used to be a Bermuda shorts lady, but shorter shorts are cooler and more comfortable, and honestly they are more flattering than Bermuda shorts. Let’s all get past this issue we have with our knees/thighs! It is much more fulfilling to run around and enjoy the summer than to worry about my legs no longer looking like they did when I was a teenager. I have exactly one other pair of shorts so this needs to happen before the summer.
  8. Fehr Trade Surf to Summit Rashguard x2: I had these planned for last summer’s shore trip, but I ran out of time and only got to sew rashguards for the kiddos (their lily-white skin is more important to protect at this point). Thankfully (?) it was unseasonably cool while we were there and I was comfortable wearing a tshirt for coverage. Isn’t it so nice that rashguards are now on trend so we pale folks don’t look silly lounging on the beach with a bunch of clothes on? I’m especially thankful that I might not have to battle with my kids to wear them, as my parents had to battle with me to wear tshirts over my swimsuit ALL. THE. TIME. I’m making my rashguards with the zip front and a half sleeve (in between short and long).
  9. Sewaholic Granville shirt: Now that I’m wearing pants to work again (seriously, I didn’t wear pants to work for at least two years—one of my co-workers even noted that she didn’t remember the last time she saw me not wearing a skirt or dress), I’m excited to make some button-downs. And once I get the fit right, I’ll probably make a casual version as well since my weekend wardrobe has turned into nothing but free tshirts and hoodies. It’s like I’m in college all over again!
Who knows if I’ll make it through all nine, but if I make even a few of these garments I’ll consider it a successful year. I’m just happy to be returning to land of garment sewing!

Friday, January 26, 2018

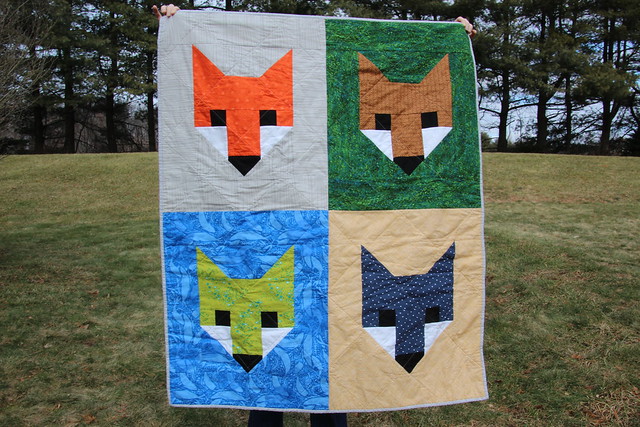
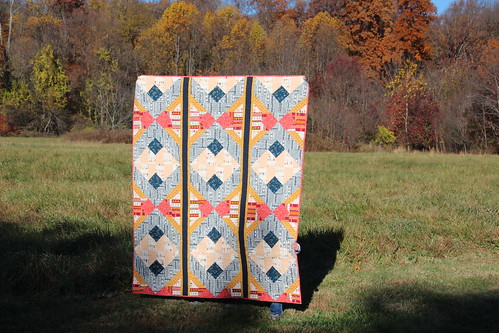
Fancy Fox II Baby Quilt

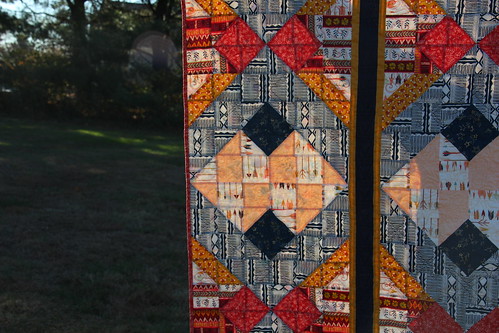
After a Thanksgiving-to-Christmas-filled sewing frenzy to finish craft show merchandise, a late housewarming gift, four lap-size charity quilts, and a table runner for my quilt guild gift exchange, I was looking forward to an easy make with the Fancy Fox II quilt by Elizabeth Hartman. This top comes together SO FAST! I cut all of the fabric one night and sewed it up in about two hours the next. Easy peasy.

IMG_3978

I've been in a self-induced stash busting mindset for the past few projects, and even though I didn't purchase any new fabric, I am really happy with the combinations I discovered after digging through my bins for a half hour. This pattern was a slight challenge to find fabric in my stash, as the background fabric calls for 1/2 yard each, whereas my stash is mostly leftover fabric from other projects and tons upon tons of fat quarters that I got for free through my guild last year. (Seriously, we got TONS: one of my guild mates estimated that we each got 40 yards of fat quarters. Then at our next two meetings we also were gifted yardage, where I walked away with an entire bolt of cat fabric. I am flush with fabric!)

The nursery is a woodland theme, which might lead you to question my use of the Lizzy House whale print, but I liked the color combination and it was the only fabric I had enough of in that color. I used this same print on the backside of a cape I made for my daughter last year, and upon seeing the quilt, she was very concerned that I cannibalized said cape to make the quilt. It was very cute. I explained that mommy has all sorts of fabric, and a ton of that whale print for unknown reasons. It served as a good illustration for why mommy has commandeered her entire closet with sewing supplies.

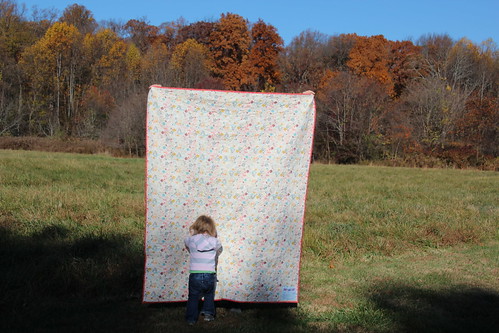
For the back, I used a light blue broadcloth that I think I initially purchased to make some mod mosaic floor pillows. After what has probably been 8 years, I was comfortable with finally throwing in the towel. At least I was keeping it in the family and using it for another Elizabeth Hartman project.

Wednesday, February 1, 2017

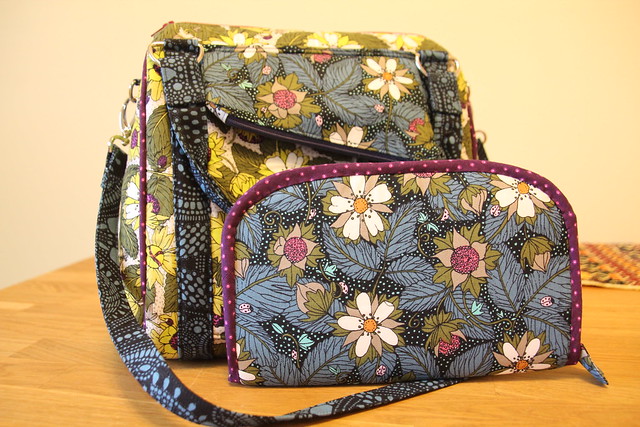
Sew Sweetness Rockstar Bag and Greenbacks Wallet

I was about to start this post with "a few years ago," and then I looked it up and realized it was six years ago, yikes.... Let's start again.

Six years ago I attended one of those fun parties at my friend's house where you choose the fabrics for a custom purse. I love my purse and it held up really well, especially since I'm not a multi-purse girl and it's been used heavily over the past 6 years. Its one flaw is that no matter how I prop it up, it falls over every single time I am in the car, spilling its contents everywhere since it only has a magnet closure. It's like the pockets are spring loaded and with even the slightest turn, out jump the tissue packets and chapstick and wallet and pill bottles and flashlight (call it ridiculous, but this comes in very handy every so often). Not to mention all of the change and random child hair barrettes that find themselves in the bottom. Once the corner edges started to fray, I decided to make myself a new purse. 

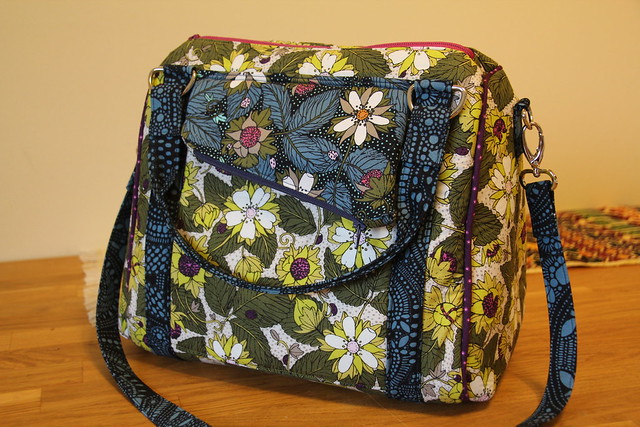
After scouring purse patterns, I decided on the Sew Sweetness Rockstar Bag. I liked that it had a flat, wide base and a zipper closure, but mostly what sold me was that it looked like a bowling ball bag. And kinda like an old lady purse. I loved it! I also ordered the hardware kit so I wouldn't have to source those separately. This was in May 2015.

Rockstar Purse

What took me so long to make this purse? This thing is intimidating! I didn't want to spend all of that time making a purse to end up with a big old mess. But after New Years I decided enough was enough and was set on making this thing so I could stop throwing fits every time my purse fell over and spilled. Can you tell how much this annoys me? It's maddening!

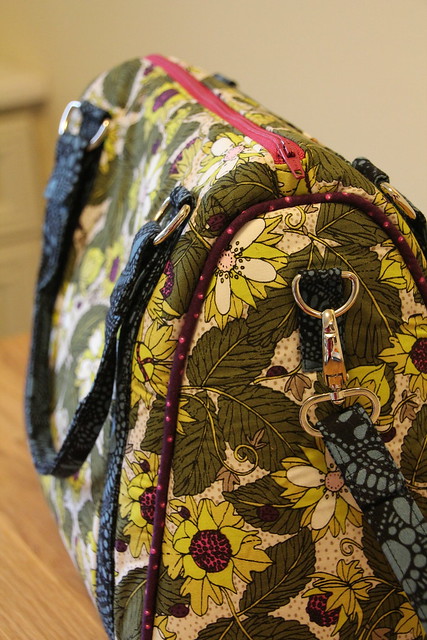
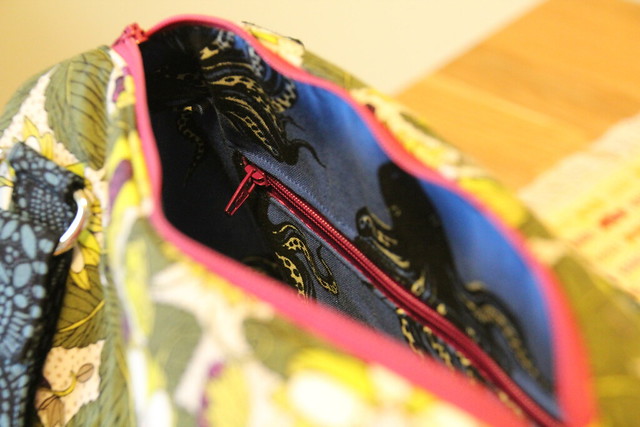
I spent a good amount of time browsing fabrics before I settled on using a sampling of Sarah Watson's Garden Secrets and Cotton + Steel Mystery Food Sapphire as the lining. Like Dom Streater, I love the mix of prints (while we're talking about it, know that she is my fav Project Runway contestant ever—and is from Philly!). I also really love a pop of color for the zipper.

For the most part, this bag wasn't nearly as hard to make as I had imagined. Sure, I made a few mistakes here and there, but it was mostly smooth sailing until the very end. Going in, I was most concerned with attaching the side panels to the front/back and oh boy was I right. The wonderful Soft and Stable that gives the bag such great stability on every pattern piece (hence the name) created my sewing nightmare. After some sweat, blood (pins!), wrestling, considering throwing the entire thing out, and very slow sewing and re-sewing, I had a completed bag. I then spent the entire night oogling it. And also the next day. And pretty much every time I use it. It is beautiful! And functional! 

Rockstar Purse

Aside from the wide base and zipper closure, I really like the many pockets (two zippered inside and a zippered and non-zip on the outside) and that it can be carried either by the short handles or the strap that is long enough to wear as a crossbody (essential while managing small wild animal children). It's also large enough to carry my water bottle, which I'm pretty much never without (I use this one). And the nicely structured sides help it stand up and keep shape so digging around inside is easy. Best of all: it wasn't even tempted to fall over in the car. This purse is a total win!!

Rockstar Purse

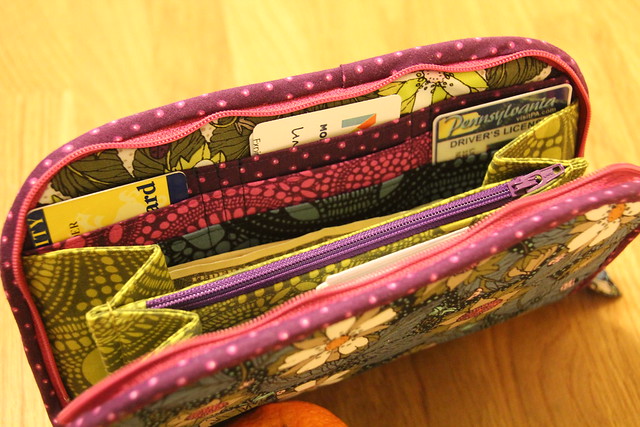
While it's not as infuriating as a purse that constantly falls over, I had been dealing with a wallet that rarely snapped closed. I figured while I was at it, I'd make a Greenbacks wallet to match my new purse.  I chose version 3 because of the zipper closure and many card slots. I only have one debit card and one credit card, but I carry around gift cards in case I randomly pop into Target, Starbucks, or Joann. That small stack of gift cards really added some heft to my old wallet, but not this one! There are plenty of card slots with even some to spare.

Rockstar Purse and Greenbacks Wallet

The pattern doesn't include a specific pocket for cash, but since I rarely carry more than $20 at a time, the space next to the pocket will provide more than enough room. There's even enough space on the other side of the pocket to slide in my phone for the times when I go out with just my wallet.

Greenbacks Wallet Version 3

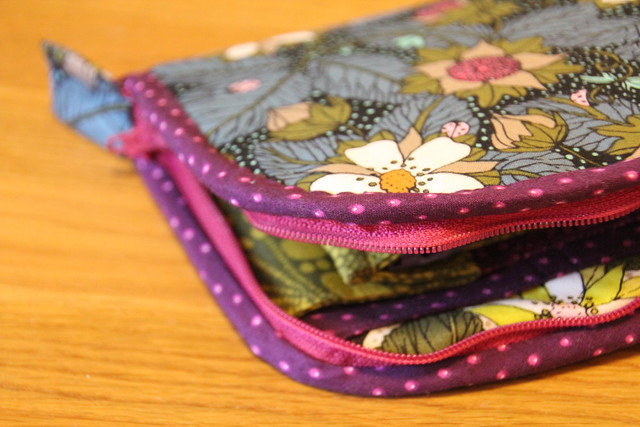
The wallet was pretty easy to put together and included only a small amount of finicky sewing to attach the bias binding (which is the only reason the pattern is considered "advanced"). Sewing slowly was the remedy! And now I have a beautiful and sturdy matching purse and wallet set. This is a first for me! Does this mean I'm a real adult now (as if having two kids didn't already seal the deal on that one)?

Greenbacks Wallet Version 3 

Thursday, January 26, 2017

More Hits from Little Things to Sew

This Christmas was a little different than last Christmas when it came to gifting handmade items. Who would have thought that having another baby would alter my Christmas gift production? :)

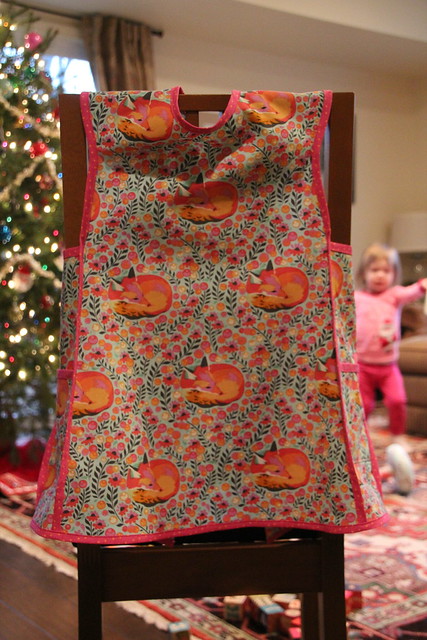
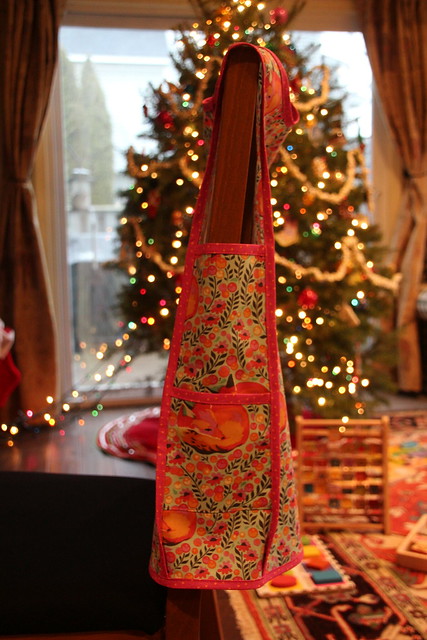
This year my niece was the only person to receive a handmade gift. She loves helping my sister-in-law cook, so I made her this quick and easy bias trimmed apron from Oliver + S' Little Things to Sew. I seriously love my edgestitching foot (Bernina #10) now. It made sewing on the trim so neat and easy.  

The apron is made completely from Tula Pink fabrics: the body is Fox Nap from the Chipper collection and the trim is Tortoise Shell from Slow and Steady. I don't usually buy a lot of Tula (I think the designs are pretty but they never seem to fit into the projects I'm making), but these prints jumped out at me when I was browsing in Pennington Quilt Works as my niece is a great lover of all things pink. I thought Fox Nap was just pink enough but will age nicely as she gets older.

Bias Trimmed Apron

I love the crazy toddler photobomb happening in the photo above. Truthfully, I completely forgot to take nice pictures of this apron and had to settle for a quick snap before wrapping it on Christmas Eve morning. They turned out a little dark, but you get the idea.

I included a little pink whisk to the side pocket when I wrapped it. That would have been a cute picture to capture!

Bias Trimmed Apron

Although they weren't Christmas gifts, right before Christmas I whipped up two pairs of mittens for my little wild animal. Before this, we had one pair of mittens that I was constantly misplacing in our tiny house (how this is even possible is beyond me). I didn't have any fleece in my stash, so I raided her outgrown clothes bag and reused an old pair of pajamas. And I was able to use leftover bias tape from the apron for the elastic casing (even if they are double the size the pattern calls for). It took me maybe two hours to complete both pairs, so this is a very quick project if you are in a bind. My daughter calls these her "Mommy mittens" and proclaims "Mommy made them!" every time she puts them on, including at school. Her teachers were impressed!


Two more wins for Little Things to Sew! I think by the time I'm through having little kids in my life I'll have sewn through the entire book. All of the patterns are so classic, easy, and well written that I will never tire of them. It's by far my favorite source for kids sewing. (I've also made the Red Riding Hood Cape, Tutu, and Explorer Vest).


Wednesday, January 25, 2017

Mini Heart Quilts: Variations on a Theme

Although made a few months apart, it seems like I've had hearts on the mind lately when it comes to mini quilts. And all before Valentine's Day even!

To celebrate my quilt guild's 5th anniversary, we were challenged to make quilts with the theme of "Five." I went through a couple of ideas before I settled on creating an homage to Big, which was released in 1989, the year I turned 5 years old. Is there a more iconic scene in the movie than the "Heart and Soul" keyboard scene?

I'm really into the reuse/repurpose and only-buy-what-you-need mentality lately (watching Minimalism on Netflix (and also probably having a second kid) only added fuel to the fire). I had just gone to the Salvation Army during their weekly 50% off sale so I had a large selection of thrifted clothes to chop up for my material. I got a strange satisfaction from breaking down all of the clothes into usable fabric.


I now have a stockpile of thrifted materials (and buttons!) that I have big plans for—you haven't seen the last of them yet.

Since I was at the height of baby brain when I made this and couldn't imagine thinking through how to measure all of the pieces on my own, I found a simple keyboard quilt pattern. It was very quick and easy to sew together, just the sort of project I could handle when 36 weeks pregnant.

I used this quilt as a personal challenge to step outside of my quilting comfort zone (straight line quilting) and finally try some freemotion quilting on an actual project instead of just test squares. I'm pleased with the result even if it's relatively simple quilting. Baby steps.

Piano Keys Mini Quilt

I wish I would have gotten a close-up picture of the bottom left of the keyboard where I quilted in "Zoltar Speaks" (the name of the arcade game that grants Tom Hanks' wish). You can kind of see the writing in the bottom right corner on the back below. I didn't trust myself to freemotion handwriting, so I wrote out the words using a water soluble marker and then traced over it. It turned out much better than I was expecting!

Piano Keys Mini Quilt Back

Speaking of freemotion quilting, I had gotten a Sew Steady table to make quilting on my domestic machine a little more bearable and was disappointed when I found this quilt almost sticking to the plastic table surface (I tried with cotton too so it wasn't due to the synthetic material). After some internet troubleshooting, I found a tip to buff the table with Turtle Wax. I can excitedly proclaim this to be a fantastic solution! I have a hunch that since Sew Steady now sells their own polishing kit, they don't buff the tables to be as smooth in the factory, but maybe that's just the way my conspiracy theory mind works. Just apply a very thin coat of original Turtle Wax on the entire table, let dry, and wipe clean with a microfiber towel. After repeating three times as suggested, my Sew Steady table is now slick as can be! I don't even need the Supreme Slider anymore, the quilt glides that nicely over the newly buffed table.

I love these little challenges from my quilt guild because it's a fun prompt to create something I might not have thought of on my own. Plus it's a great way to make just-because gifts for the people you love. This little beauty is now hanging in my music-teacher-sister's classroom. Check out our guild blog to see all of the "Five" themed quilts. I love that everyone approached it differently.

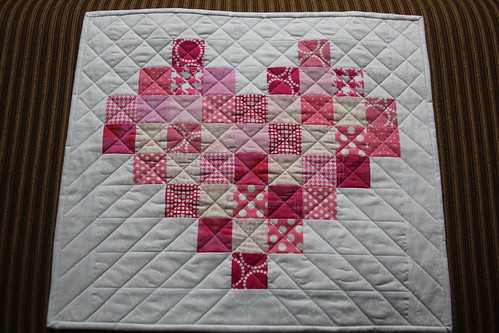
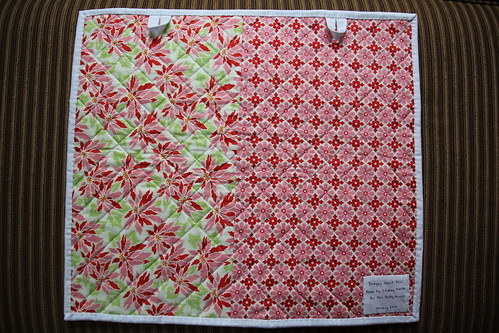
Each member of my guild was recently given a bag stuffed with fat quarters. It was a huge haul, and free! I decided to use some of the pink prints to make a mini quilt to send to a friend's quilty mom who has been in the hospital (pink is her favorite color).

I used the Scrappy Heart tutorial from the Hopeful Homemaker. It was super quick and easy to sew (and again, probably something I could have figured out on my own if my brain wasn't so zapped). It seriously took longer to "randomly" arrange the prints than it took to sew together. And even after spending all of that time flipping and switching the prints, I still managed to have a diagonal line of light colored prints down the left side of the heart. Of course I didn't notice until it was all sewn together. Gah! Since it doesn't look quite as glaring in person as it does in a photo, I decided to keep it as is. Otherwise I'm happy with the scrappy look.

Even though I went with my old standby straight lines for the quilting, I really like how I mixed it up and only quilted the crosshatch on the heart and above. Yes, this is mixing it up for me! I think it adds a nice movement and visual interest.

Scrappy Heart Mini Quilt

This was the first time I sewed hanging loops onto the back of a quilt. I included two Command hooks in the package so they could easily hang it up in her hospital room. 

Scrappy Heart Mini Quilt Back

I also added a label, which I've only ever done once before on a quilt (besides the Quilt of Valor—the label was mandatory). For some reason I envisioned making and attaching a label to be a super long and annoying process, but I was pleasantly surprised to find that it took only 15 minutes from start to finish. Now I love the idea of labeling all of my quilts!

Just in time for this epiphany, Quilt Alliance is currently hosting a Labeling pledge (thanks for the heads up, Jess!). If you take the pledge you are entered into a drawing to win custom quilt labels! But isn't the idea that the details behind your quilt won't be lost in the void of time more of an incentive?

Monday, January 23, 2017

Follow the Stars Quilt of Valor

Last March I learned about the Quilt of Valor Foundation while listening to the now defunct Quilt Your Heart Out podcast hosted by Mary and Marianne Fons. From what I understand, Marianne has been involved with the foundation for quite some time. The foundation's mission is to award quilts to service members and veterans touched by war. I thought getting involved would be a good opportunity to show my appreciation for the sacrifice that our service members and their families make for our country. Plus, I noticed that most of the quilts being awarded were very traditional in style and there might be younger veterans who would be interested in receiving a more modern style quilt.

Follow the Stars Quilt

Joining the organization is pretty easy and soon after I was contacted by my state coordinator with my first assignment. After some searching, I decided on the Follow the Stars kit by Maureen Cracknell from Hawthorne Threads. The color palette is patriotic without being overly traditional and the pattern reminded me of the floor in a fancy building (in a good way, of course). I didn't realize that I would have to make roughly 5,000 half square triangles to construct the quilt top, so it was a little slow going for me. It is pretty magical how arranging all of those squares just so results in a big and bold geometric design.

Follow the Stars Quilt Back 

Once I finished piecing the top and the back, I sent both to a volunteer long arm quilter who was super quick to return a beautifully quilted sandwich back. Then all I had to do was attach the binding and the label.

Follow the Stars Quilt 

What better way to show our appreciation and wrap our service members and veterans in a warm virtual hug than through quilts?

Wednesday, September 21, 2016

Crayon Challenge Mini Quilt

The upside to having pneumonia is the copious amount of couch time that accompanies the exhaustion. Before I got sick I was on track to finish the mini quilt that I made for my quilt guild's Crayon Challenge that started in June. We blindly chose three crayons and were tasked with making a quilt using only those colors and a neutral if we wanted. I'm glad I didn't push to finish before our September meeting since I was in the hospital instead of ogling my guild mates' beautiful quilts!

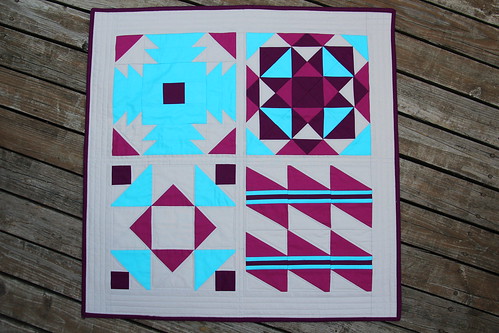
At first I was a little concerned with only using four colors but then I remembered the Summer Sampler blocks that I've been receiving every Monday for the past few months. Have I mentioned my love for classic quilt blocks? Perfect for only using four colors!

I admit that I totally lucked out with my colors. I probably wouldn't have put this quilt together on my own, but I love how it turned out and the colors are totally fun and go perfectly together. I used Kona solids Ash, Berry, Cerise, Peacock to make the Parallel, Deck of Cards, Summer Slice, Corner Canyon blocks.

IMG_1224

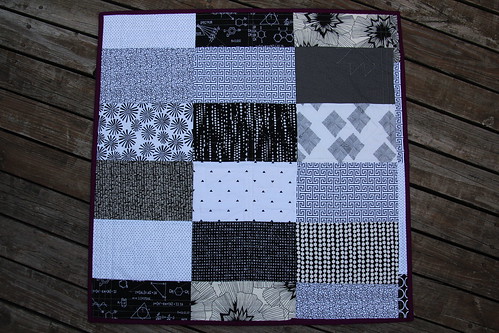
For the back I used some of the prints that I got in a black and white fabric swap at our last guild meeting. How much fun is this guild?! I'm so glad I found them last year.

IMG_1225

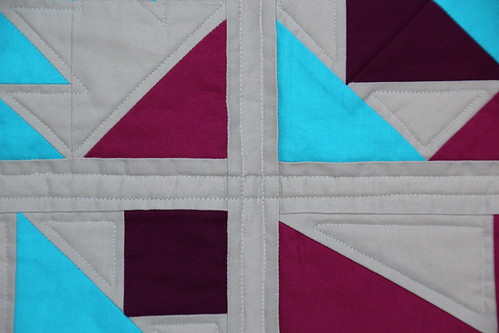
I've stuck to straight line quilting on all of the quilts I've made so far, either diagonal, stitch in the ditch, or a grid across the entire quilt. I really wanted to go outside of my comfort zone for the quilting on this one, especially since I finished piecing it in July and theoretically had plenty of time to figure out my quilting plan. But of course I procrastinated and chickened out and ended up sticking with more straight line quilting. HOWEVER, I got a little adventurous and instead of straight line quilting across the entire mini, I highlighted the gray sections of the quilt blocks. Even though I wimped out, I love the effect that the quilting added.

IMG_1243

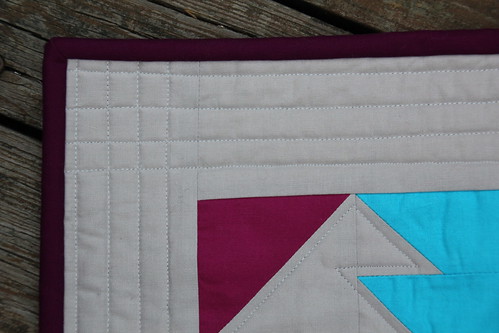
And then I straight line quilted in the sashing and the borders. I couldn't resist! Plus I love the grids that the quilting created in the corners and in the middle of the quilt.

IMG_1231

Here are some more detail shots because I couldn't resist.

IMG_1232

IMG_1237

And this is where my couch time came in handy. So many threads to bury!

IMG_1239

Check out the quilts that my guild mates made for the challenge. There is such a wide range of quilts, I wish I could have seen them in person!

Monday, September 12, 2016

Paper Pieced Cassette Tape Mug Rug

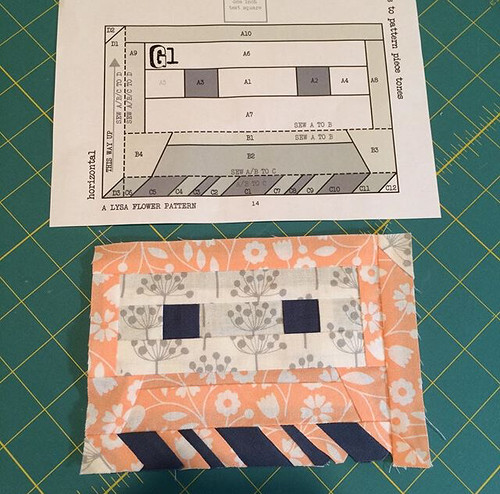
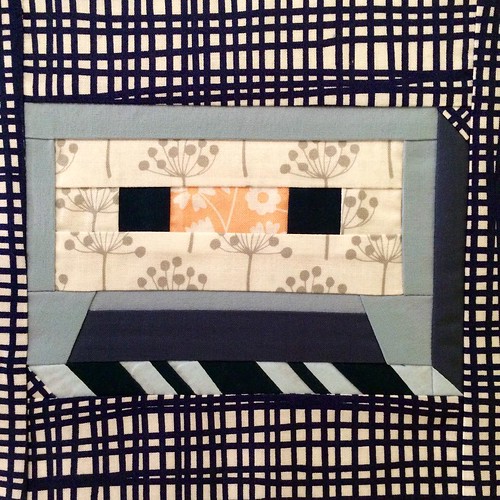
For our June meeting, my quilt guild hosted a paper pieced mug rug swap. I had done very little paper piecing up until that point so I took this as a challenge and dove right in. I found Lysa Flower's Cassette Tape pattern and it looked kinda hard, but I decided to go for it since a small mug rug wasn't a huge commitment. If it didn't work out, I could always make something less complicated.

My first attempt went pretty well, but I didn't cut the bottom pieces of the cassette large enough so there were a few gaps along the bottom edge. I learned very quickly that I need to test the seam before I sew it to make sure that the piece is going to flip the correct way after pressing. Unpicking those tiny stitches is really not fun. This post by Lee Heinrich on the Bernina We All Sew blog was extremely helpful.

Paper pieced cassette tape, take 1

The second time around I cut very generous pieces for the entire pattern and I think it turned out really well! The only thing I'd change next time is to not add this wonky crosshatch border around it, because even though my seams are pretty straight, the bottom edge gives the illusion that it's very wonky. I used Lotta Jansdotter and Elizabeth Olwen scraps for the finished mug rug, along with some blue solids.

Paper pieced cassette tape, take 2

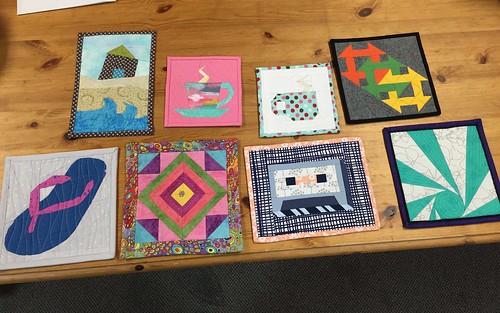
Here are all of the awesome mug rugs from the swap. I came away with the adorable pink steaming tea cup second from the left in the top row, made by our president, Neva!

09
Photo credit: Maggie from CJMQG

Sunday, September 11, 2016

Pretty Sewing Supply Storage

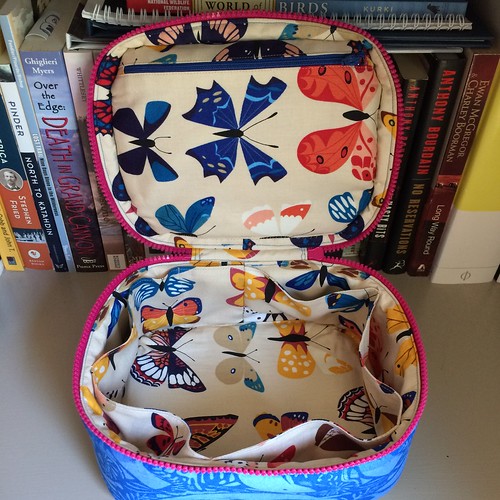
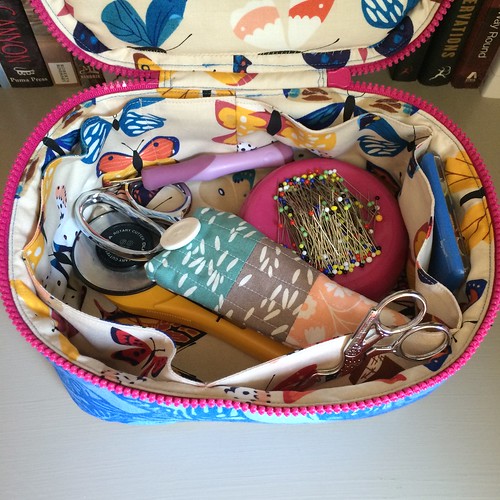
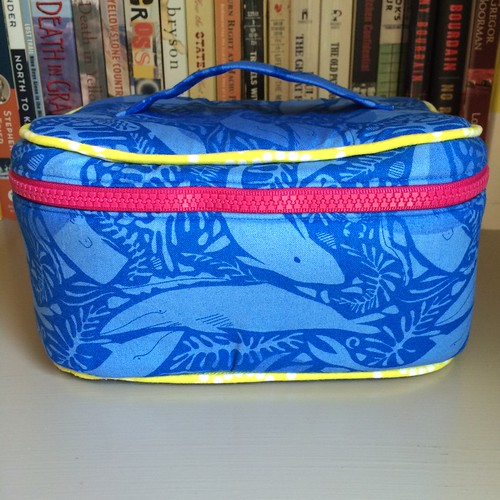
This train case was an impulse project after I stabbed myself once too many times on pins while reaching into my sewing supplies zipper pouch. I've only made a handful of bags over the years, so initially the Sew Sweetness Crimson & Clover Train Case was a little intimidating. But, with my seam ripper handy, I decided to tackle it one step at a time and it wasn't so bad at all! And no, I can't even look at this thing without getting "A Praise Chorus" in my head.

Sew Sweetness Crimson & Clover Train Case

This train case was the most complicated "bag" that I've sewn so far, but, like all of Sara's patterns, it's broken up into short logical steps that are easy to follow. I even made my own piping for the first time, something I thought would be fiddly and hard but turned out to be super easy, especially with the use of my Bernina piping foot (I used foot #12, but you could also use foot #38).

Sew Sweetness Crimson & Clover Train Case

Construction got a little nerve wracking toward the end when there were many layers to sew through, but I took my time and sewed slowly and carefully and it all worked out. I dipped into my Lizzy House stash since the case would be sitting alongside my sewing machine for the foreseeable future and I wanted the fabric to be something beautiful that I loved. The finished case has a zipper pocket in the top flap and smaller pockets all along the edges of the lower half. It fits my everyday sewing tools perfectly with room to spare!

Sew Sweetness Crimson & Clover Train Case

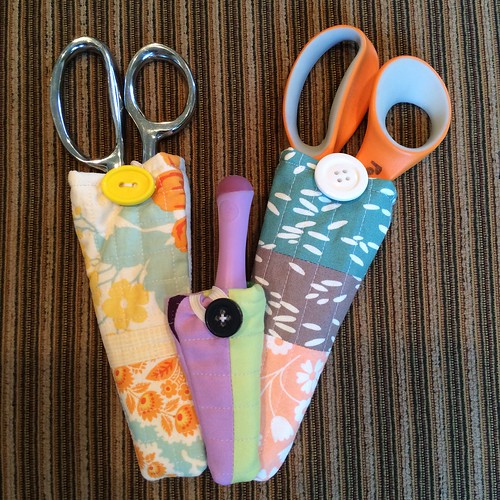
Around this time I also made sheaths for my scissors using A Threaded Mess' 30-Minute Scissor Keeper pattern. My Gingher scissors came with a black plastic sheath, but my other scissors have been floating around in my zipper pouch just waiting to stab me or bust through the pouch fabric. Since I was getting my tools organized, I decided to make pretty sheaths for all of my scissors and avoid a scissor incident before it occurred.

I raided my scrap bins for these and easily found enough to cover two large and one medium size scissor keepers. Mine took a little longer than 30 minutes each, but mostly because I was piecing together small scraps and then I quilted them to get a little fancy. The pattern calls for a small piece of cardboard to be inserted at the tip of the sheath so the points of your scissors don't poke through. I used pieces of a cereal box: it's just sturdy enough for the added protection but not so stiff that it's hard to maneuver into place. I gladly threw that sad black plastic sheath in the recycling when I was finished!

Scissor Keepers

Hurray for pretty sewing storage! Why do I feel like this is going to be a slippery slope and lead to me finally replacing the standard red sewing machine cover that came with Pippi to something more pretty?

Saturday, September 10, 2016

Reusable Household Items

I don't know about your household, but our house goes through a ton of paper towels, especially now that we have a toddler. All of the cost and paper waste was killing me, so I finally decided that enough was enough and in May I made reusable paper towels. Life. Changing.

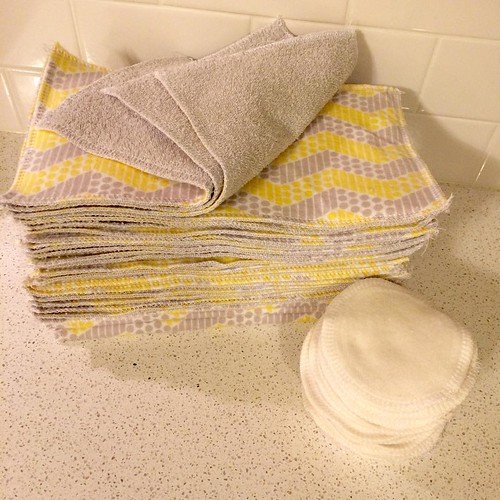
I picked up 1.5 yards of terry cloth and flannel, sliced them up, paired them together, and ran them through the serger. Quick, dirty, and simple. And thus was birthed my favorite make of 2016 (aside from the baby boy that I will be birthing in November). Yes, I'm already declaring it the winner! Everyone in the family loves them! We use them for everything: spills, wiping up the kiddo after meals, while cooking, wiping up counters, for drying fruit after its washed: you name the kitchen task, and we find a way to use the reusable paper towels.

What makes the reusable paper towel concept work so well is that I made so many of them. The 1.5 yards made 34 paper towels that are about the same size as a single sheet in a Bounty select-a-size roll. This is key. If I had made fewer, I think we would use them far less often, but since there are so many, we never run out and therefore use them all of the time. We keep them in a stack on the end of our kitchen island so they're easy to grab in a pinch.

Reusable paper towels and cotton rounds

When I was searching for ideas, I saw some sets on Etsy that have snaps and connect together to look like a roll of paper towels. This is a cute idea, but in reality I think having to deal with the snaps would just get annoying. Plus you can't fit nearly as many on a roll as we have in our stack. My daughter even likes to take one every so often to use in her play kitchen! At least once a week, either my husband or I will marvel at how great they are (maybe we are a little too easy to please). I can't praise these suckers enough. Do yourself, your wallet, the environment, the world a favor and make yourself some of these things. You won't regret it!

While I had my serger out I also made reusable cotton rounds out of cotton fleece. I went the super easy route again and just serged two layers of fleece together and again the result was awesome. We don't go through nearly as many cotton rounds as we do paper towels, but it seemed so wasteful to throw away the rounds after only using them to apply astringent. I still use disposable cotton rounds to remove nail polish, but the reusable rounds have reduced our consumption of disposable rounds. I throw these in a lingerie bag before I put them in the wash so they don't get lost among the other items in the laundry (similar to what I do for the kiddo's socks) and then air dry them on top of the dryer so they don't get all pill-y and rough.

I'm curious to see what other reusable items you guys have made, life changing or not. What am I missing that can lessen our impact on the environment?

Friday, September 9, 2016

Pillow Covers for Grandmom

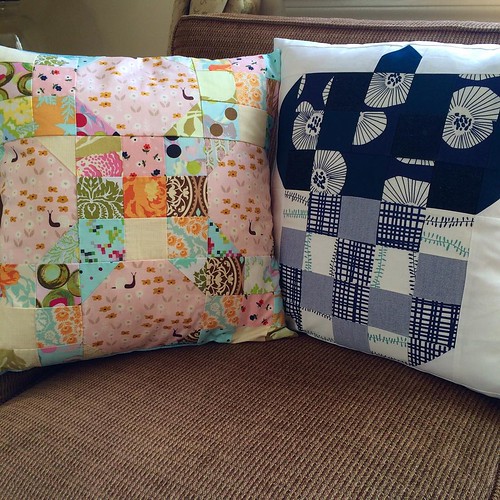
Earlier this year, my grandmother moved from an apartment to assisted living. Her new room was pretty drab, so I whipped up these pillow covers to brighten up her space. They are both made from Canoe Ridge Creations Fresh Mini Quilt Club patterns (Acorn pattern is from September 2015 and Farm Fresh is from January 2016) and both are made entirely from scraps! I love scrap buster projects: not only are they economical, but they cut down on the piles of scraps that fall over every time I go digging through my stash. It's a win-win.

Pillow covers

In retrospect, I made the Farm Fresh cover a little too unbalanced colorwise, but I was determined to use scraps and get these out the door quickly to my grandmother. At the very least, it is bright and cheerful and it makes me smile even if it is a little nutty. They have a simple envelope style back so the covers can be washed. I also labeled the back just in case her fellow assisted living mates think of getting sticky fingers! Just kidding... mostly.

If you're not familiar with the Fresh Mini Quilt Club, it's a club where Megan sends you a new mini quilt pattern every month. They're quick and easy, all measuring between 16" and 24", so even if you aren't using scraps, they aren't a big investment to make. The last round just ended, but be on the lookout for the next round starting in the next couple of months! Megan's IG is wonderful and she's always posting beautiful pictures of rural Iowa where she lives with her husband. It makes me want to travel out west again really bad!

Wednesday, September 7, 2016

Quick and Easy Craft Fair Apron

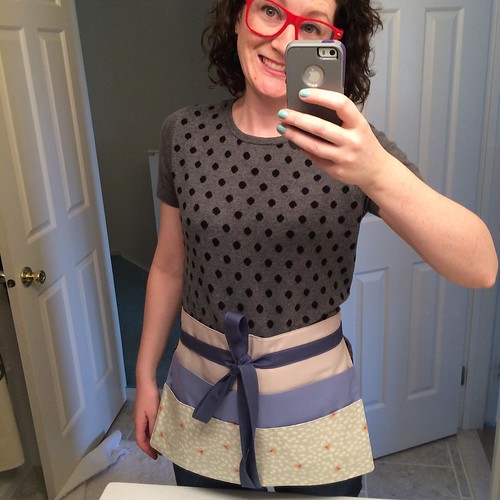
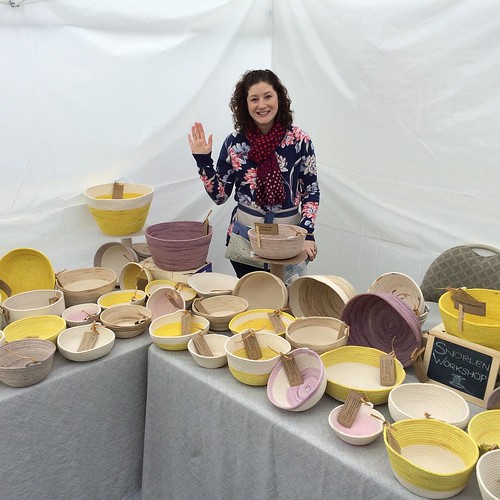
Back in March, the day before my first craft fair selling rope bowls, I got the idea to whip up a simple half apron to hold cash and my phone. Considering I still had a very long list of things to do to prepare and a firm cut-off time so I could drop Pippi (my machine) off for a much needed cleaning, I was not surprised when I got the "you are nutty" look from my husband when he realized what I was doing.

I quickly dug through my scrap pile and decided that the leftover fabric from Hazel the Hedgehog would perfectly match the colors of the rope bowls that I would be selling. Because everyone needs their apron to match the merchandise.

After 5 minutes of perusing Google Images, I decided to use the measurements from Sugar Bee Crafts combined with the ties from More Like Home (except I added a little length because I wasn't using bias tape). I liked the design from Crafty Staci the best, but there was no time for zippers and snap pouches. I had less than 2 hours from cut to finish! And I also didn't have a zipper in my stash that matched the fabrics. I was determined to make this a cheap, if not free, project.

Instead of using interfacing, I lined each layer with leftover cotton duck from the Sewing Circle Tote. I liked how it added stability but didn't make the apron stiff.

I zoomed through making the apron part and then realized that I didn't have enough fabric for the ties. I considered using the little time I had left to dig through my stash to look for new fabric, but, knowing what's in there, I realized that nothing would be as perfect as the fabric I had chosen. So I decided to pack things away and pick up some more of the tie fabric when I dropped Pippi off. After all, I had my old sewing machine in the attic that I could use to quickly make the ties....

You see where this is going, right? There is a reason why I got a new sewing machine 6 years ago and why my old one was confined to the attic. She is pretty but she is the devil. She never stitched nicely, always jammed, and was a constant source of frustration. Plus, I don't even know if I still have bobbins to fit her. This led me to question why I even still keep this machine under our roof. And yet, I still asked my poor husband to pluck her from the attic. And then she sat on the floor by the dining table untouched for 4 days and was then returned to the attic after I got Pippi back.

Super easy craft fair apron

So my apron didn't get finished in time for the craft show. Not a huge loss since the show was kind of a bust and I wasn't constantly running to and from my cash box. The small crowd that was there wasn't buying anything from anyone and they weren't really our target audience anyway. We had a bunch of wonderful friends and family who came to support us though. Thank you to everyone who came out! One of my two non-family sales had me sign the bottom of the bowl!

A couple of months later was my second craft fair, Handmade Hopewell, and the apron worked out wonderfully. And it was a great crowd so not only did we sell a ton of bowls, but we got to chat with a bunch of really awesome people. Here I am, newly pregnant and dealing with crazy unseasonably cold May weather for PA/NJ. It was raw and chilly but we made the best of it. We'll see you there next year!

Handmade Hopewell Booth

Monday, September 5, 2016

Abby Glassenberg's Asleep Awake Doll

Oh, hi! Remember when I used to blog regularly? It seems that Instagram has become so much easier for posting my sewing progress that I've neglected this poor old blog. I'm still an avid keeper of my sewing spreadsheet, which has morphed so much over the years that I might do a new post about how I keep myself organized. But I was starting to miss being able to see a quick snapshot of the projects that I have completed over the course of a year, so I'm going to make every attempt to bring this blog back, if only to write a little more in-depth about my finished projects than IG allows. Get ready for some massive catch-up for this year (in no particular order)!

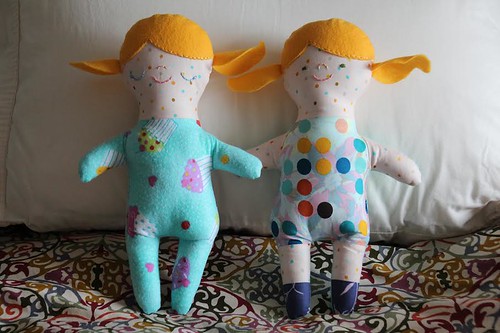
First up, Abby Glassenberg's Asleep Awake Doll! I loved these adorable dolls when I first saw the pattern but resisted purchasing it until I had an actual need, which happened to coincide with a sale. Bonus! I made one for my adorable niece's first birthday and, since I had originally wanted to make one for my daughter, I decided to make two at once. This pattern is so quick and easy! I could have made them both in one night had the Olympics not taken over my entire life before the birthday party. So this little dolly got gifted a little late. Thankfully the birthday girl nor my friend minded!

doll2

I made a couple of adjustments as I sewed these little cuties up. First, I cut out the fabric pieces for the awake side of the doll first, sewed them together except for the head, and then used the body of the awake side to cut out the asleep side (the awake side uses different fabric for the arms/legs/body/shoes while the awake side uses one fabric for the entire body/shoes). This was much quicker than taping together the pattern pieces to cut out the asleep body as the instructions state and now I can reuse the pattern pieces without having to cut/rip apart the taped pattern pieces. Plus I ended up with exact copies of the asleep and awake sides, which worked nicely when I was sewing the two sides together.

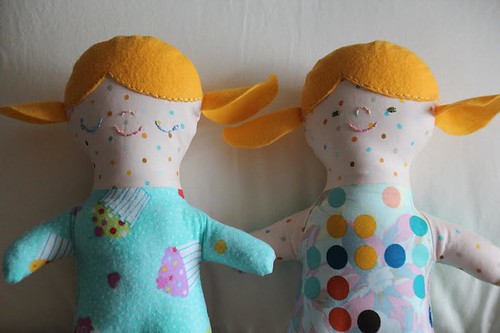
My second adjustment was to use embroidery floss to sew the hair pieces onto the head. The pattern calls for you to sew the hair pieces on with your machine, but honestly I forgot to pick up matching thread when I bought the felt and I didn't feel like going back out for such a tiny amount of thread. Since I have a crazy large embroidery floss stash, I easily found the perfect color and used that instead. I love the texture it adds! And aren't the pigtails adorable?

doll3

The best part about these dolls is that they're entirely made from scraps except for the felt and the flannel. I wanted these to be girly, and the only flannel I have in my stash are small pieces from my epic I Spy bag production or remnants from my nephew's explorer vest. Neither would work! I was able to cut both dolls from a fat quarter of flannel though, so the additional fabric wasn't a huge expense.

I will definitely be making a boy version for our little guy when arrives in November!

Wednesday, February 24, 2016

The True Cost and the Clothing Epidemic

Have you guys seen The True Cost? It focuses on the clothing industry and its impacts on the world—both on humans and the environment. I watched it on Netflix in December and it has haunted me ever since. Pair it with all of Jenelle Montilone's work and Shirley Kurata's "Being a Socially Responsible Shopper" article in yesterday's Lenny Letter and I'm convinced: we as a society need to change our shopping habits. (If you aren't receiving the twice-weekly Lenny Letter, get over there and subscribe right now!) Trust me, all of the above are informative and moving without being overly depressing.

One of the awesome things about knowing how to sew means that I have the capability to change my spending habits when it comes to clothes. We vote with our dollars and my dollars are no longer going to support clothing manufacturers who exploit their workers and pollute our environment.

In recent years I've been a little more focused when it comes to clothing purchases. A couple of years ago I started purging my closet and getting rid of anything that I didn't wear for one year. You probably won't be surprised by how much you have in your closet that you simply don't wear. I've also been more mindful about the clothing that I purchase, although I haven't been super strict and a few items have slipped into my closet that I haven't worn nearly as much as I thought I would.

It's easy to have a knee-jerk reaction to movies like The True Cost and declare "no more mindless shopping!," then come to realize that it's a little harder to execute in real life. Sure, I can make the grand plan of only making my clothes going forward, but that takes time and sometimes you need to fill gaps in your wardrobe a little faster than your free time allows.

Enter The True Cost's "Five Tips for Shopping Smarter." The first tip is so easy to remember and would hands-down put a dent in the damage clothing manufacturers are doing if everyone who is able commits to it: ask yourself if you are going to wear that item at least 30 times. Thirty is a far cry from the average 7 wears that an item usually gets. 7! Contrary to what advertisers want you to believe, you do not need to change out your wardrobe with the four seasons (or even more often). You also don't need to worry about wearing the same outfits week after week. If you love it and it's still in good condition, who cares if you wear it every week?

Looking back, my maternity wardrobe was my most environmentally conscious, not because I made everything, but because I limited it to the bare essentials: 6-7 dresses for work, 2 pairs of leggings, 1 pair of jeans, 2 tshirts, a casual sweater, a bathing suit, and probably one or two other items. That was pretty much all I wore for my entire pregnancy (save for the first month or so when I could still fit into my regular clothes—I got a belly quickly!). I wore those items over and over and over again, mostly because I couldn't justify spending more money on clothes that had a limited cycle of use (also why I couldn't justify making any of my maternity clothes—my limited free time is too precious).

I haven't bought any clothes since I saw The True Cost in December (I know, such a sacrifice to not buy clothes for almost three whole months). I have been devising a plan for when my current items get worn out or I need to add an item to spice up the life of my wardrobe. Then, serendipitously, Sewaholic ran a sale on their patterns and my plan was solidified. I snatched up all of the patterns that I've been coveting and drafted a wardrobe plan that I'll slowly build over time.

A photo posted by Lindsay (@lindsaypindsay33) on

I'll steadily chip away at my list so when the time comes for an item to get donated or thrown out, I won't have any gaps to prompt a quick online shopping fix (because let's be honest, I can't remember the last time I went shopping in a store). I've already made a couple of these patterns, but I know that those I haven't made yet will work based on previous sewing missteps. Which is another great benefit to sewing your own clothes: you know what does and doesn't work with your body shape so you can focus your time on clothes that you love and don't mind wearing over and over again!
In case you're wondering, here is my list. The blazers that I have should last me a couple of years until I finally find a blazer pattern that I love. Once my cardigans wear out, I plan to create rub offs of them because they fit me perfectly. Yes, the list is very heavy on Sewaholic patterns. What can I say, this pear-shaped girl loves them!

Work Wardrobe

Casual/Workout Wardrobe
Even if you're not ready to do an overhaul like me, small changes like shopping secondhand and trading clothes with friends can make a difference. Have you thought about your clothing spending habits and their impact on the world? 

Friday, February 19, 2016

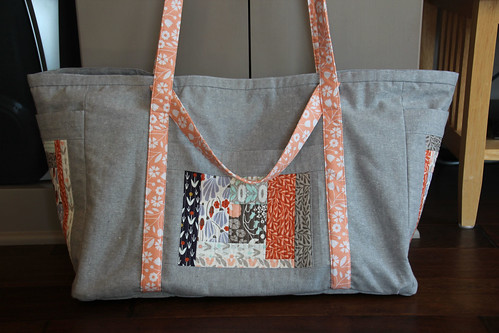
Elizabeth Hartman Sewing Circle Tote

You guys, it's finished! And only over a month late for my mom's birthday!

Sewing Circle Tote Front

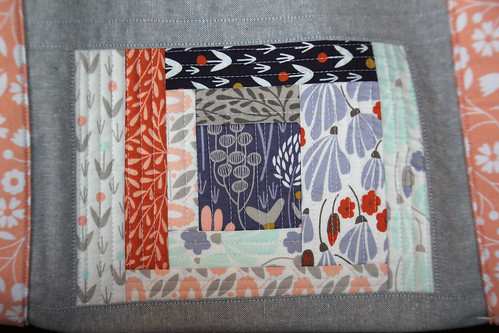
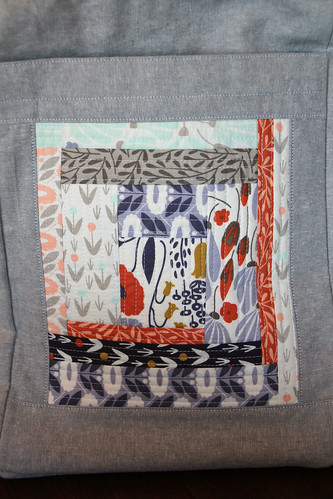
As I mentioned on Instagram, I'm in the middle of preparing for my first craft fair in March, but I sneaked in little bits of time here and there over the last month to make my mom an Elizabeth Hartman Sewing Circle tote for her birthday (sorry, the pattern is out of print). I used the same Elizabeth Olwen and essex linen fabrics that I used for the Perfect Tote and it came out beautifully! I love love love it.

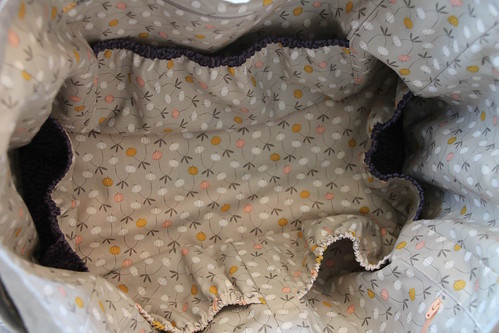
Sewing Circle Tote Inside 

I still love the quilt-as-you-go process.

Sewing Circle Tote Side B

Sewing Circle Tote Back

Sewing Circle Tote Side A 

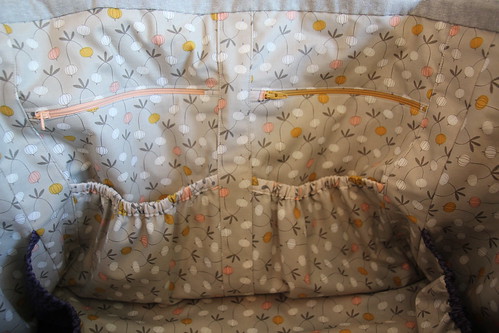
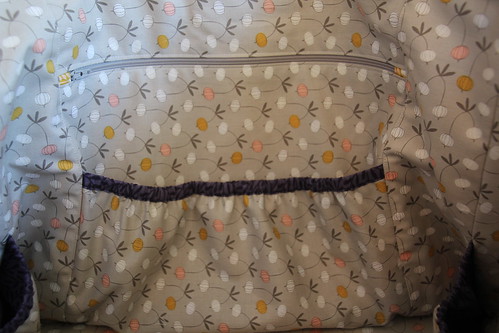
And I love all of the pockets on this thing. There are four on the outside and then the inside is packed with pockets: two small zipper pockets with elastic pockets underneath, one large zipper pocket with an elastic pocket underneath, and two elastic pockets on the sides. That's twelve pockets! TWELVE!

Sewing Circle Tote Small Zip Pockets

Sewing Circle Tote Large Zip Pocket 

What I didn't love was cutting out roughly 5 million pattern pieces. Or maybe it felt like 5 million because I was cutting out an identical one for myself at the same time? Mine will have to wait until after March 6, but watch out, we'll be sporting mommy-and-me matching Sewing Circle totes when it's finished! I'm going to leave the smaller handles off of mine so we can tell the difference.

I was initially a little disappointed with how floppy the tote ended up, but then I realized if I added any sturdier material the tote would have been heavier and then really heavy once it's stuffed full of sewing supplies. It is the perfect size to cram in all sorts of rulers, cutting mats, an iron, fabric, and pretty much anything else you would need to bring with you to a class or a sewing date. My mom immediately started filling it up with all of her quilting class goodies to see how everything would fit. There is PLENTY of room. There's even enough room to bring along your laptop and embroidery module if you have a fancy machine like that (my mom does, I don't).

I didn't get the nice detailed pictures that I would have liked because I admittedly forgot to take pictures until we were walking out the door to go to my parents' house. I'll take lots of pics when I finish my own!
Wednesday, January 13, 2016

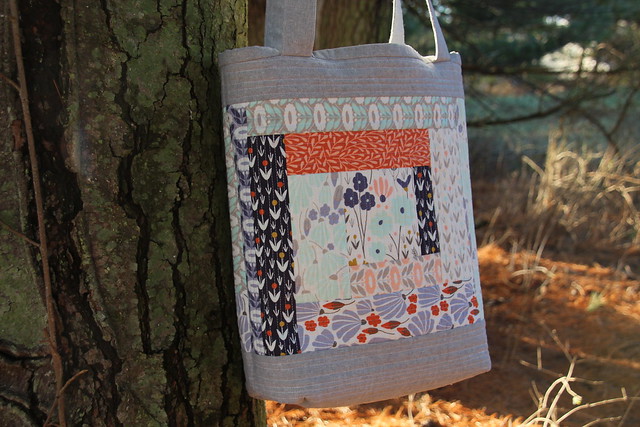
Elizabeth Hartman Perfect Quilted Tote

Last fall I joined the Central Jersey Modern Quilt Guild after spending the day with them at Lizzy House’s Meadow Quilt workshop. No, I don't live in Jersey, but the drive to them is much closer than the Philly guild. They are so much fun and it’s exciting to have found a group of people who love sewing and quilting. Each year they host a Secret Quilter gift swap around Christmas. It’s completely optional and those who want to participate fill out a questionnaire that overviews preferences for style, color, and item (something small like a mini quilt, tote, potholder, pincushion, etc.), as well as social media handles so the partner can dig around and figure out what to make. It’s like investigative sewing!
My partner loves pretty much all Cloud9 fabrics, so I finally had the chance to pick up some of Elizabeth Olwen’s Morning Song. My initial plan was to make a tote bag out of quilt blocks, but I got behind on my other Christmas sewing and decided to make Elizabeth Hartman’s Perfect Quilted Tote instead (sadly it's no longer available for purchase). I am so glad I changed my plan!

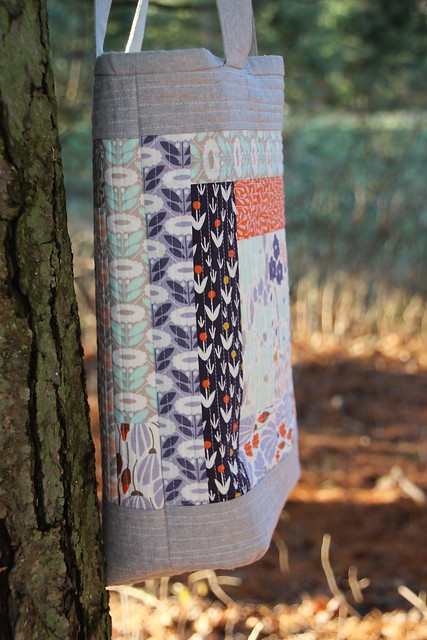
Elizabeth Hartman Perfect Quilted Tote 

The tote features quilt-as-you-go sides. Ooooh you guys, quilt-as-you-go is SO MUCH FUN. And easy. And satisfying, because when you’re finished building the panel, you are finished quilting it too! (Duh.) The exterior pieces are quilted onto cotton duck, which makes the bag so sturdy that it stands up by itself without anything in it. I need to make myself one of these!

Elizabeth Hartman Perfect Quilted Tote 

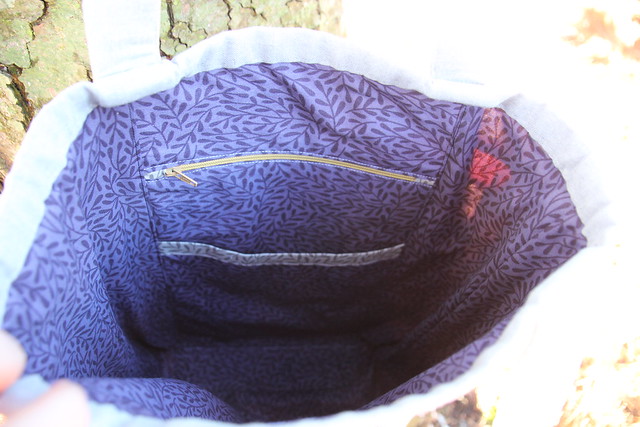
The inside is so roomy and has a zippered pocket and a deep open pocket. I love the contrast of the purple lining to the cooler tones on the outside of the tote. (Forgive this picture. It rained all but a half hour on the one day that I had a chance to take pictures in daylight.)

Elizabeth Hartman Perfect Quilted Tote

I was off the week of Christmas and by some miracle my daughter was taking 4-hour naps each day (and still sleeping 12 hours at night—she is a champion sleeper, don’t hate me), so I was able to bust this out in a few days and finished mere seconds before the new episode of Sherlock premiered on New Year’s Day. Hurrah to my first finish of 2016 on the first day of the year!

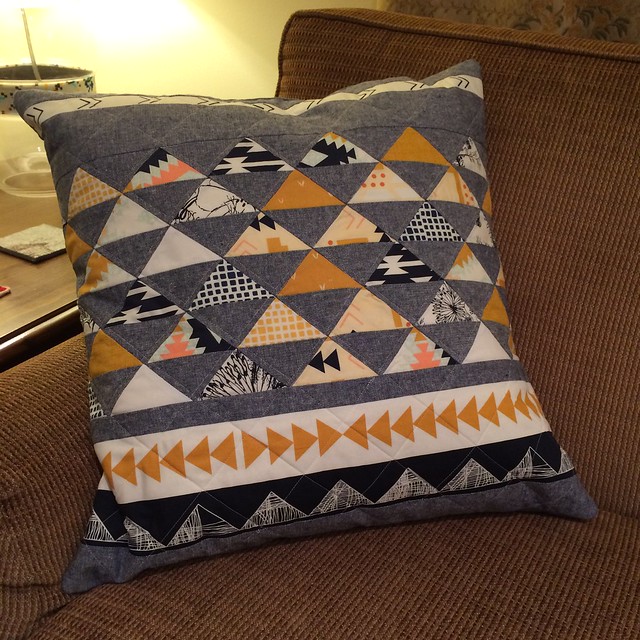
It was so hard to part with this beauty but I quickly got over it when I received this beautiful quilted pillow from my partner. She used April Rhodes fabrics as a tribute to my April Rhodes Adventure Swap banner and it turned out perfectly! This was my favorite gift out of the whole bunch and it’s mine, all mine! And it matches my couch perfectly. And it’s beautiful. Did I mention that? Now I want to fill up the couch with April Rhodes/Essex linen pillows!

Secret Quilter Gift

Tuesday, December 29, 2015

Christmas-Themed Seamwork Denali Vest

You guys have heard of Seamwork Magazine, right? It's a monthly online sewing magazine that also includes two patterns that take three hours or less to complete. Access to the articles is free and the patterns are $7 each, or you can subscribe and get them both for $6.

The October issue featured menswear and included two unisex patterns: a sweatshirt and a vest. I knew immediately that I wanted to make the Denali vest! My least favorite thing about these patterns is that they are PDF and you have to print and tape them all together. It seems like a waste of my precious free time. But I didn't really have a choice since these patterns are only offered as PDFs.

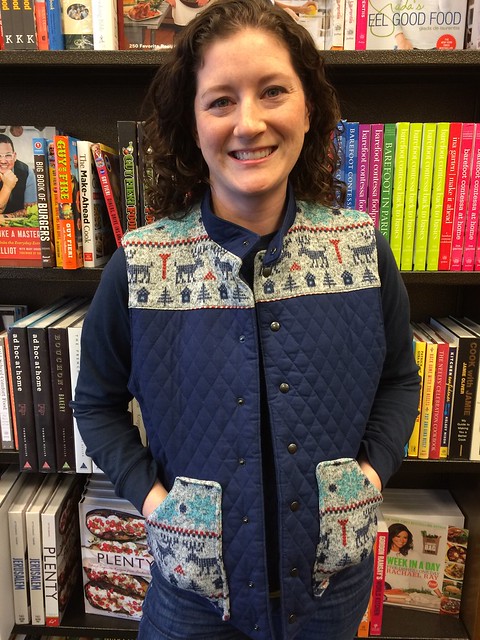
My original plan was to make an autumn themed vest that was burgundy and plaid, but that never happened. Then when I was in Joann at the end of October I happened upon this awesome fleece-backed knit Christmas print and snatched some up. I'm glad I did, because the next time I went back there wasn't any left. I also found pre-quilted navy fabric at Joann, which was a super time saver.

The weekend before Christmas I had a pocket of free time before a dinner date with friends so I cut out all of the pattern pieces and started sewing. This thing goes together quickly! Definitely under three hours from start to finish, as long as you don't have major issues installing the snaps.

Am I the only one who struggles with getting snaps to clasp together correctly without ruining them? It took FOREVER to get these eight snaps on and my husband and I ruined at least 10 snaps in the process. I think part of the issue was that the vest is thicker than recommended for the Dritz snaps, but the cheap installation tool is also partly to blame. It was such a relief when that last one attached!

And then it was 70 degrees on Christmas (in SE Pennsylvania!) so I wore it to my in-laws' house and promptly took it off. I wore it home from my parents' house later that night, but I didn't really need it. I felt like I needed to get some wear out of it for my efforts! It was finally the perfect temperature to wear today on a day date with my husband to Distrito. If you haven't been there, I highly recommend. It's my favorite restaurant and we appropriately pigged out. And then browsed for books while we tried to digest. It was the perfect setting for a dreary day photo shoot!

IMG_6735

In retrospect, I would have only used one layer of the knit fabric for the pockets so the edges don't turn out so bulky. The pockets are actually lined up on the vest, I think I'm just standing kind of weird here. There were so many people around and it was hard to get a good shot in without looking like a total nut!

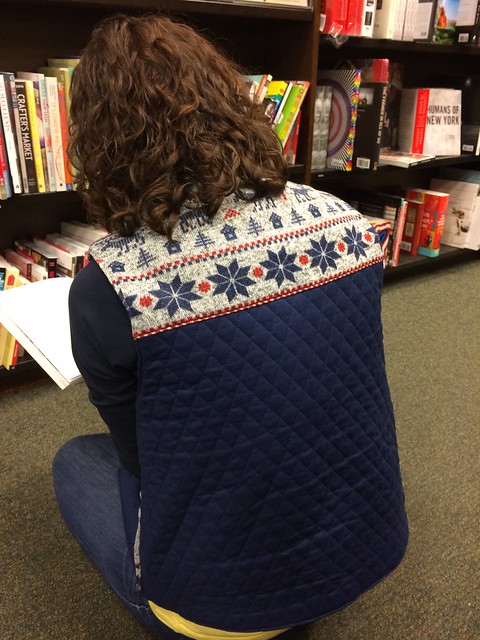
I took extra care to line up the fabric straight when cutting out the pattern pieces, but the placement of the red row at the seam was a very happy accident! I was focusing on getting the snowflakes and reindeer in (they are under my hair), but the red row is the perfect framing for the back yolk.

IMG_6740 (2)

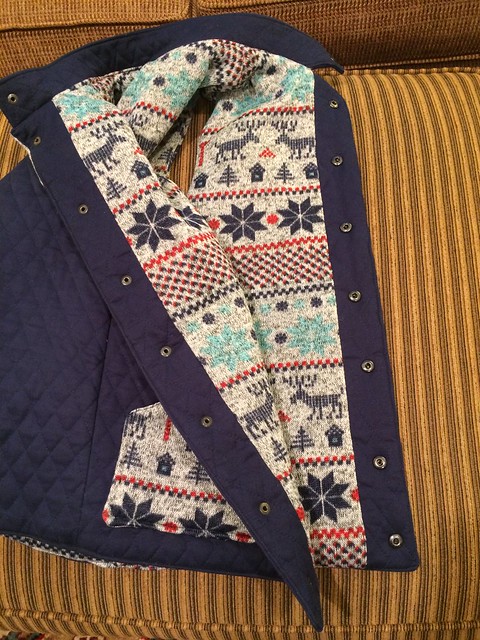
 I also really love the inside. The facings with the lining make it nice and clean inside and out.

IMG_6742 (2)

All in all, the pattern is a little boxy, but it was quick and easy for a Christmas-themed article of clothing!